Oven and Range Cleaning tips

Once the table has been cleared after a big meal, you may feel as if you’ve had enough cleaning. Even the most dedicated neat freak might cringe at the thought of cleaning their oven. But putting it off can make cooking more challenging.

Turkey for Thanksgiving Day in the oven

There are many important reasons to keep your oven clean. Over time, residue from cooking and spills can build up and become a drag on oven and range performance. And the “leftovers” that build up on the bottom and sides of your oven can also make the food you prepare taste different. (We’re guessing neither you nor your guests would appreciate the subtle flavors of the charred residue of several meals in their entrée or dessert, but we could be wrong!)

Grease and grime can clog the burner and affect performance. Sugary spills on glass cooktops with traditional elements can damage the glass.

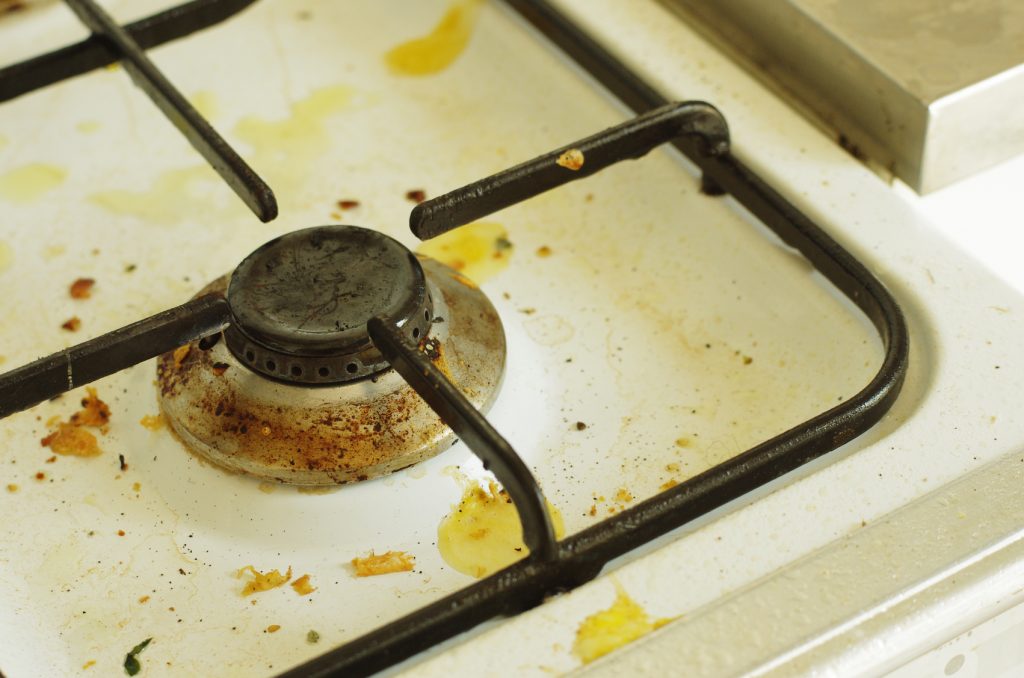
Fall behind on cleaning, and before you know it, your range looks like this.

A very very dirty kitchen!

Instead of waiting until it’s unavoidable, clean your oven and range after every use. That may sound like a lot, but it’s the difference between a guaranteed quick and easy job and one that could require significantly more time and elbow grease. Make cleaning a regular part of your cooking and baking.

Wait until the oven cools before you begin cleaning to avoid burning yourself. Once it has cooled, clean every part of your range. That means the oven walls, glass cooktop, burners, finish, and knobs. Each is made from different materials and therefore may require a different approach. Your appliance’s manufacturer will be able to provide instructions for each.

What to use: This is where it gets tricky. Appliance manufacturers test many cleaners on their ovens and ranges, but it’s impossible to test all of the options that are on the market. Your oven’s use and care manual may have some suggestions, as will the labels of the specific cleaners. You can’t go wrong, however, with warm soap and water or a white vinegar and water solution, which are unlikely to damage any finish. Avoid cleaners with abrasive qualities, as they could scratch the oven’s finish. Some manufacturers recommend carefully using a razor blade to clean stubborn dirt from oven glass.

Technique: Again, consult your appliance’s use and care manual for specific instructions. Avoid steel wool and similar products, which can damage the finish. Go with the grain (not in a circular motion) to avoid scratching, particularly if your oven has a stainless steel finish. That could take a while, so be patient.

Self-cleaning: Many ovens offer self-cleaning features. Traditional self-cleaning means the oven will heat to an extremely high temperature—as high as 900 degrees—while the residue is burned off. You will not be able to open the oven during a self-cleaning cycle. Oven racks and all pans should be removed during the cycle. After the cycle is complete and the oven cools, you should be able to easily wipe out the ashes. Many manufacturers are now offering a steam cleaning option as well. These models heat water to a boiling point and utilize steam to soften anything in the oven for easy cleaning.

What’s your best oven and range-cleaning advice?

Choosing a Portable Electric Heater: Features, Use and Safety

black electric heater on laminate floor in the room

If you are one of the millions who now works from home, maintaining a comfortable indoor temperature during the cold winter months is important. While wearing multiple sweaters is perfectly acceptable, a portable electric heater might be just what you need to stay comfortable at home this winter.

Like any appliance, portable electric heaters come in a variety of models and sizes, with different features. We’ve put together a guide to make it easy for you to choose your next portable heater and use it safely.

Heaters are classified based on how they generate heat. Your choice will depend on your heating needs:

  • Panel heaters could be wall-mounted or freestanding, and may include fans.
  • Radiant heaters generate warmth by heating oil within the unit, though the oil doesn’t need to be refilled.
  • Fan heaters distribute heat from an element using a fan.
  • Ceramic heaters use a ceramic heating element and may also use a fan to spread heat.
  • Infrared heaters generate heat from a surface within the heater. The heat is emitted in the form of infrared energy.

What you need to consider

Sorting through all of your options for an electric heater could take until summer. Knowing how you’ll use the heater will help you narrow your choices. Here are three questions to consider:

Will you be using the heater for temporary personal heat or to keep a room steadily warm? The size and type of heater, and the size of the space you’re trying to heat, will be factors.

Do you need instant heat, or can the heat be generated gradually? Keeping your feet warm under your desk at work for a few hours will call for a different solution than making sure guests stay warm overnight in a chilly bedroom.

What’s your noise tolerance? Any heater with a fan will generate some level of sound. An in-store demonstration will help you decide what’s appropriate.

Heater features
Personal electric heaters offer a number of features for operation, safety and heat distribution. They might include:

  • A thermostat to keep the heat at a steady temperature. Some models offer a digital setting.
  • Oscillation to distribute heat
  • Adjustable fan speeds
  • Some types of heaters may employ additional safety features, including automatic shutoff if the heater tips over, cool-touch housing, child locks, or motion sensors that automatically turn the heater off if anything gets too close.

Portable heater safety

There are a number of steps you should take to heat your home safely, regardless of the style of heater you choose:

  • Purchase a heater that is safety certified, meaning it has been tested by a Nationally Recognized Testing Laboratory. Look for a safety certification mark on the packaging or the heater.
  • Never leave a heater unattended when it is being used and always unplug heaters when they are not being used.
  • Do not use a heater with a power strip or extension cord. Overheating of a power strip or extension cord could result in a fire.
  • Avoid placing anything on top of the cord, including furniture, as it could damage the cord. String cords out on top of area rugs and carpeting.
  • Keep combustible materials, including furniture, pillows, bedding, papers, clothes and curtains, at least three feet away from the front, sides and rear of the heater.
  • Keep flammable materials, such as gas and paint, away from the heater.
  • Do not use heaters in wet or damp areas unless they are designed for bathrooms or outdoor use. Moisture may damage heaters not designed for this.
  • Periodically check the plug and outlet for a secure fit. The outlet may need to be replaced if the plug does not fit snugly or if the plug becomes very hot. Consult with a qualified electrician to replace the outlet.
  • Don’t plug any other electrical device into the same outlet as the heater. It could result in overheating.
  • Keep children away from heaters and do not place one unattended in a child’s room.
  • Place heaters on a flat, level surface. Only use heaters on table tops when specified by the manufacturer. Do not place your heater on furniture. It could fall, dis¬lodging or breaking parts in the heater.
  • To reduce the risk of hyperthermia, which can be fatal, do not leave space heaters operating unattended in a confined space around infants or individuals with reduced sensory or mental capabilities.

Have a warm, cozy winter. You’ll be looking for air conditioners before you know it. (And if you want to get an early start on AC shopping, we have you covered.)

5 Questions to Ask Before Buying a Used Appliance

Autumn is normally a time when appliance shoppers think ahead to the holiday season and try to purchase new appliances before guests arrive and families gather for a holiday meal. But this isn’t a normal time, and as anyone in the market for a major appliance has probably heard, they might have to wait additional weeks before their preferred appliance model can be delivered. The slowdown is a result of many factors, including the COVID-19 pandemic, which has increased demand for appliances as consumers, who are spending more time than ever at home, are taking steps to bring new levels of comfort and convenience (like second freezers) into their lives.
Appliances are essential to our daily lives. Not being able to find the new appliance model they want, when they want it, might drive some to consider the buying a used appliance instead. That is understandable, but the decision to buy a used appliance requires careful research and an understanding that you might be taking on some risks.

Ask these questions if you are thinking about buying a used appliance.

  1. How old is the appliance? While major appliances tend to last for a decade or more on average, their age can affect how well they function. Also, depending on the age of the used appliance, a new model may be more energy efficient.
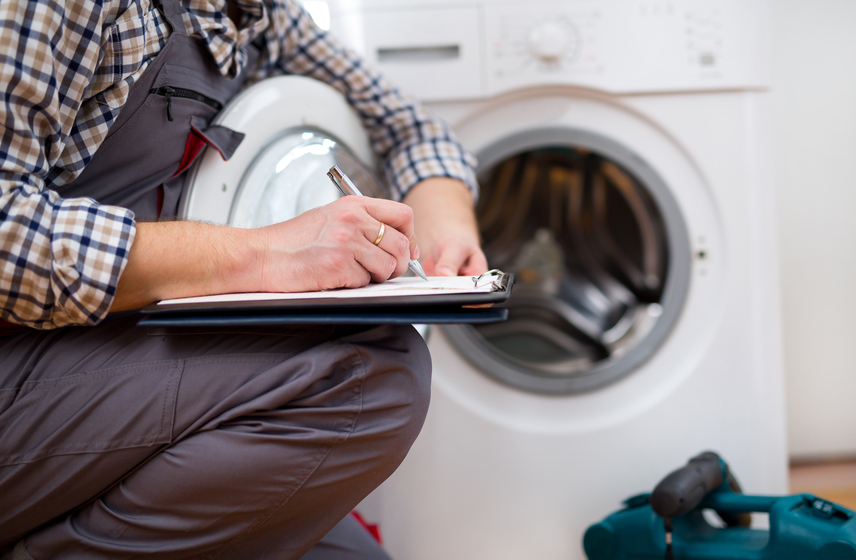
  2. Is the appliance intact? Inspect the appliance for frayed or damaged power cords, switches and parts. Damage can create safety risks.
  3. Has the appliance been repaired? Ask the seller about the appliance’s repair history, and look for signs of home repairs or tampering. If they can’t provide the repair history, consider skipping the purchase.
  4. Are all parts original? Do not buy a used appliance if the operating manual and all parts that came with the original aren’t included. The owner’s manual will contain important use, safety and repair tips.
  5. Has the appliance been recalled? Check with the U.S. Consumer Product Safety Commission to see if the appliance has been the subject of a safety recall, and check back throughout the life of the appliance.

If you have any doubt after you answer these questions, and you have options, it might be better to wait until your preferred appliance model is available. According to AHAM research conducted in December 2020, of all the people who reported purchasing a major appliance during the first year of the pandemic, 74% were able to find the appliance that they desired and only 9% were not able to purchase their preferred model.

5 ways appliances can make your home healthier

From making healthy eating easier to cutting down on sneeze-inducing allergens, appliances can be used to drive healthy habits and create a healthier home environment. Here are five ways home appliances can be used to make your home healthier today:

1. Quick meal storage: Keep those healthy meals and snacks within reach in your refrigerator. Store sliced vegetables and fruit in sandwich bags for easy access. Use sectioned containers to help balance your meals. Store boiled eggs to save time at breakfast, and speed up dinner prep by freezing extra portions. Tip: Put the healthier foods at eye level, so you see them first.

2. Add in vegetables: Use an immersion blender to add more vegetables to your sauces and stews. Bake vegetables in your oven at a high temperature to caramelize them and make them more palatable for picky eaters. Tip: An immersion blender can help you smooth out sauces for eaters who are sensitive to texture.

3. Clean teeth: After you polish off those healthy meals, take advantage of an electric toothbrush to clean your teeth. Electric toothbrushes can be especially helpful for individuals with mobility issues, and for children who may lack the dexterity for effective brushing. Tip: Spend 30 seconds brushing each quadrant of your teeth for a full two minutes.

4. Cleaner air: A room air cleaner can reduce the amount of common allergens like tobacco smoke, dust and pollen in your home. Room air cleaners certified through AHAM’s certification program are tested for their ability to remove all three of those. Look for the Clean Air Delivery Rate (CADR) on the label—the higher the number, the faster the air cleaner filters the air. Tip: Choose an air cleaner that’s appropriate for the size of the room in which it will be used.

5. Take the might out of mites: The Asthma and Allergy Foundation of America says dust mites “may be the most common trigger of year-round allergies and asthma,” causing symptoms like sneezing, stuffy nose, itchy eyes and a cough. Washing linens and rugs in hot water can kill mites, a dehumidifier can reduce the humidity that helps them thrive, and a vacuum with a HEPA filter can help remove them from your home’s hard surfaces. Tip: Have someone who doesn’t suffer from allergies do the vacuuming.

Bring culture and creativity to the kitchen July 4th (Pt. 2)

Grilling on Independence Day is a tradition for many. And while the aroma of grilled food wafting through backyards and neighborhoods is a time-honored part of the July 4th experience, cooking outdoors isn’t always an option. The good news is you can still create plenty of culinary fireworks right in your kitchen. We talked with Chef Thomas J. “TJ” Delle Donne, assistant dean of culinary relations and special projects at Johnson and Wales University in Providence, Rhode Island, to get his insights on planning and executing a Fourth of July meal without the grill.
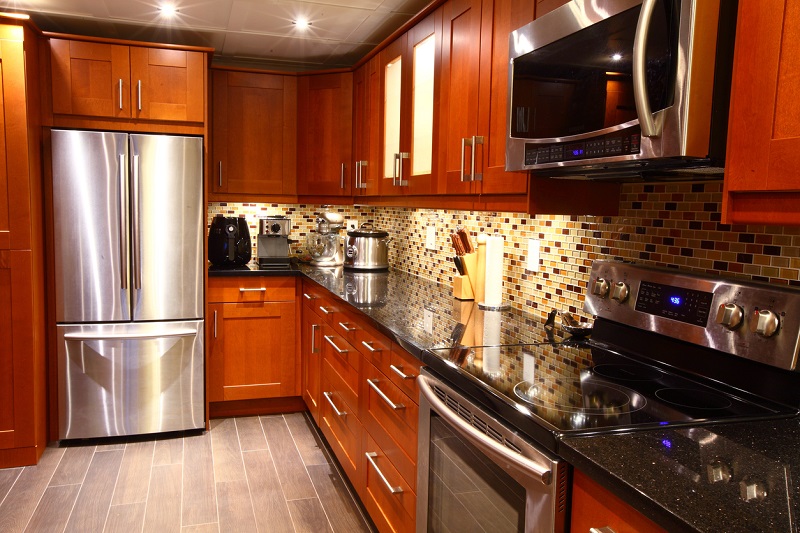
Choosing the Menu

In our last post, we looked at how to prepare traditional July 4th favorites like hot dogs, burgers and barbecue indoors. Delle Donne recommends looking at local cultural influences and ingredients to add a unique twist to your Independence Day celebration.

“We have a vast culture across the country,” Delle Donne says. “At any four corners of the U.S., we can find true, authentic flavors of other cultures.”

“If you’re from Rhode Island, you have a huge Italian and Portuguese influence,” Delle Donne says. “If you’re from down South, you’ll have a Latin American/Cuban influence. If you’re from Arizona, the Southwest, you’ll have a Mexican influence. It’s an American holiday, so we want to stay true to American traditions. But if you’re looking to entertain in a different way, celebrate those traditions as well.”

As you look for local ingredients, you may find you pick up some valuable cooking advice as well. “Get to know the farmers,” Delle Donne suggests. ““You can meet them at any farmers’ market. See what’s out there. Maybe you’ll do a red, white and blue potato salad, a fennel bowl. Sometimes, those farmers are cooks, too, and they can give you some awesome ideas.”

In the kitchen

There’s little you can do on the grill that you can’t do in the kitchen, Delle Donne says. “Grilling has a very unique definition,” he says. “You’re getting flavor and aromatic aspects from a source of fire that’s traditionally wood or charcoal. With a gas grill, you’re getting a radiant heat source and achieving a sear like you’d get in a pan. The effect you’re getting from a gas grill is a sear and a roast. It’s the same thing you have in your house.”

“Your broiler is radiant heat,” Delle Donne says. “It’s grilling upside down. If you think about it that way, you have the same appliance.”

Even outdoor standbys like beer can chicken can be cooked indoors. “Use a high-sided roasting pan and a mirepoix of vegetables to make a flavorful sauce,” Delle Donne says. “You can add some garlic and celery. You can probably get four chicken roasters in the roasting pan. You get the temperature high enough and you’ll have that nice, crispy chicken.”

You can recreate the appearance of grilled food indoors. “You can add grill marks by getting the oven hot enough and using the oven rack,” Delle Donne says. “You’re using your appliance as your grill substitute. The only thing you’re missing is the charcoal.”

The flavor of smoked vegetables can be brought inside as well. “If you have a good hood system in the house, you can smoke on the stove top. Smoked mushroom salad is delicious. You can smoke your sliced summer squash, your corn. I use a four-inch pan, use a steamer-type basket that fits in that pan, soak wood chips and use the perforated pan in that rack. Put it on the range in a low heat and let those wood chips smoke. Have good vents.” Delle Donne doesn’t recommend this technique for meats.

Planning

Plan your menu in advance, Delle Donne says. “I’m a big proponent of mise en place. It means ‘everything has its place, everything in its place,’” If the Fourth is on a Tuesday, spend your Sunday getting things together. Write the menu down. What do you need for each menu item? That’s where a lot of people go wrong. The menu drives everything.”

No grill? No Problem! How to do Memorial Day cooking in your kitchen (Part 1)

Grilling is often par for the course on Memorial Day weekend. Maybe it’s a rainy day, or you don’t have the outdoor space. Never fear! You can still satisfy your desire for summer classics right in your kitchen.

We spoke with chef Gabriel Ross, who teaches culinary fundamentals at

Chef Gabriel Ross

the Culinary Institute of America in New York. As a meat specialist who spent 15 years living in New York City apartments, he’s the perfect candidate to teach a crash course in celebrating America’s independence without a grill.
“July 4 is one of the busiest times of the year for the meat business,” Ross said. “The things people are thinking about are barbecue, like ribs, pulled pork or barbecue chicken. Those are the flavors we associate with the holiday. Those preparations can be accomplished inside.”

Just as with other big cooking holidays like Thanksgiving and Christmas, you’ll cut down on a lot of stress by preparing as much as possible in advance. Ross walked us through indoor preparation for a collection of grilling favorites:

Barbecue: You can get the same texture of traditional, slow-grilled barbecue chicken or ribs by slow-cooking meat in the oven, Ross says. “It’s harder to get that smoky flavor, but most people will slather it with barbecue sauce. The ribs are tender, the chicken is tender. It’s a pretty good approximation. Most people won’t be able to tell the difference, aside from the lack of grill marks.” Ross recommends cooking the meats covered at 275-300 degrees. “If you’re using St. Louis-style spare ribs, it could take 3-4 hours to get it nice and tender. Baby back ribs are a little leaner and cook faster. They might take only 1.5-2 hours. Once they’re tender, take them out, rub them down with your favorite sauce and throw them under the broiler.”

The slow cooking can be done 2-3 days before you’ll be eating the meats, Ross says. “Store them in your refrigerator, then take them out and blast them in a hot oven or under the broiler. Then you won’t have to spend the whole day cooking.”

Chicken: Chicken will cook faster than pork, Ross says. “I recommend dark meat because the white meat tends to dry out,” he says. “Breast meat tends to cook a lot faster.” Cover chicken legs or thighs and cook them slowly until they’re tender. “They usually only take 45 minutes to an hour,” Ross says. “They’re not going to be golden brown and crispy, but it’s just the first stage of cooking. You can put sauce on and put them back in the broiler and nobody will know the difference.”

Pulled pork: Pulled pork is a major time commitment. It’s typically cooked slowly over a charcoal fire for 6-8 hours. “It’s actually much easier to do inside, especially if you have a slow cooker.” Ross suggests using pork shoulder, picnic shoulder or pork butt. “Those cuts are great for pulled pork,” he says. “The pork butt or shoulder butt is the perfect size to fit in a large slow cooker. You can rub it down, put it in with a little bit of liquid, and cook it slowly until it’s falling apart. Then add your favorite sauce. You can cook it overnight, while you’re sleeping, and serve it right out of the slow cooker.”

Hot dogs: Ross’s New York City roots have made him a fan of the “dirty water” boiled hot dog, which is easy to prepare on your range. “If you want to do a bunch of dogs at the same time, put a pot of water on, add some salt to preserve flavor, keep the water right below boil. You can keep them there as long as you want.” Add sliced onions or beer to the water to add flavor. However, if you’re determined to replicate a grilled hot dog, consider cooking it on an indoor electric grill or a panini press. “Take the dogs, split them lengthwise, and put them on the grill. You’ll get the grill marks and crispy skin.” As a last resort, put the hot dogs under the broiler until they start to blister, Ross says.

Burgers: Attaining the outer crust that comes with a grilled burger is more challenging indoors, but still possible. “Whatever you’re cooking it in has to be very hot,” Ross says. “I recommend, if you have it, a cast-iron skillet. Preheat it until it’s smoking hot. Brown the burgers on both sides. If you want to cook it more, put it on a cookie sheet, in a hot oven until it’s done. You won’t get that smoky char, but you have a little more control and won’t have to deal with flareups or fire.” The faster you brown outside, the more moist the inside will be, Ross says. Make sure you cook ground beef until the center reaches at least 155 degrees Fahrenheit.

Shrimp: Here’s another summer favorite that can be prepared in advance. “A simple shrimp cocktail is easy and straightforward,” Ross says. But if you want grilled shrimp skewers, the broiler makes a fine substitute for the grill. “If you have a cast-iron skillet, you can do the shrimp on there. Get it nice and hot, kind of blister them on that cast iron.”

Vegetables: There’s still room for vegetables on this meat-centric holiday. “If I’m doing sausages or hot dogs, I like to do some peppers and onions to put on top.” Vegetables also make a great side dish on the Fourth. “A nice hot oven is a dream for preparing vegetables,” Ross says. “I’ll cut them into chunks, often with a little oil salt and pepper, put them in the oven until they start to color outside.” Ross is also partial to serving fennel alongside sausages, and roasted zucchini. “Go all the way up—most home ovens will go to 500 or 550,” Ross says. “A lot of people are afraid to do that. Keep an eye on it and know those vegetables will be done within 5-10 minutes. You have to turn them a couple of times.”

Dessert: Keep it simple, Ross recommends. “With all the heavy meats and other foods that go with the holiday, sometimes simple fresh fruit with whipped cream and a little poundcake or sweet biscuit is all you need.”

Ross has recently started to take advantage of the immersion circulator (also known as sous vide), which has given him an easier path to grilled meats. “I cook everything in the circulator,” he said. “I take it out of the bag, get a good hot fire, and basically just mark it up on the grill. It only takes a good minute or two to get grill marks.”

Clearly, a lack of a grill is no reason to skip that tasty, traditional Memorial Day cuisine. From your oven to your slow cooker, your appliances will give you the tools you need to cook up a memorable holiday meal.

What the future may hold for kitchen design and appliances

What comes to mind when you think about the kitchen of the future? Robotic servers? Automated cleanup?
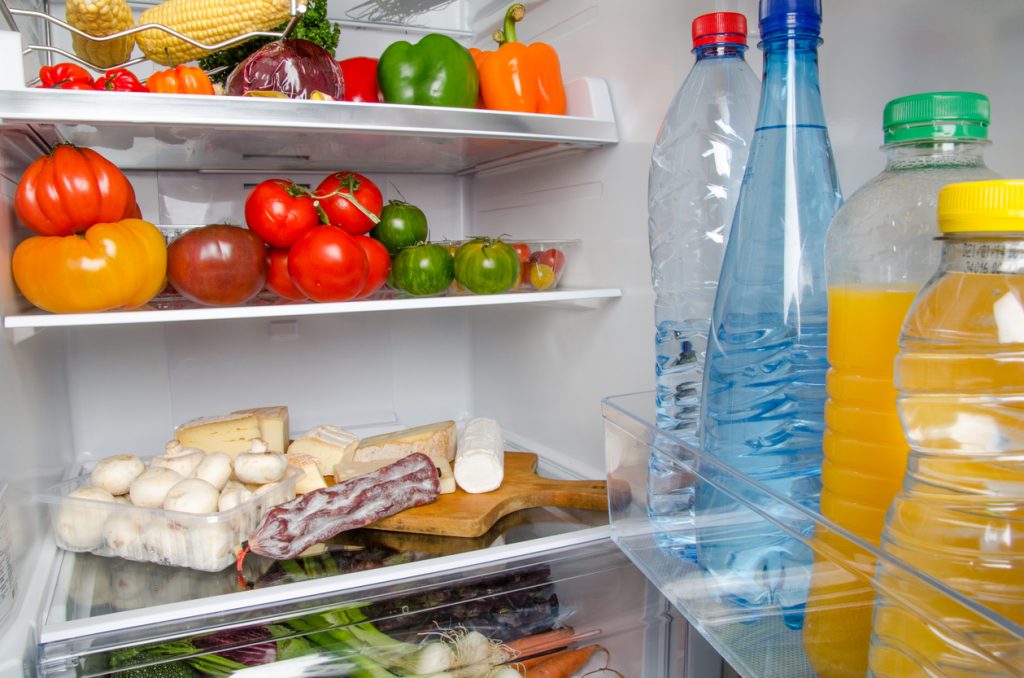
Sci-fi imagery aside, the kitchen is likely to keep its status as the household gathering space and hub for entertaining. But certain elements will trend toward personalization, and we’re likely to see both expanded and more specialized roles for appliances.

We recently spoke with two kitchen designers, Loretta Willis, Principal of Loretta’s Interior Design in Alpharetta, Ga. and Andrea Edwards, owner of CRP Design in Oklahoma City, to peer into the future and speculate on what the future might bring for kitchen design and appliances. Here are some of the trends they expect to see, both in the near and more distant future:

Personalization: Certain elements of the kitchen will be customized for very specific uses, depending on daily habits. That might mean a pull-out refrigerator drawer for certain easy-to-prepare breakfast or lunch foods, for example. It could become common to see more than one of certain appliances in kitchens, all part of a trend toward kitchen personalization. “Under-counter refrigerator drawers are a big trend,” Willis says. “It’s convenient and you don’t need to have everything in one place. Let’s say there’s a zone for food prep and cooking. You might have an under-counter drawer for things you tend to prepare daily. You might have a refrigerator drawer that just has water, soda or juice. The kids can go there—it’s so convenient. You still need your large refrigerator, but it doesn’t have to be the all-in-all.”

Specialized cooking: Some consumers are looking for ovens that do more than just bake. They’re also looking for the speed and look of commercial appliances. “I think people want the appearance of a professional kitchen,” Willis says. Right now, that look is primarily seen in high-end kitchens, but Willis sees the potential for mid-priced appliances to offer a professional kitchen look, even if they don’t offer all of the same features as their high-end counterparts. Edwards is seeing interest in steam ovens and a decline in built-in fryers, which were popular several years ago. Pizza ovens are also drawing interest. “I‘ve had a lot of specification requests for pizza ovens,” Edwards says. “I could see more of that, a combination oven with a pizza oven integrated.”

Extra, smarter dishwashers: People who like to entertain or who tend to use a lot of dishes might consider installing more than one dishwasher. “I’ve had some clients that had two dishwashers,” Edwards says. “I’ve done some recently where we have one in the kitchen and one in the butler’s pantry. I think we’ll see more of that.” Willis sees potential in dishwashers that automatically adjust to the appropriate cycle, depending on how dirty the dishes are. “I don’t think we’ve imagined, yet, all that can be done. I think we’re definitely going in the direction where one day you might just turn it on and it will choose the cycle.”

Refrigerators doing more: Do you like to listen to music while you cook? Edwards anticipates growth in the popularity of refrigerators with built-in speakers. Screens in refrigerators could also catch on. She also sees the trend toward more refrigerator doors and compartments continuing. “Having more compartments is a big deal,” Edwards says. “The pull-out doors on the bottom are big, and I think that will continue.”

Space built-in for portables: Portable appliances that get heavy use are being built into kitchen designs. “Open shelving is a real trend right now as far as storage of portables,” Willis says. “It’s creating a more open look.” But storage and display of portables will remain dependent on the client’s needs and choice, she says. If you’re going for an open storage plan, Edwards recommends choosing appliances whose colors coordinate with your kitchen.

Coffee stations: Coffee makers are beloved appliances in millions of kitchens. Now, some coffee lovers are expanding their devotion to the caffeinated beverage beyond a coffee maker into an all-encompassing coffee station. “We’re at a point where we’re seeing more coffee stations built in,” Willis says.

What would you most like to see in your kitchen of the future? Share your future kitchen visions in the comments!

Expert tips on refrigerator organization

You know the routine: Open the refrigerator, put the item wherever you can find enough space, then quickly close the door. If this sounds familiar, you’re not alone. It’s how many people organizetheir refrigerator. While that may work just fine for some, it’s also a recipe for scattered meal planning and potentially wasted food. And the cost of food waste adds up, with a recent estimate by the American Chemistry Council putting it at $640 per year, per household.

Organizing your fridge can make sure more of your food ends up in your belly instead of in the trash. It also means less wasted money on food you aren’t eating. We reached out to Becky Rapinchuk, the cleaning and organization guru known on the Web as Clean Mama, for her tips on organizing the fridge.

The most common mistake people make in refrigerator organization is putting food where it fits instead of a space that makes sense, Rapinchuk says. She recommends putting food that’s already opened in the front of the refrigerator to make sure you’re using the oldest food first.

You have a number of options for storing food in the refrigerator, but clearly label what you’re putting there. Rapinchuk prefers glass containers for leftovers and labels them (using freezer or washi tape and permanent marker) with the date they were put into the refrigerator or freezer.

Rapinchuk, who’s a mom of three, makes a weekly meal plan and shops on the same day every week (Friday is her preferred day.) Shop according to what you have planned, and prepare what you can in advance. Before she leaves for the grocery store, Rapinchuk straightens up the refrigerator and wipes down the shelves. The refrigerator gets a thorough cleaning once a quarter.

There are other benefits to organizing your refrigerator. If you make it easy to find the food you’re looking for, you’ll be less likely to get frustrated and order takeout instead.

How do you keep your refrigerator organized? Share your tips in the comments!

Kitchen redesigns: Appliances, Cabinets and Space

During a redesign, your appliances, cabinetry and counter space work together to create a balance between function and style. Choices like the size of your range and other appliances can directly affect cabinet space, and choosing more storage or counter space could mean you’ll have to make concessions elsewhere.

Kitchen design is a personal process, and while there are plenty of trends to go around, each design and redesign is unique and shaped by homeowners’ preferences, personality and desires. We spoke with two designers who have a combined 50 years of kitchen design experience between them. Both agreed that kitchens are built around the appliances, where any design project should start.

Paula Kennedy, Timeless Kitchen Design, Seattle

For designer Paula Kennedy, the kitchen redesign process starts with a discussion on appliances. Many of her clients are one step ahead and have already begun researching their options, but she encourages them to take their time. “I tell them to go to an appliance dealer I trust and respect, and I make sure they don’t just walk in on a Sunday when everyone else is in there,” Kennedy says. “Take some time off from work and do it right.” She’ll sometimes join her clients on a visit to the retailer or give the dealer a heads up that they’ll be coming in. “I’ll specify some things to help them avoid mistakes,” she says. If they want a built-in refrigerator, for example, she’ll make sure they’re looking at the right models. “Saying ‘built-in’ to one manufacturer is different than to another,” she says. “There’s built-in, there’s flush-door, there’s framed-door, there’s fully integrated. They don’t all use the same language.”

Your choice of appliance, particularly the size, directly impacts the cabinet design. “It’s one of the most critical points,” Kennedy says. Cabinets take time to build, and they need to be ordered early in the process. A late change can affect how the cabinets and appliances fit. Be comfortable with your decisions, because even a quarter-inch difference in the size of an appliance can have major implications on the cabinetry. Does your dream kitchen design include appliances enclosed in custom cabinets? You’ll need to decide in advance, as panels must be an exact fit.

“We often start with the cooking range,” Kennedy says. “Do you want a range vs. a cooktop? How many ovens do you want? More cooking means less storage, and everyone is just screaming for more storage. It’s a tradeoff. Clients come to me with a list of appliances. We have to prioritize their needs. You aim for function plus storage.”

For portable kitchen appliances, it’s a matter of balancing countertop space for their use and kitchen storage. “People love their small kitchen appliances, but storage for those is a nightmare. When I walk into a house and see them all on the countertop, I have the challenge to properly design space for those countertop appliances so it’s not an eyesore, it’s not cluttered, it’s functional and not taking up counter space.” Talk to your designer about storage options that make it easy to access the appliances you use regularly and store those you use less often in a way that makes sense.

Your choice of appliance finishes should fit within your overall color scheme. Stainless steel is popular, but it may not be a good match for you. “Finish is a huge factor,” Kennedy says. “It drives what color we’re choosing for the cabinets. It has to be a color you love.”

Toni Sabatino, Toni Sabatino Style, New York
Toni Sabatino of Toni Sabatino Style calls her approach to kitchen design “appliance-driven.”

“The style of the appliance, along with the architecture of the home and ventilation are really important.” Your lifestyle should determine what you need, Sabatino says. Some factors to consider are cooking habits, diet and family size.

“A family that goes to Costco and Price Club and buys 130 boxes of pasta will need more pantry space than somebody who buys fresh food,” Sabatino said. “Somebody who keeps a kosher kitchen may have two sets of dishes.” Do you do enough entertaining to warrant including a second dishwasher? Put your priorities in order and allow them to guide your decisions.

When choosing cabinetry, Sabatino encourages clients to take style cues from their home’s architecture. “If you want an old house, classic look, inset white shaker cabinets are popular,” she says. “That will pair with just about any interior because it’s simple and has a built-in furniture look. It will pair with just about any appliance style—stainless or wooden ventilation covers. That’s a timeless look.”

Even though they aren’t built-in, you’ll have to think about your portable appliances during your design as well, both those you use frequently and those you don’t. If you use many small appliances on a regular basis, think about whether an appliance pantry might make it easier to store and get to what you need. Sabatino asks clients about their portable appliances during the planning process. “Do they have a yogurt maker that’s in the basement because they don’t have space for it?”

Also think about what you’re giving up when planning how to incorporate portable appliances. If you drink a lot of coffee, you might want to reserve some space on the countertop for your coffee maker. But that also means you’ll have less counter space. Designing cabinet space especially for portables means you’re limiting what can be put in that space, Sabatino says.

Do your homework, understand your options and apply them to your lifestyle. Plan carefully and know what you want before you begin, Sabatino says. “Changing your mind can throw off everything.”

Rise of the Robots: Robotic Vacuums Now a Floor Care Fixture

Traditional vacuum cleaner with a hose, nozzle and brush versus a modern circular automated low profile unit, high angle view on a shaggy white carpetDo robots live among your appliances? There’s a growing chance at least one type does. Sales of robotic vacuums and cleaning robots are expected to grow from $981 million in 2013 to $2.6 billion by 2020. And the innovations keep coming. New features like cameras, voice controls and improved navigation have taken robotic vacuums from a novelty to a fixture in floor care.

So what does one need to know before turning over vacuuming duties to a robotic partner? Robots have come a long way in floor care, but they’re still widely considered a supplement to, not a replacement for traditional vacuums. They can’t yet climb stairs, but they can sometimes reach areas that are hard to get to with traditional vacuums, like deep beneath furniture. They’ll take longer to clean a room—about 30 to 90 minutes, depending on the robot and the size of the room—but they can also do it on their own, whether or not you’re there to supervise.

Red robotic vacuum cleaner and smartphone. Smart appliances concept. 3D rendering image.The hundreds of robotic vacuum models on the market offer different features. They use different methods to find their way around a room, using laser, cameras or infrared sensors. They may have different work capacities or perform better on certain surfaces. Some models use lithium ion batteries, others use nickel metal batteries.

Are you ready to welcome a robot into your home? Follow these tips to create a more hospitable habitat for your new cleaning companion:

Break down barriers: Take a look around the area you’re going to vacuum, and remove any potential obstacles. Even a sock or something smaller on the ground can interrupt cleaning, particularly if the robot tries to vacuum it. Remove any items that could get stuck in your robot’s rollers and cause an error.

Remove the cords: Just as you would with traditional vacuums, make sure the area being cleaned is free of plugs and power cords that the robot may try to vacuum.

Keep it confined: A robotic vacuum goes where you allow it to go. Close doors that might lead it to another area that does not need to be vacuumed, or use the technology features to keep it within a certain range.

Welcome it home: Many robotic vacuums will automatically make their way back to their charging station when their power starts to drop. Put the charging station in an area that’s easy for the robot to access.

Keep the robot clean: Keep your robot’s sensors and other navigation tools free of debris, as it can interfere with navigation. Empty the robot’s dustbin after every use. Make sure filters are clean and replace as necessary.

The next robotic revolution

Robots are slowly making their way beyond vacuuming into areas like mopping and air purification. Automation is becoming part of appliances, with many new models incorporating voice controls and the ability to adapt to our habits. Are there any tasks you would be happy to hand off to a robot? Let us know in the comments!

About This Blog

HOME for cooking, cleanliness, comfort and care

Categories