Buying a toaster or toaster oven? Here’s what to consider

Whether it’s an oven, juicer or sous vide immersion cooker (they’re great for eggs), many appliances play a part in creating the perfect breakfast. But no appliance is more synonymous with breakfast than a toaster. If you are shopping for a toaster or toaster oven, you are going to find yourself faced with countless choices. They’ll range from simple “pop-up” models that do nothing but toast and cost under $20, to toaster ovens rife with features that may cost several hundred dollars.

We take toast very seriously. We understand that breakfast, which likely includes toast, can set the tone for the day, and we want to help you choose the toaster that helps get you to the right place. That’s our focus in our latest installment of our series on breakfast. (Did you miss the first two? We covered nontraditional takes on eggs and toast.) As with most appliances, it helps to spend some time thinking about how you’ll use the toaster. For help, we talked to experts at AHAM member KitchenAid for the lowdown on today’s toaster. They offered these suggestions on what to consider before you buy a toaster or toaster oven.

Capacity: How much bread do you toast in a typical morning? Do you have a large family that tends to line up waiting for the toaster? The demand for your toaster will tell you how many slices you need your toaster to handle at once. Most toasters will offer anywhere from two to four toast slots, though you may find a few models offering six. Toaster ovens will also advertise their toast capacity based on the number of slices it can hold at once. They may also describe capacity by using other foods they’re capable of handling, like pizza or meats.

Appearance: Unlike some of your other small appliances, a toaster is likely to live in full view on your countertop and become part of your decor. Make sure you choose a color and style that you like.

Bagel setting: Who doesn’t love a good bagel? Many toasters are built to handle the popular breakfast bread, with wide slots and a bagel setting. When you set your toaster for a bagel, power to the outer elements is reduced so the heat is focused on the bread side of the bagel.

Accessories: Do you need a bun warmer or sandwich rack? Some toasters come with attachments that rest a few inches above the toast slots.

Lift and descent: Some toasters allow you to use the lever to lift the toast a bit higher for easy removal. Other models offer “automatic descent,” a sensor-enabled feature that brings the bread into the toaster after you place it in the slot.

Cooking functions: Toaster ovens offer cooking functions beyond toasting, but the number of functions will likely vary by model. Typical functions you might come across are bake, toast, broil, warm, reheat. Choose your settings carefully if you’re partial to cooking or reheating meals in a toaster oven.

Hungry yet? Read the first two installments of our series on breakfast:

Cook a “shell” of a breakfast with these alternatives to chicken eggs

Toast isn’t just toast: Creative takes on a breakfast standby

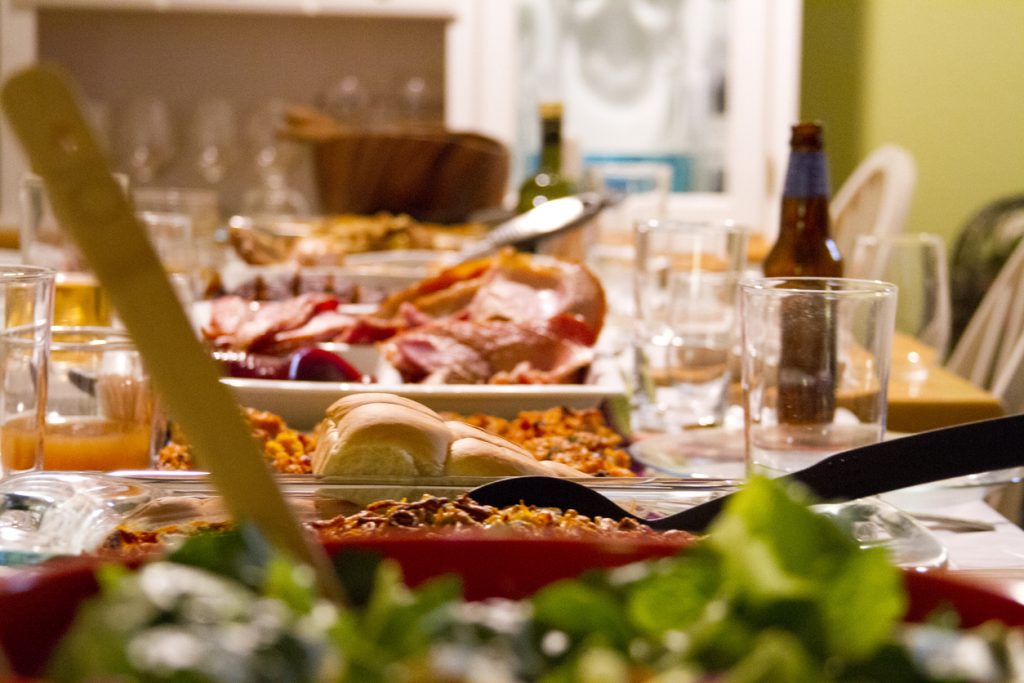
Refrigerate and Freeze: Safely storing holiday leftovers

Leftovers are a cherished part of the holiday meal experience. And that’s a relief, since after working so hard to prepare the great holiday feast, the kitchen may be the last place you want to be. Your refrigerator and freezer make it possible for you to enjoy those holiday flavors days, or, if you freeze your leftovers, for months to come.

Food safety is the first thing you should think about when storing that leftover holiday turkey, vegetables, stuffing, side dishes and desserts. The U.S. Food Safety Inspection Service (FSIS) says leftovers, regardless of the type of food, can be stored safely in the refrigerator for 3-4 days, or for 3-4 months in the freezer. Hot food should be refrigerated within two hours of the time it is cooked or taken out of an oven or other appliance that has been keeping it warm, FSIS says.

Bacteria can still grow on hot food after it is placed in the refrigerator, so it’s important that it cools as quickly as possible. Separate hot foods, like soup, into smaller containers to speed up cooling, FSIS recommends.

Don’t forget to check the temperature in your refrigerator regularly. It should be kept between 34 and 40 degrees Fahrenheit.

Tips on storing leftovers

If you’re hosting the holiday meal this year, you know the leftovers are coming. Plan for them. The Food Network suggests making room in the refrigerator in advance by using up items the week before. Have plenty of containers ready and label them in advance so you’re ready to move the food to the refrigerator or freezer right away. Take stock of your containers and use those that are sized appropriate for your refrigerator.

Cafemom recommends cutting the turkey into smaller sections for storage. Remove any stuffing from inside the turkey. Use gallon-sized food storage bags to store soup and gravy. Put the bag inside another container before you pour in the contents and let it sit for a moment to check for leaks.

Keep food preferences in mind if more than one person will be polishing off the leftovers. Cookstr suggests storing the light and dark turkey meat in separate containers.

Reheating

Just as you would when cooking it the first time, make sure your leftovers reach 165 degrees F when you reheat them. If you use a microwave—the go-to reheating appliance for many—arrange the food neatly on a microwave-safe dish and cover it with an appropriate cover, FSIS says. Bring any sauces, soups or gravy that you’re reheating to a rolling boil. Frozen leftovers can be safely thawed in your microwave or refrigerator.

A professional chef’s advice on organized holiday cooking

It’s Thanksgiving. Or Christmas. Or any large family or social gathering that is built around a meal. The holidays and big events are a time for home cooks to shine, but they’re also times when success can depend on careful planning and organization. The effort you put into planning and organizing can be the difference between a meal that is memorable for the right or wrong reasons.

“It’s crucial,” says Matthew Britt, a culinary instructor and veteran restaurant chef. “It’s probably the most overlooked thing. I’ve seen some awesome cooks struggle at the holidays, and I’ve seen some average cooks crush it. It all comes down to planning.”

Britt, a Johnson and Wales University instructor who worked for years as executive chef overseeing the contemporary Latin American cuisine at Ceiba in Washington, D.C., says certain principles from restaurant cooking are just as applicable in the home kitchen.

“We throw around the words mise en place—everything in its place,” Britt says. “Everything from setting up your station, to setting up what you can the night before.” Successful cooking also takes focus, and your frame of mind—try not to stay positive and not become overwhelmed.

Britt suggests starting your planning a week in advance. Go into the holiday meal prep with a full pantry. “The number one thing to solve headaches while cooking is to have the kitchen stocked,” he says. “It might seem crazy, but spend a couple hundred dollars to have your pantry loaded—spices, oils, condiments. Invest in your pantry, your core ingredients. It’s a little more expensive up front, but it will save you so much headache.”

Set the stage: Gather everything you need—ingredients, accessories and small appliances, and put it in one place. “I put a big tablecloth on the table and put all of my ingredients and equipment on it,” he says. “Have everything laid out in advance so you know where it is. OCD is the friend of any chef. Make everything as detailed and organized as you want it.”

Get a head start: Many chefs and cooks will suggest doing what you can in advance. That’s good advice, but it isn’t a question of just checking off tasks. Consider how far in advance the foods can be purchased and stored without losing their character. And remember that some dishes are just as good reheated as they are freshly prepared. “The holidays are conducive to baking,” Britt says. “Anything you can bake—and casserole—can be made the night before. It’s usually contained in some sort of casserole dish or pot and reheats relatively well.” Stuffing and mashed potatoes are also good candidates for reheating in the oven or microwave. Chop what vegetables you can the night before, too. Store it in labeled bags in the refrigerator. A second refrigerator can provide valuable storage space when you need it, Britt says.

Get ready to delegate: If you’re the one heading up the holiday meal, the kitchen is yours. That doesn’t mean, however, that you have to go it alone. “Put some people you trust to work,” Britt says. “Families, spouses, kids. Give people a title. Say ‘you’re my sous chef this season.’” One valuable way people can contribute is by giving feedback on the menu and meal plan. They’ll let you know if you’re over- or underdoing it, Britt says. While that can be a blow to a home cook’s ego, their feedback and criticism can make your life a lot easier. “It could mean revising the menu or getting input on how to do something,” Britt says. “It could be getting tips on how to cook the turkey from the butcher at the grocery store. It could be [delegating] small jobs like washing dishes. That’s going to save you so much time to focus on the food. At the end of the day, you’re the chef.”

Do a dry run: Now that you’ve stocked the pantry and assigned tasks, it’s time to get your game face on. A walk through the cooking schedule and process the night before can mean smooth cooking on the big day. “Say ‘This is our game plan.’ If you go through the process, move throughout the kitchen, and mark everything out, you’ll be surprised how smooth it will go.”

Clean as you go: This includes any small appliances you’ll use along the way. Don’t let the cleaning pile up. You’ll take up valuable kitchen space and could be setting yourself up for a big cleaning job at the end of a long cooking day. Save oven cleaning for after the holiday.

Are you ready to cook? Stay flexible and be ready to adapt. “If you mess something up, be able to wing it,” Britt says. “Maybe the turkey didn’t come out like I wanted, but maybe I’ll make a banging gravy that covers it up being a little dry.” Optimism is important for successful cooking.

Kitchen essentials

Have you ever wondered what appliances a professional chef keeps in their kitchen? Britt shared a few of his favorites.

Blender: “It’s critical, not only for sauces, but also for drinks,” Britt says. “I use a bar blender as my workhorse.”

Immersion blender: “I love an immersion blender for working with things on the counter,” he says.

Double oven: “It’s the best thing,” Britt says. “You may only use it once or twice a year, but having a separate oven to keep things warm while roasting the turkey is crucial.”

The Perfect Holiday Meal: Join AHAM’s Twitter Chat!

Lifelong memories are built around holiday meals, both in the kitchen and at the table. It’s the time of year when friends and family prepare their special recipes of the season, which you might have been anticipating since the last holiday.

AHAM is bringing together chefs, home cooks, nutrition professionals, manufacturers and anyone else who loves holiday cooking and eating for a Twitter chat on The Perfect Holiday Meal. Join us to share your best advice on the preparation, cooking and clean-up of your holiday meal. And, get those pictures ready to share your favorite holiday memory!

Join us at 2 p.m. ET on Thursday, Nov. 16. Follow AHAM on Twitter at @AHAM_voice and use the hashtag #AHAMHolidays to join in. See you there!

Cook a “shell” of a breakfast with these alternatives to chicken eggs

We’re continuing our series on breakfast with another twist on the traditional (last time, it was toast) with a look at alternatives to traditional chicken eggs. All of these can be prepared in the traditional ways on your cooktop or in your oven—scrambled, fried, etc.—but you may notice a slight difference in color, texture or taste. Consider bringing duck, goose, ostrich or quail eggs to your breakfast table if you’re in the mood for sampling eggs laid by fancier fowl.

Duck: Duck eggs are larger and have a tougher shell than chicken eggs. (That means they’re harder to “quack.” Ha ha ha…) You can cook duck eggs the same ways you’d cook chicken eggs. But since you’re already straying off the beaten breakfast path, why not go a bit more exotic? If you’re into sous vide cooking, ChefSteps recommends serving their sous vide duck eggs over asparagus with olive oil, champagne vinegar, minced chives and chopped black truffle.

Goose: Goose eggs are as big as about three large chicken eggs. They’re likely to be harder to find since geese produce far fewer eggs than chickens. Try this scrambled goose egg recipe from Tastessence, which adds plum tomatoes, girolle mushrooms and chopped garlic for a fresh twist on a breakfast favorite.

Ostrich: Perhaps you’re serving breakfast to a large group of people. Or maybe you’re just really, really hungry. If either one of these is the case, an ostrich egg may be the way to go. And you’ll only need one, because one ostrich egg is equivalent to about two dozen chicken eggs. Are you recovering from a long night out? This ostrich egg omelet recipe, from the Travel Channel, is a traditional hangover cure in South Africa. Ostrich eggs can be tough to crack and you’ll probably need to use a few tools to get the job done.

Try the eggs!

Quail: It takes about five quail eggs to equal one chicken egg, but the speckled shells add a unique splash of color to your breakfast prep. Use a knife or scissors to penetrate the delicate shell. Use your oven to take your morning egg back to the nest with this recipe from JoCooks: quail eggs in hash brown nests.

Good things come in small, speckled packages.

Great eggs aren’t just for the oven and range. Take advantage of your smaller appliances, like your blender and immersion blender when you’re making scrambled eggs. And as always, take the time to follow safe cooking practices.

Have you ventured outside the shell of traditional breakfast eggs lately? What’s your favorite egg alternative?

Coffee, stand mixers, and love: Appliances are popular items on wedding registries

Autumn. It’s the season of cool breezes, falling leaves and fluttering hearts. October and September according to wedding website The Knot, are the most popular months for weddings. If you’re the one about to exchange vows, you’ll want to build a wedding registry that will make your life journey easier and more convenient. That means plenty of appliances.

Kitchen appliances are popular on wedding registries. In fact, a stand mixer routinely tops wedding registry site Zola’s list of registry gifts. Also on Zola’s list of most popular appliance registry gifts: a waffle maker (“Couples really love their waffles,” Forrest says.), hand mixer, food processor, two-speed immersion blender, a programmable slow cooker, a smart toaster oven, and multiple blender models.

Silver Spring, Md. resident Mindy Halpert will marry her fiancée, Mike Reinitz, in May. They recently moved in to a new house, so they considered what they’ll need for their home when building their registry.

“When we were moving, we said we could buy that now, or we can wait for the registry,” Halpert said. “I’m thinking long-term, high-quality.” She likes to cook, and the couple plans on regularly hosting large family gatherings. Appliances on her registry include an electric knife, a multi-cooker, a coffee grinder and high-end coffee maker, a hand mixer, a handheld vacuum and a steamer mop. The couple also registered for two food processors: a 14-cup and a 3.5 cup, so they’re ready to prepare meals for both small and large groups. She registered at multiple retailers – some online and some brick and mortar– keeping in mind the shopping preferences of her guests.

So what appliances should you include on your registry? Like so many choices, it depends on your lifestyle.

“Think about what you want before you go to the store and are armed with a scanner,” says Betty Gold, Good Housekeeping’s senior editor and product analyst, kitchen and food. “Have a discussion with your partner about what you actually need, want and will use for the rest of your lives. A lot of people go hog wild. They see something like an oyster shucker and register just because it’s there.”

Hannah Brown, wedding registry coordinator for Macy’s, encourages couples to focus on their realistic lifestyle when registering for gifts. “There are the couples who host and entertain, and then there are other couples who like stay at home and cook together for themselves,” she says. “This will point the couple in the right direction to look for trendy barware versus quality pots and pans. Many times couples have the appliance they want in mind, but aren’t sure of the brand or model to select. We advise couples to consider the brands they are already familiar with and the lifestyle that they hold. The most popular appliances for couples, Brown says, are single-serve coffee makers, stand mixers, toasters and toaster ovens, blenders and food processors, and immersion blenders.

Here are some other items to consider for the registry:

  • Multi-cooker: “If you make hearty cuts of meat or make chili often, we tell people to get them,” Gold says.
  • Sous vide immersion cooker: This is more appropriate for experienced cooks. “People using them are serious cooks or are into cooking,” Gold says. “Sometimes people are weekend cooks. They’re the sous vide cooks who want to cook a special meal once a week.”
  • Coffee maker: Again, know what you like and how much space is available. A pod coffee maker might work better for people who are short on time. Also keep aesthetics in mind when selecting or giving a coffee maker. “They’re going to sit out all the time. If you’re giving someone a coffee maker as a gift, it’s going to have permanent real estate on the countertop. Espresso machines are a great gift. They’re a little higher-end, but you can make your coffee in less than a minute.
  • Stand mixer: “We recommend that anybody who bakes get a stand mixer,” Gold says. “If you don’t bake a lot, don’t register for it.”
  • Countertop oven: “You can do anything in the oven, except you can do it on your countertop,” Gold says.

Are you tying the knot soon? What are you putting on your registry? Let us know in the comments.

Toast isn’t just toast: Creative takes on a breakfast standby

It’s time to get serious…about breakfast. Whether you enjoy a leisurely breakfast or take it on the run, the odds are pretty good that your appliances are involved. Over the next few weeks, we’ll take a deep dive into the role your appliances play in the most important meal of the day.

Let’s start with toast, that reliable, comforting breakfast mainstay. You pop it into the toaster, choose your level of color (which says a lot about you as a person), add a pat of butter or other spread and enjoy. There’s nothing wrong with traditional, but if you’re looking for more adventurous ways to enjoy your toast, we’ve collected some recipes that will add some spice (in some cases, literally) to your morning slice.

Healthy peanut butter banana toast with chia seeds: Healthy Glow recommends using sprouted whole grain or gluten-free bread for this recipe, which also incorporates cinnamon. Like many specialty toast recipes, this could be a side or its own meal.

Avocado pesto toast: Avocado toast is a popular item these days. This recipe, from Cookie + Kate, combines pumpkin seeds, avocado, garlic and lemon juice, with the suggested options of eggs and cherry tomatoes.

Fig, ricotta & truffle honey bruschetta: Even humble toast can be exotic. Use sourdough bread for this recipe from heneedsfood. You’ll also need ricotta, rosewater, fresh and dried figs, pistachios, almonds, truffle honey and micro watercress. You might have a smaller window to make this recipe—fresh figs are in season for a short time in early summer, then in late summer through fall.

Healthy cinnamon toast: The mention of cinnamon toast has our mouths watering. Genius Kitchen offers this recipe, which brings together banana, flax seeds, brown sugar and cinnamon to top wheat toast. You can put it all together in minutes. They recommend serving it with a glass of rice or soy milk and a fruit bowl.

Simple spinach toast with poached egg: If you like greens in the morning, this recipe by From the Grapevine  might be for you. Add spinach, butter, a poached egg, salt, pepper and butter to your choice of toast.

How you like your toast reveals key aspects of your personality. You can find out the secrets with The Toast Test: A One-question Personality Quiz. Take it now. Trust us, you’ll be finished before your toast. This study says the best toast is cooked for exactly 216 seconds, but we’re convinced it’s a matter of personal preference. The research could not possibly be as rigorous as the data we’re collecting through The Toast Test.

How do you like your toast? White or wheat? Butter or jam? Let’s get this discussion going!

Need Halloween costume inspiration? Look to your appliances.

Are you searching for that Halloween costume that will have everybody talking, win a prize in the office costume contest, or just have everyone fawning over your ingenuity? You have come to the right place. We’ve gathered some of the best appliance-themed Halloween costumes from the Web to get your creative juices flowing. So grab your art supplies and get to work! (If you’ve recently purchased an appliance, a large box could come in handy.)

Many special costume possibilities open up when you have a little one on the way. This take on the “bun in the oven” from Coolest Homemade Costumes adds a chef to get the family involved.

Halloween is a great time to air your dirty laundry as a washer, dryer or the dirty laundry. This one, also from Coolest Homemade Costumes, is perfect if you have a trio of friends looking for a concept costume.

If your tastes lean more toward the macabre, you might want to try this “head in a freezer” costume.

There are those who dress up as their appliances, and those who dress up their appliances. The folks at Crafster made this toad costume out of wool to get their robotic vacuum into the Halloween spirit.

October can be chilly, or it can be…toasty. Make your toaster costume authentic (and reveal your personality) by setting the toaster to your preferred level.

What will you be dressing as this year?

Space Heater Round-Up: AHAM’s Expert Advice, All in One Place

Winter is coming, and it’s time to start thinking about how you’re going to fend off those seasonal chills. To help you prepare, here’s the best of our expert advice on portable electric heaters.

These key questions will help you choose the portable heater that works best for you:

  • Will you be using the heater for temporary personal heat or to keep a room steadily warm?
  • Do you need instant heat, or can the heat be generated gradually?
  • What’s your noise tolerance?

Learn about the types of heaters available –

  • Panel heaters can be wall-mounted or freestanding, and may include fans.
  • Radiant heaters generate warmth by heating oil within the unit, though the oil doesn’t need to be refilled.
  • Fan heaters distribute heat from an element using a fan.
  • Ceramic heaters use a ceramic heating element and may also use a fan to spread heat.
  • Infrared heaters generate heat from a surface within the heater. The heat is emitted in the form of infrared energy.

What features do you need? Today you can easily find heaters with the following:

  • A thermostat to keep the heat at a steady temperature. Some models offer a digital setting.
  • Oscillation to distribute heat
  • Adjustable fan speeds

And finally, no matter what type of heater you end up with, AHAM recommends these safety tips:

  • Read the manufacturer’s instructions and warning labels before using your portable electric heater.
  • DO NOT leave operating heater unattended and always unplug heater when not in use.
  • DO NOT use your heater with a power strip or extension cord. Overheating of a power strip or extension cord could result in a fire.
  • String out cords on top of area rugs or carpeting. Placing anything, including furniture, on top of the cord may damage it.
  • Keep combustible materials, such as furniture, pillows, bedding, papers, clothes and curtains at least three feet from the front of the heater and away from the sides and rear. DO NOT block heater’s air intake or exhaust source.

Vacuum features, settings and technique: Expert advice

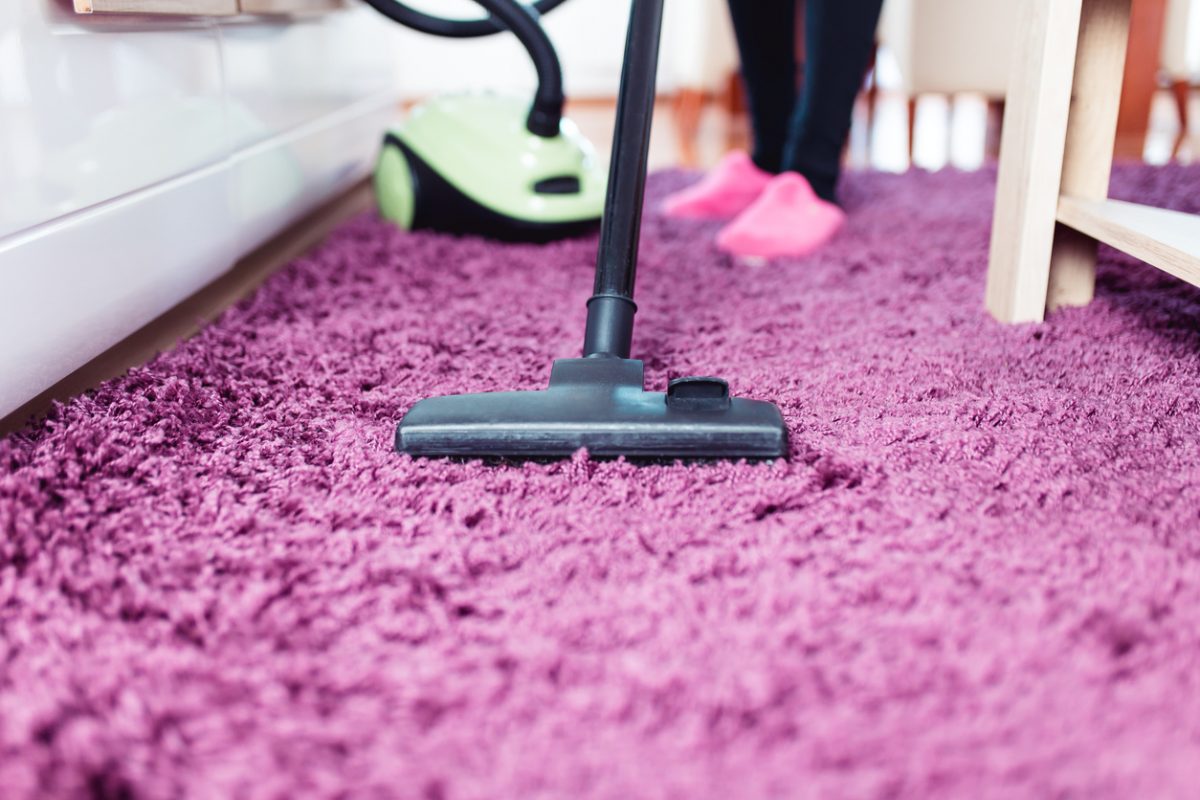
Vacuums are one of your go-to appliances as you strive to keep your home clear of dirt, dust, pet hair and allergens. There’s a good chance vacuuming is part of your daily or weekly routine. A 2013 global survey by AHAM member Electrolux found that 33% of respondents vacuumed 2-5 times per week, 13% vacuumed daily and 3% more than once a day.

How you vacuum, not just how much you vacuum, is an important factor as you strive to conquer household dust. The various settings and features incorporated into many vacuum models, combined with the proper technique, will help you maximize your vacuum’s ability to keep your home free from dust and dirt.

Features

The features vacuums offer vary, but adjustable height, “full-bag” sensors and variable motor speed are common. All of them affect your vacuum’s performance.

Adjustable height: Many models allow you to adjust the height of the vacuum as you clean different surfaces. But vacuum owners often don’t realize that a lower height setting doesn’t necessarily mean a deeper clean. “If it’s too low, it won’t clean properly,” says vacuum guru Tom Gasko, curator of the Vacuum Cleaner Museum in St. James, Missouri. So how do you know which height is right? “Recline the handle and start the vacuum in its highest position,” Gasko says. “Turn it one notch down until you hear the change in sound—it will become a deeper, throatier sound.” That sound means the brush is sweeping correctly. The team at BISSELL, an AHAM member, recommends a higher setting for thicker, plush carpets, and a lower height for low-pile carpet or bare floor.

Speed settings: Another common assumption is that high speed equals better cleaning. The appropriate speed depends on the surface you’re vacuuming. “If you’re cleaning an area rug, the high speed tends to bunch it under a nozzle,” Gasko says. “The lower speeds work better. Let’s say you have a woolen area rug. Don’t use high speed. You’ll drag the carpet and it will destroy the nap of the rug. Your draperies don’t need near the suction of the shag rug. On your sofa, it can tear the fabric.”


“Empty bag” indicator: A “full bag” indicator is great for telling you when it’s time to change the bag. “If that [indicator] window is three-quarters of the way full, that bag is three-quarters of the way through. If you’re vacuuming three rooms and you have a shedding dog, you might want to change the bag.” Bissell recommends emptying bagless vacuums frequently so they don’t overfill. This leads to fewer clogs and better performance. And check your brush, too: hair on the brush roll can decrease its effectiveness and cause stress on the vacuum’s belt. Clean the brush regularly for the best performance.

Attachments: Many vacuums come with a variety of attachments. Some of the more common are crevice tools, turbo brushes, extension wands and dusting brushes. “Use crevice tools and turbo brushes to vacuum upholstery and get in between cushions on the couch,” the BISSELL team says. “Use extension wands to reach dust on ceiling fans, cobwebs in high corners, etc. Dusting brushes can be used to reach around books and items on shelves. Gentle bristles won’t scratch delicate wood surfaces.”

Technique

When you vacuum, do pull back harder than you push? Many people naturally do. They’re unknowingly leaving dirt on the floor. Why?

“Vacuums are designed to be pushed at a specific speed,” Gasko says. “They’re to be propelled forward at 12 inches per second, backwards at six inches per second. Your backward pull has to be slower than your forward push.” Brushes on vacuums rotate forward, from the back to the front. “If you pull it back at half the speed, the brush has time to groom the carpet and sweep all the dirt out of the carpet because you’re going against the direction the brush turns.”

If your vacuum includes swivel, use it to reach those tight areas and corners, BISSELL recommends.

If you’re using a stick vacuum on a bare floor, it’s also a good idea to slow down and give your vacuum enough time to remove the dirt. “People think they can get through their kitchen in less than a minute,” Gasko says. “A bare floor doesn’t mean you can push the vacuum faster.” BISSELL recommends turning off the brush roll when vacuuming hard floors so that debris don’t scatter and brushes don’t damage delicate floors.

How you push the vacuum also matters. You may be using too much arm.

“People will stand and make star-shaped patterns with their arm,” Gasko says. “You’re supposed to hold the vacuum in your hand with your arm not bent.” He recommends walking forward at about 12 inches per second and backing up at half that speed for maximum dirt removal. “Make two passes, one forward and back, at the proper speed. Using your shoulder and elbow is inefficient, and your carpet will be cleaner.” Don’t go too fast, and be methodical in your pace when cleaning high-traffic areas of the home, BISSELL recommends.

Do you use a canister vacuum? If you tend to pull on the hose to get the canister to follow you around the room, there may be a better way. Proper technique involves wrapping the hose around the small of your back and holding it in your left hand. This will allow you to move the canister without pulling on the full length of the hose, Gasko says.

Are you cleaning drapes, furniture, shelves and other higher-up areas? BISSELL suggests cleaning those first, before you vacuum the floor. That way, if dust drifts from the higher spots, you’ll only have to vacuum the floor once.

About This Blog

HOME for cooking, cleanliness, comfort and care

Categories