Your Recipe for Safer Holiday Cooking

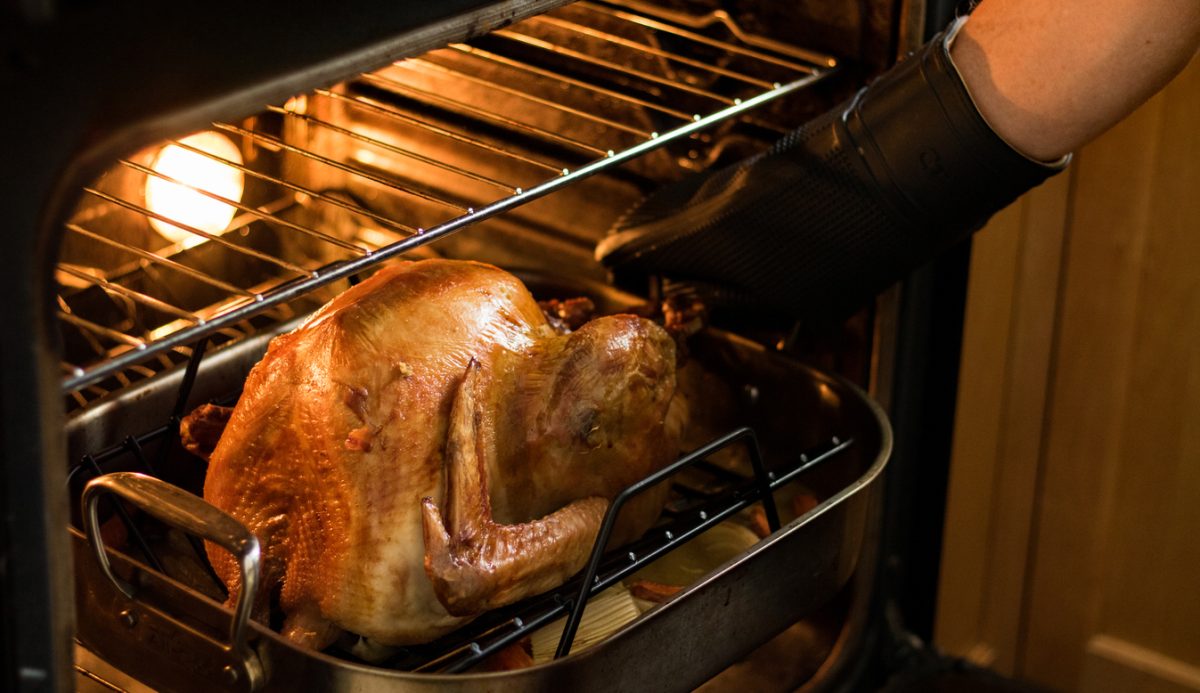
The holiday season is coming, and kitchen appliances, from major appliances like the oven and range to portables like the stand mixer and immersion blender, will put to good use across the U.S. to turn out holiday favorites from turkey to cookies to pies. Appliances are extremely safe when used properly and are tested for safety long before they make it to your kitchen. However, the holidays are busy times in the kitchen, and it is easy to get distracted and lose sight of kitchen safety, especially if you are hosting a large group.

Unattended cooking is still the leading cause of home fires, according to the National Fire Protection Association. In fact, NFPA reports that Thanksgiving is the peak day for cooking fires, followed by Christmas Day and Christmas Eve.

While you’re putting together your menu and planning for the big meal, it’s a good idea to take a step back and review basic cooking and kitchen safety practices. Follow these steps to keep your kitchen safe and your holiday guests happy and well fed:

Always monitor what is cooking: If you have to walk away for a minute, ask a family member or guest to keep an eye on the range.

Wear close-fitting clothing or short sleeves to reduce the risk that clothing will catch fire.

Clean your oven and range before cooking to prevent food and grease buildup.

Turn pan handles inward to keep them out of the reach of children and prevent dangerous spills.

Watch out for dangling cords: Keep portable appliances unplugged when they aren’t being used, but make sure the cord is in a safe place and can’t be pulled or snagged.

Don’t use appliances near the sink to reduce the risk of electric shock.

Use the right microwave cooking times to avoid overcooking food and potentially starting a fire.

What to do if a cooking fire happens

Fires can happen even in the safest kitchens, and it’s important to know how to respond in the event a fire does break out.

Call the fire department, directly if possible. Often, a direct call (rather than calling 911) will allow the fire department to respond more quickly. Keep the number of the local department on hand.

Smother any grease fires by sliding a pan over the flames. Turn off the heat and leave the pan in place until it cools. Don’t try to carry it outside.

Keep a box of baking soda nearby to put out any other fires. Never use water or flour to put out cooking fires.

Keep a fire extinguisher in the kitchen, within easy reach. Make sure it is a type that will work on cooking fires.

Keep oven and microwave doors closed if a fire breaks out to smother the flame.

Stay organized, stay safe and enjoy the process of putting together the biggest meal of the year. And take advantage of appliances like your freezer to get a head start.

Forget “Fridgescaping”: Refrigerator Organization for Less Stress and Healthier Choices

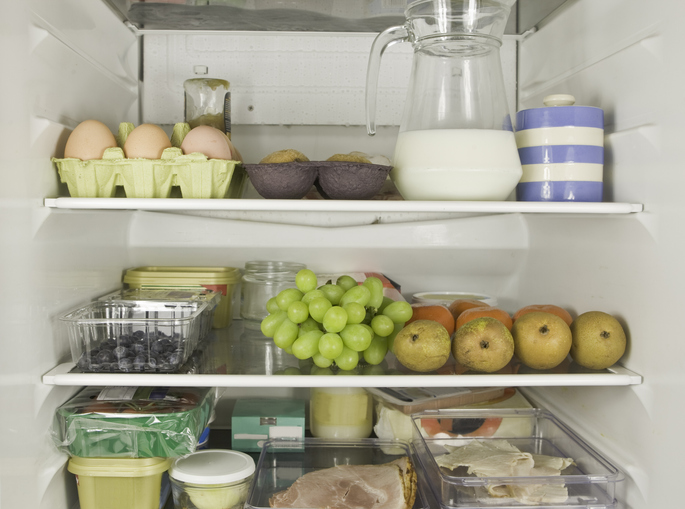
If the kitchen is the hub of the home, the refrigerator is more like a sun at the center of the universe, orbited by family members. It is where most meals begin, an essential appliance that can also have a major effect on the food choices you make. And while you may not realize it, investing some time in organizing your refrigerator can take some stress out of your busy life.

The everyday act of opening the refrigerator door can lead to a decision that may affect our day in the short term, or your health if the choices become a habit. Do you take the time to make a salad or grab a slice of leftover pizza? Should you satisfy your sugar craving with an apple or a dessert? When life gets busy, being overwhelmed by too many decisions could lead people to make the quick, easy and sometimes less healthy choice when they are deciding what to eat or put in the kids’ lunch.

“Many of my clients are able to meet their goals more efficiently with organization,” says Caroline Passerrello, a spokesperson for the Academy of Nutrition and Dietetics and instructor at the University of Pittsburgh. “The more hectic the schedule, the more organization matters.”

Organizing your refrigerator takes some time, but that investment has the potential to pay off in multiple ways. You’ll take some of the decisions out of your day, you will make healthy choices easier and, you may even save money by letting less of your food expire. “The fewer decisions you have to make, the better,” Passerrello says.

So when you have a few minutes between learning your fall schedule, shopping, driving and packing lunches, read what two nutrition experts have to say about organizing your refrigerator.

Plan before you dive in

The process of organizing a refrigerator starts not at the refrigerator door, but with your grocery list. It should involve everyone in the household. “I plan out lunches for the week ahead of time and often give my kids a list of snacks to choose from,” says Dana Angelo White, sports dietitian and associate clinical professor of athletic training and sports medicine at Quinnipiac University and owner of Dana White Nutrition. “I include my kids in the process in the hopes that everyone stays happy and willing to dig in!”

“Take stock of what you need before you go, and plan to store it in a way that makes sense,” Passerrello says.

An organized refrigerator is also safe

In a safe refrigerator, foods are rotated and stored properly. “Try your best to keep things like raw meats and fish separate from ready to eat foods,” White says. “I have also taught my three kids to ‘FIFO,’ which stands for first in, first out – basically don’t open the new milk container until the one that is already open is used up!”

Put meat, fish and other raw foods on the lowest shelf to avoid cross contamination.

Rotate as you shop

Rotating your food (FIFO) according to the expiration date can also help you cut down on food waste. “Take stock of what you have before you go shopping,” Passerrello says. “Make sure you rearrange it when you come home so you’re not pushing stuff back.”

Healthy choices should be visible and accessible

That means keeping them visible, toward the front, in containers that make it easy to tell what is inside.  “I try to keep the staple ingredients readily accessible in the fridge so I can make lunches as efficiently as possible.” Passerrello recommends putting the foods you want to eat at eye level. “Having the most readily available choice reduces decisions because you don’t have to think about it. We make too many decisions these days. Whatever we see, we want to grab.

Prep fruits and vegetables before you store them

“Whether you opt for pre-cut or DIY, if they are ready to eat, the kids are more likely to eat them,” White says. “Carrots, cucumber slices, pepper strips and orange wedges are some examples for easily accessible finger foods. Along with produce, I always have things like yogurt, cheese sticks and hummus at eye level in the fridge so the kiddos can grab and go.”

Know what’s in your drawers

Take advantage of the drawers in your refrigerator that are designed to store things like produce and cheese, but don’t just pile the items in. “If you can’t see into the drawers, make sure what you want to eat is what you see first,” Passerrello says. Maybe add a bin so not everything goes in there like a junk drawer. In the vegetable drawers, pull forward what is in there.

Consider special dietary needs

If a family member has celiac disease, diabetes, a food allergy or another condition that requires dietary changes, do your best to make that change the norm for the household. However, as Passerello acknowledged, that is not always practical. Consider whether you need to reserve part or all of a shelf, drawer or space in the refrigerator to keep the necessary foods.

Start small and build organization into a lifestyle

“Trying to do a complete overhaul might be too much at first,” Passerrello says. “Make a small change—pick a shelf—and commit to it.”

Finally, think about how you will stay committed to organization. “To help hold myself accountable and spark future ideas, I post my weekly plan on Instagram every Monday,” White says.

Suffering from Fall Allergies? We’ve Got Tips for Conquering Them


While most people tend to think of spring as peak allergy season, the reality is that millions of people suffer from allergies all year long, and the Fall season can be particularly bothersome for allergy sufferers.  

Hay fever—which actually has nothing to do with hay or fevers—is a general term used to describe the symptoms of late summer and fall allergies. The biggest culprits of hay fever are pollen and ragweed.  

According to the American College of Allergy, Asthma, and Immunology (ACAAI), ragweed starts to release pollen in mid-August, when the days are still warm and the nights start to get cooler. It can last well into September and October, typically continuing to wreak havoc until the first hard freeze, depending on where you live. It grows wild almost everywhere, especially on the East Coast and in the Midwest. Ragweed pollen is really light, so it spreads far and wide, and even if ragweed doesn’t grow where you live, ragweed pollen can travel for hundreds of miles in the wind!  

Autumn leaves can also trigger allergic reactions for millions of people. While most homeowners find it difficult to keep up with all those pesky leaves, for allergy sufferers, raking leaves presents even greater challenges. It can agitate pollen and mold, releasing it into the air, causing allergy and asthma symptoms to spike. 

Speaking of mold, it’s yet another fall allergy trigger. While we know that mold can grow in damp areas in the house, mold spores also love wet spots outside. Piles of damp leaves and decaying plants are ideal breeding grounds for mold. 

Indoor Allergens 

While the great outdoors is the source of most seasonal allergens (which also make their way inside on clothes, shoes, hair, and more), our homes harbor all sorts of indoor allergens, with many causing chronic suffering and asthma, especially for those who are more susceptible to respiratory issues, like young children and the elderly, or those with auto-immune disorders. 

With simple everyday living, all sorts of unseen contaminants and air pollutants are generated, like dirt, dust, pet dander, cigarette smoke, and even chemicals. Those pesky dust mites and other pollutants get stirred up in your indoor air anytime your HVAC system is running, whether air conditioning or heat. That’s because your HVAC system pulls in all those contaminants and pollutants, and then recirculates the air throughout your home an average of five to seven times per day!  

Then there’s mold, which is perhaps the most bothersome allergen of all. Mold and mildew can lurk all around your home, and if undetected or ignored, mold growth can turn into a serious health issue for everyone living under its roof. 

Just like seasonal outdoor allergies, indoor allergens trigger sneezing, wheezing, runny noses, and more. 

Tips for Dealing with Allergens in the Home 

While there is no cure for allergies, many of the appliances you may already have around the house—namely a room air cleaner, vacuum, and clothes washer—can help reduce indoor air pollutants. Following are our best tips for dealing with indoor allergens:  

  • Invest in a room air cleaner. Portable room air cleaners, also called air purifiers, represent the quickest, most accessible option for improving indoor air quality in the home. Air cleaners can filter out harmful particulates such as tobacco smoke, dust, and pollen, making the air your family breathes cleaner and healthier. When you’re ready to purchase an air cleaner, always look for the AHAM Verifide® mark (learn more about AHAM Verifide below). 
  • Wash your bed linens and pillowcases in hot water and detergent to reduce allergens; dry them in a hot dryer cycle to kill dust mites. Keep pets out of the bedroom to reduce pet dander in your bedding. Use dust mite-proof covers for pillows, comforters, duvets, mattresses, and box springs. 
  • Vacuum frequently. Vacuuming helps keep allergens low, but keep in mind that poor quality vacuums can put dust back into the air. Look for certified asthma- and allergy-friendly vacuums.  
  • Prevent pollen from getting inside by keeping windows and doors closed. Use air conditioning in warm weather to control dust mites and reduce humidity. Change filters often. 
  • Take a shower, wash your hair, and change your clothes after you’ve been working or playing outdoors. Ask everyone who enters your home to leave their shoes at the door. 
  • Control dust mites by keeping surfaces in your home clean and uncluttered.  

According to the Asthma and Allergy Foundation of America (AAFA), allergies are one of the most common chronic diseases, with more than 100 million Americans suffering from various types of allergies each year.  

About AHAM Verifide 

When you’re ready to purchase an air cleaner, always look for the AHAM Verifide® mark. Room air cleaners certified through the AHAM Verifide program have been rigorously tested by an independent laboratory to ensure the product will perform to the manufacturer’s product claims for the suggested room size. AHAM’s standard for measuring an air cleaner’s efficacy is called the Clean Air Delivery Rate (CADR). CADR indicates the volume of filtered air an air cleaner delivers, with separate scores for tobacco smoke, pollen and dust. The higher the CADR number for each pollutant, the faster the unit filters the air. The AHAM Verifide mark can be found on product packaging.  

To find AHAM Verifide® room air cleaners, use AHAM’s online searchable directory to locate the model that’s right for you. 

Find a Certified Room Air Cleaner Here 


Your Indoor Air Quality Checklist: College Edition

Amid the busyness of packing, moving and preparing for the fall semester, it’s understandable if you haven’t thought much about the indoor air quality (IAQ) in your college student’s dorm. But the move to college can expose students to a number of potential indoor air quality issues. The start of the fall semester coincides with fall allergy season. Plus, the close living quarters of college life make fertile ground for the spread of viruses like the common cold, flu and COVID.   

There’s no question that all students want to avoid allergens, viruses and the other indoor air pollutants that can get in the way of learning and socializing. And they are everywhere: According to the U.S. Environmental Protection Agency, indoor air may carry two to five times the level of pollutants as outdoor air. 

Now that you know why indoor air quality is important, it’s time to put together your indoor air quality college dorm checklist.  

 1. Room air cleaner 

A portable room air cleaner should be at the top of your IAQ checklist. Room air cleaners remove indoor air pollutants like dust, smoke, pollen, viruses and bacteria and are the most readily available way to improve indoor air quality in any space. They can also reduce odors, which are much more noticeable in a small space like a dorm room and can cause stress between roommates.  

You will come across many options, so it is important to choose a model that will be effective in your student’s dorm or apartment. It’s easy to do. First, learn the size of the room where the air cleaner will be used. Dorm rooms vary in size, but the average is about 12 ft. x 19 ft. or approximately 225 sq. ft. Find the exact measurements by calling ahead or bring a tape measure on move-in day to learn the room’s square footage. Once you know the size of the room in square feet (for example, a 10 ft. x 12 ft. room = 120 sq. ft.), search the AHAM Verifide® directory for models that have been independently tested for the reduction of airborne pollutants.  The AHAM Verifide® program uses a trusted test method called CADR or Clean Air Delivery Rate, to measure the unit’s performance and its reduction of smoke, dust and pollen. More than 50 brands have undergone testing through AHAM Verifide®, so you are sure to find a product that meets your needs and has been tested to AHAM’s standards. Compare air cleaner models here.

Don’t skip the measurement. A model that is too small will not clean the air effectively. A unit that is too large may generate excessive noise, which can be an issue in a small space like a dorm or apartment (especially with roommates). Some air cleaner models will include a maximum noise level, indicating the number of decibels it puts out at its highest noise level.

2. Replacement air cleaner filters
 

Air cleaners don’t need much maintenance, but depending on the model, the filter may need to be replaced periodically. Filters should be changed and cleaned according to the manufacturer’s instructions. A warning on replacement filters: Only purchase replacement filters from reputable sources. Replacement air filters are common targets for counterfeiters, who often try to sell the fake filters at bargain prices. Ask the retailer or manufacturer for recommendations on the best source for replacement filters. 

3. Handheld vacuum with a HEPA filter 

A vacuum with a HEPA filter can also help remove pollutants like dust and other particles. Any particle on a surface can easily be kicked into the air. Vacuum regularly to remove them. You can also use the vacuum to remove particles that settle on the surface of the air cleaner. 

More tips to keep the clean air flowing

While space in a dorm room often comes at a premium, the air cleaner should be put closer to the center of the room rather than in a corner or against a wall. This will allow the air to flow more freely through the air cleaner.

Air cleaners don’t need much maintenance. Filters should be changed and cleaned according to the manufacturer’s instructions. Clean the outside of the air cleaner periodically to remove any accumulated dust and other pollutants.

Using an Air Cleaner to Manage Wildfire Smoke

During wildfire season, many people in areas affected by smoke use air cleaners (sometimes called air purifiers) to improve the air quality in their homes.

How an air cleaner is maintained and operated can affect its performance. If you are using an air cleaner to manage wildfire smoke, take these steps to ensure that your air cleaner continues to operate at a high level:

Change the filter regularly: Your air cleaner’s use and care manual will recommend how often to change your air cleaner’s filter. These recommendations are based on the manufacturer’s testing, but can vary depending on how often you use the filter and the level of pollutants in the air. An air cleaner that is used frequently in an area affected by wildfire smoke may require more frequent filter changes. If the filter is changing color or if the level of air coming out of the air cleaner drops, it could mean the filter should be changed. Keep extra filters on hand, especially during wildfire season.

Some air cleaners do not require filters, relying instead on an electrostatic precipitator (ESP), which charges particles and attracts them to a plate. Clean the plates regularly. Check your use and care manual for specific cleaning instructions.

Clean the outside: Some manufacturers recommend using a vacuum to remove dust from the outside of the air cleaner. Vacuum or gently clean the dust from the outside of the air cleaner when you notice a buildup. An air cleaner that is dirty on the outside is likely dirty on the inside, so make this part of the process when you are replacing or cleaning the filter.

Vacuum regularly: Air cleaners are only part of the equation if you are seeking cleaner indoor air. Do a thorough cleaning of the area and use a vacuum with a HEPA filter to remove particles that have settled so they are not kicked back into the air you breathe.

Change your furnace filter: If you change your furnace filter regularly, you might not have to change the filter in your air cleaner as often. However, a furnace filter is not a substitute for an air cleaner because it is designed to trap large particles. In addition, it is common for particles to miss the furnace filter and end up inside the home.

Give your air cleaner room to breathe: It might be more convenient to place an air cleaner against a wall and in a corner, but that will restrict airflow and reduce performance. Move the air cleaner toward the center of the room and operate it on high in an area free of obstructions. The more air that goes through the air cleaner, the more pollutants it will remove.

An air cleaner with a HEPA filter and activated carbon filter can also  help reduce the smell of smoke in your home. Run your air cleaner until the smell subsides and change the filter as recommended. This post from University of Colorado Boulder researchers offers more tips on how to reduce smoke odors.

Are you shopping for an air cleaner? Here is how to make the right choice

If you are shopping for an air cleaner, you will likely come across models that use different types of technologies to clear the air. More important than the method the air cleaner uses is whether the air cleaner is appropriate for the size of the room in which it will be used. Look for the AHAM Verifide® Mark and the air cleaner’s Clean Air Delivery Rate (CADR) on the air cleaner packaging. The mark means the air cleaner has been independently tested for its ability to remove tobacco smoke, pollen and dust and meets CARB ozone limits.  The suggested room size for the air cleaner will be noted prominently on the label.  Under normal circumstances, you could choose an air cleaner with a smoke CADR two-thirds the size of the room in which you will use the air cleaner. However, those in areas heavily affected by wildfire smoke should select an air cleaner with a smoke CADR that matches the room size. For example, an air cleaner with a smoke CADR of 200 would be appropriate for a 200 square-foot room in an area affected by smoke.

Tell us your top concerns with your indoor air quality.  We’d like to hear from you.

Storm Prep: How to keep frozen and refrigerated food safe


If you’re preparing for a major storm, stocking up on enough food and water should be part of your plan. You also need to have a plan to keep your food safe to eat during and in the wake of the storm, especially if you lose power.

Eating food that hasn’t been stored properly can lead to a number of foodborne illnesses. Those can be serious under normal circumstances, but the potential lack of access to medical care during a severe storm makes avoiding illness even more important. Additionally, many foodborne illnesses can cause vomiting and diarrhea, which can lead to dehydration. The condition can quickly become life threatening if you don’t have access to sufficient water.

Be prepared to keep your food safe during any serious storm with these important safety tips from the Food and Drug Administration and Centers for Disease Control and Prevention:

  • Use a thermometer: Monitor the temperatures in your refrigerator and freezer. Refrigerators should be kept at between 34 and 40 degrees Fahrenheit, freezers at 0 degrees Fahrenheit. If the temperature in the freezer is 40 degrees Fahrenheit or lower, the food is safe to eat or refreeze. Any perishable foods that have been refrigerated and kept at temperatures above 40 degrees Fahrenheit for more than two hours should be thrown away. Tip: Look for a thermometer that sends the temperature directly to your mobile device or can be monitored remotely. Otherwise, don’t open the door to check the temperature until the power is back on.
  • Make and store ice: If your freezer can make ice, make as much as you can starting days before the storm is set to arrive if you have advance warning. You can use the ice to help keep the food cool if you lose power, or use it in a cooler. You may also freeze containers of water. The ice will help keep food in the freezer cold, and you can also drink the water when it melts if your water supply is cut off. Tip: Buy dry or block ice to keep the refrigerator cold for extended periods. Fifty pounds of dry ice keeps an 18-cubic-foot, fully stocked freezer cold for two days, according to FDA.
  • Move food to the freezer: If you know the storm is coming, move leftovers, milk, fresh meat and other foods that can be frozen to the freezer. They’ll last longer if the power goes out.
  • Keep coolers handy (and the ice to fill them): Food will stay safe in refrigerators for about four hours after a power outage. Move them to ice-filled coolers if the power is off or is expected to be off for longer.
  • Keep refrigerator and freezer doors closed: Only open them when necessary when a power outage is a possibility, even if you haven’t lost power. This will help keep the temperatures in both down.
  • Keep the freezer full: A full freezer will keep food frozen for about 48 hours if it isn’t opened. That time is cut in half, to 24 hours, if the freezer is only half-full.

What to keep, what to toss

The CDC offers these tips to help you decide what is safe to eat and what should be discarded:

  • Any food that has come into contact with flood or storm water should be thrown away. This includes containers with screw caps, snap lids, crimped caps, twist caps, flip tops, snap-open, and home canned foods.
  • Throw away any food that has an unusual odor, color or texture.
  • Thawed food that still contains ice crystals may be eaten or refrozen.
  • Throw away any canned foods that are bulging, opened or damaged. Cans that have come into contact with flood or storm water should be washed in a solution of 1 cup bleach and 5 gallons of water.
  • Never use potentially contaminated water to wash dishes, brush your teeth, wash your hands, wash or prepare food or prepare baby formula.

Never rely on a food’s smell or taste to determine whether it’s safe to eat. When in doubt, throw it out.

Food Safety Tips for a Power Outage

Summer comes with the threat of hurricanes and other serious storms. It is important to have a plan in place to keep your food safe to eat should your home lose power. Follow these tips from the USDA to prepare before the storm hits:

  • A fully packed, free-standing freezer (that has remained closed) will stay at acceptably cold temperatures for two to four days.
  • Place dry ice, a block of ice or several frozen gel packs in a well-insulated cooler; transfer perishables from the refrigerator to the cooler.
  • According to the National Center for Home Food Preservation, a 50-pound block of dry ice will keep the contents of a full, 18-cubic-foot freezer cold for two days.
  • The following partially defrosted foods may be safe to eat/refreeze if they still contain ice crystals or have been kept below 40 degrees: beef, veal, lamb, pork, ground meat, casseroles, soups and stews, hard cheeses, juices, flours, nuts, packaged waffles and pancakes, frozen meals/convenience foods.
  • If dairy items, poultry, meat, seafood, fresh pasta, fresh greens, eggs, soy meat substitutes and leftovers have been held at 40 degrees or higher for more than two hours, discard them.
  • If opened mayonnaise, tartar sauce, horseradish, commercial garlic in oil or other spreads have been held at 50 degrees or above for more than eight hours (or any salads made with those items), discard them.
  • The following items are safe (if they had been opened/refrigerated): Peanut butter, jelly, mustard, ketchup, olives, pickles, Worcestershire sauce, barbecue sauce, soy sauce, vinegar-based dressings, fruit, raw vegetables and hard cheeses (including grated).
  • Never taste food to determine its safety, and do not rely on odor or appearance.
  • Food information hotlines: USDA Meat and Poultry, 800-535-4555; FDA Seafood, 800-FDA-4010; FDA’s Food Safety Information, 888-723-3366.

For more tips, visit the USDA’s Food Safety website.

Cordless Appliances and Battery Safety


Do you use a cordless vacuum, robotic vacuum or cordless kitchen appliance? Eventually, you will have to replace your appliance’s rechargeable battery. And when that time comes, you’ll likely go online to look for the best deal.

While everyone wants to save money, that “good deal” on a replacement may cost you later. Just as they have with replacement refrigerator water filters, counterfeiters are now pushing fake replacement batteries onto the market.

Branded replacement batteries are made specifically to fit appliances of the same brand. A counterfeit battery may power the appliance at first, but they are not designed with the same circuitry as the genuine appliance replacement. Furthermore, they do not include the same safety features, putting you at risk for fire, injury, or property damage.

Fortunately, you can reduce your chances of ending up with a counterfeit replacement battery by purchasing replacement batteries only from the manufacturer of the appliance or other trusted source.

Safe use of appliance batteries goes beyond where you purchase them. Proper storage, transport and disposal is also important. Follow these tips from the Power Tool Institute’s Take Charge of Your Battery campaign:

  • Store lithium ion batteries away from liquids and metals, such as keys, coins, screws and nails.
  • Do not throw batteries away with the trash. Take them to a recycling center or dispose of them in a receptacle specifically designed for batteries.
  • Don’t use batteries that have been dropped or damaged. Contact the manufacturer to report the damage.

Be Prepared for Wildfire Season with an Air Cleaner

In recent years, people in areas where wildfire smoke hasn’t historically had much of an effect have received a wakeup call about indoor air quality and the importance of planning for smoke events. A room air cleaner is one of your best defenses when wildfire smoke and ash wreak havoc on indoor air.  Don’t wait: Air cleaners can become popular items when wildfire smoke affects indoor air quality, and retailers sometimes report that they are in short supply during smoke events.

The smoke and particulate matter put out by wildfires is a health risk for anyone, but it is particularly dangerous for people with asthma or other conditions that affect breathing. The U.S. Environmental Protection Agency and Government of Canada recommend that people in wildfire-prone areas consider purchasing an air cleaner as part of their preparation for fire season, a step also recommended by ASHRAE’s just-released 10 Elements of a Smoke Readiness Plan.

If you are shopping for an air cleaner to improve your indoor air quality during wildfire season, you will likely come across models that use different types of technologies to clear the air. More important than the method the air cleaner uses is whether the air cleaner is appropriate for the size of the room in which it will be used. Look for the AHAM Verifide® seal and the air cleaner’s Clean Air Delivery Rate (CADR) on the air cleaner packaging. The seal means the air cleaner has been independently tested to ensure that it meets the manufacturer’s claims about its ability to remove tobacco smoke (the smallest particles included in CADR), pollen and dust. The suggested room size for the air cleaner will be noted prominently on the seal.

Under normal circumstances, you should choose an air cleaner with a smoke CADR two-thirds the size of the room in which you will use the air cleaner. However, those in areas heavily affected by wildfire smoke should select an air cleaner with a smoke CADR that matches the room size. For example, an air cleaner with a smoke CADR of 200 would be appropriate for a 200 square-foot room in an area affected by wildfire smoke.

If you are using an air cleaner to improve indoor air quality during wildfire season, take these steps to ensure that your air cleaner continues to operate at a high level:

Change the filter regularly: Your air cleaner’s use and care manual will recommend how often to change your air cleaner’s filter. These recommendations are based on the manufacturer’s testing, but can vary depending on how often you use the filter and the level of pollutants in the air.  Extended operation in an area affected by heavy smoke may require more frequent filter changes. If the filter is changing color or if the level of air coming out of the air cleaner drops, it could mean the filter should be changed. Keep extra filters on hand, especially during wildfire season.  Purchase replacements from reputable sources to ensure they are authentic and not counterfeits.

Clean the outside: Some manufacturers recommend using a vacuum to remove dust from the outside of the air cleaner. Vacuum or gently clean the dust from the outside of the air cleaner when you notice a buildup. An air cleaner that is dirty on the outside is likely dirty on the inside, so make this part of the process when you are replacing or cleaning the filter.

Vacuum regularly: Air cleaners are only part of the equation if you are seeking cleaner indoor air. Do a thorough cleaning of the area and vacuum regularly to remove particles so they are not kicked back into the air you breathe.

Change your furnace filter: If you change your furnace filter regularly, you might not have to change the filter in your air cleaner as often. However, a furnace filter is not a substitute for an air cleaner because it is designed to trap large particles. In addition, it is common for particles to miss the furnace filter and end up inside the home.

Give your air cleaner room to breathe: It might be more convenient to place an air cleaner against a wall and in a corner, but that will restrict airflow and reduce performance. Move the air cleaner toward the center of the room and operate it on high in an area free of obstructions. The more air that goes through the air cleaner, the more pollutants it will remove.

Make Food Safety Part of the Plan During Summer Celebrations

Cooking and sharing meals is a time-honored summertime tradition, especially on holidays like Memorial Day, Independence Day and Labor Day. While you may be thinking more about serving your guests, you should take steps to ensure food safety during your summertime gathering, especially if you are cooking, eating or serving outdoors. Cases of food poisoning, which affects about 48 million people in the U.S. each year, tend to increase in the summer.

Food safety starts with your refrigerator and freezer. You can start by making sure they are in good working order. Freezers, particularly in hot, humid weather, can be prone to frost buildup, which can be a drag on performance. Fortunately, it is easy to prevent. Your refrigerator may have to work a bit harder to keep food cool in the summer, so make it as efficient as possible by keeping the coils free of dirt and dust and properly arranging the food inside. Keep your refrigerator between 37 and 40 degrees.

From storing to cooking to serving, food temperature matters. A digital thermometer is a valuable tool to ensure you are cooking foods thoroughly, regardless of whether you’re cooking with an indoor grill, cooktop, oven or outdoor grill.

The U.S. Food Safety Inspection Service (FSIS) suggests these safe cooking temperatures for popular summertime foods:

Ground meat: 160 degrees for beef, pork, veal and lamb, 165 for turkey and chicken.

Fresh beef, veal and lamb: 145 degrees. Allow to rest three minutes before serving.

Fish: 145 degrees or until flesh is opaque and separates easily with a fork.

Shrimp, lobster, crab: Cook until flesh is pearly and opaque

Clams, oysters, mussels: Cook until shells open

Both hot and cold foods can quickly creep into what the FSIS calls “the danger zone,” (between 40 and 140 degrees Fahrenheit), when bacteria are most likely to grow. Keep hot foods above 140 until they’re ready to serve, and keep cold foods refrigerated until they’re ready to serve. Serve cold dishes on ice when possible. Don’t leave foods out for more than two hours. Are you serving food outside in hot weather? Cut that time to one hour, the U.S. Food and Drug Administration recommends.

If you’re doing your summer party potluck style, keep track of who is bringing what so you can plan for safe storage and serving. Make sure there is enough space in your refrigerator so you can put the dishes in there when your guests arrive if you aren’t planning to cook or serve the dishes they bring immediately. Are you out of space? Keep a cooler of ice on hand with a digital thermometer to monitor the temperature. Store your drinks in a separate cooler to avoid opening it frequently and raising the temperature.

Don’t reuse the dishes you used to transport raw food outside to the grill. Put them in the dishwasher as soon as possible to avoid reusing them accidentally.

Whether you are cooking indoors or outdoors, paying careful attention to food safety while planning and celebrating will help you worry less and focus more on what’s important: giving your guests great memories.

About This Blog

HOME for cooking, cleanliness, comfort and care

Categories