Quarantined? Using what you have at home

We’re spending more time indoors right now than normal. Keeping each other safe is extremely important right now, but we have to keep ourselves and our families busy, too. Luckily, there’s more to do around your home than you think!

Do you love to cook? Normally, we are so pressed for time it’s easy to default to our tried-and-true recipes most nights. Not anymore! Make the most of your time inside by using this as an opportunity to try something new. With the right appliances, your options are almost limitless.

Break out the Stand Mixer: Your stand mixer is an all-purpose star. Practice your baking skills with a new cake recipe (we love Smitten Kitchen), try making some homemade pasta, or even sausage. Get creative – browse the attachments available for your stand mixer.

Have a Cultural Food Night: You can’t go out to your favorite Thai spot right now, why not try making it at home? Check out our series on cultural cooking for inspiration – we’ve spoken with experts on Mexican, Thai and Cuban cuisine.

#TreatYourself with a Milkshake: Surprise the kids and pull out the blender for a milkshake bar. Grab a few ice cream flavors and fruit and let them make their own flavors. We’re all craving comfort foods right now, and milkshakes are a classic.

It’s also a great time to get some cleaning done. Keeping things neat is important as we find our homes transitioning into multi-purpose spaces for working and learning.

What’s the difference between cleaning and sanitizing? Staying safe from harmful microbes is likely number one on the priority list – here’s what you need to know.

Start your spring cleaning early: When was the last time you cleaned your refrigerator coils? Does your vacuum bag need to be replaced? Make a spring appliance cleaning checklist.

Organize your refrigerator: Keeping all the new food in your fridge organized will save you time and money on leftovers.

How are you making the most of your time at home?

Bring Culture to Your Kitchen Part 3: Cuban

Cuban cooking is about making the most of what you have. Its recipes aim to make a lot out of a little, using the ingredients that are on hand.

“They don’t have a winter, but still can only get certain things at certain times of the year,” says Guillermo Pernot, chef-partner of Cuba Libre Restaurant and Rum Bar. “When the fish don’t swim by because migration comes in September, you don’t have fish. Mangoes come at certain times of the year. Papayas come at certain times. Potatoes are difficult to find. Sometimes you don’t have carrots, sometimes you don’t have eggs. It’s this wonderful struggle, in a good way. You can make food about almost everything, and make it fantastic.”

Pernot was born in Argentina, but has focused on Cuban and Latino cooking for years. He spent time as a chef with a restaurant owned by Gloria Estefan Group in the 1980s, and went on to launch his own Latin-themed restaurant, Pasion, in New York. Today, Cuba Libre aims to represent an evolution in Cuban cuisine. He’s also personally connected to the culture through his wife, who is Cuban.

“Simple” and “seasonal” might be the two words one would use to describe Cuban cuisine. Food on the island, which is about the same size as its closest U.S. neighbor, Florida, draws from a range of influences. Pernot, who has traveled to Cuba, described restaurants that take advantage of ingredients found nearby. You might find a Haitian influence in the eastern part of the island and ingredients like coconut, chocolate and chilis, Pernot said. Restaurants in the agricultural region of Vinales in western Cuba tend to utilize only local ingredients found in that region. “You find these little pockets of food culture throughout the island,” Pernot says.

Local market and fruit shop in Havana, Cuba

Family and food are two cornerstones of Cuban life. Extended families often live near one another. “Usually, people don’t move far outside of the city,” says Pernot. “They won’t move more than five or six blocks away. The group stays together, and they gather every Sunday.” The menu might include arroz con pollo, beer and maybe a roasted pig. They’ll start the fire and cook over several hours. “People gather, they dance, they play music, they laugh.”

“Food is about family, and Cubans are big on family and gatherings, enjoying life and food together,” says Bruce Ozga, dean of culinary education at the North Miami campus of Johnson & Wales University. He has been observing Cuban cooking for more than 20 years in Miami, where the Cuban influence is strong. Preparing meals is also a family affair.  “The food is very important, and everybody loves to get their hands in the process,” Ozga says.

“Everybody brings something and they come together and eat. But it doesn’t stop there—it’s the music, it’s the dancing and having a great time with family.”

So gather a group of your family and friends (and maybe a pig to roast). It’s time to bring a little bit of culture from America’s island neighbor to your kitchen.

Appliances & Ingredients 

Of course, a good range is important for braising and stewing, both common Cuban cooking methods. A multi-cooker or pressure cooker will be useful for cooking rice and beans, staples in Cuba, and stews like ropa viejo, a common dish at the Cuban table.

Shakes are common in Cuba—mamey shakes (made from the fruit of the native mamey sapote tree), as well as soursop shakes and fruit shakes like pineapple, mango, papaya. “The majority of the fruits they have are local, tree-ripened and ready to go,” Ozga says. “Cubans love their sugar. They juice sugar cane. Orange juice is all fresh-squeezed. That’s part of the culture.” Shakes may also include milk, ice or vanilla extract.

Get a good, durable pot for whipping up a big batch of arroz con pollo. Use a panini press to make grilled sandwiches, and a tortilla maker.

Cuban cooking calls for ingredients found in most U.S. kitchens: onions, garlic, green peppers, cumin, oregano, paprika, oil, rice, beans, eggs, pork, chipotle, diced tomatoes, lime, avocados and plantains.

Start with the basics. “You’re not Cuban unless you’re making a good pot of rice and beans,” Ozga says. Pernot recommends putting together a simple meal of yellow rice and picadillo. Pork is always welcome at the Cuban table. Try your hand at plaintains maduros or plaintains tostones. For dessert, make a flan from condensed milk, evaporated milk, eggs, sugar and vanilla extract.

Embrace the simplicity of the menu. “Here we have a culture that makes a lot out of a little” Pernot says. “Not everything has to have the best fish or the most expensive ingredients. Just buy a tough cut of meat, stew it, buy peppers, carrots, potatoes and green peas. Make the best stew. Make the best rice possible. For $20 you can feed six people or more. We should learn how to do that.”

Ropa vieja, the traditional Cuban meal

Finally, prepare and share the meal as a group, to celebrate the spirit behind the meal. “The people who escaped Cuba and settled in south Florida still keep strong roots and they keep their Cuban culture with them,” Ozga says “They know where they came from, and they always seem to embrace life.”

Scents of Home: Use a diffuser to create your home’s identity

Scent is an integral part of our memory. Consider the smell of chocolate chip cookies, your brain jumps to the people and places associated with the scent so quickly that the cookies almost become an afterthought. Conversely, thinking of a bad smell probably brings you to a specific place in your mind, like a garbage dump, or that time you opened a carton of expired milk. Whether good or bad, scent evokes nostalgia.

The scent of a home varies from room to room and comes from a number of factors, including cooking and cleaning habits, ventilation and changing weather conditions. It’s part of what gives a home its character.

We spend so much time decorating our homes to make them places of comfort for our families. Curating your home experience shouldn’t stop with what you can see. A scent identity is a powerful way to let your family know they’re home, and is easily created with essential oils and a diffuser.

What is an essential oil? According to master aromatherapist Jimm Harrison, in technical terms, they’re volatile lipid from plants that is extracted through distillation or pressed from a peel. In less technical terms, they smell good and are widely used to boost your mood and health.

If you’re just starting out with essential oils, focus on the basics.

Lavender: “Lavender is considered calming,” Harrison says. “If you look at it in a lab, you’ll see it has calming properties. But it can be used in many situations. It can really balance emotionally. For someone who is fatigued, it can energize. It helps heal the skin. It has some anti-inflammatory properties.”

Peppermint: “Peppermint is one of the more energizing of the oils,” Harrison says. “Mint has this uplifting, alive feeling. It’s good for digestion and pain. It also has antibacterial and antiviral properties.”

Citrus: “Most people have a positive association with citruses,” Harrison says. “They tend to be happy, uplifting and joyful.”

Frankincense: “It has an interesting property that’s hard to document,” Harrison says. “Historically, it helps to quiet the mind. If you’re religious or spiritual, it’s a good oil to ease up that mind chatter for a meditative or prayer state. It’s a great oil for diffusing because it can be energizing even though it’s quieting the mind.”

Copaiba: “It’s really good for pain relief—topical for massage and relaxing the body,” Harrison says. “It can have both calming and energizing properties. For skin care, it can promote regenerative wound healing.”

Once you’ve found some scents you like, start having fun! Play around with ratios – citrus with a drop of peppermint will smell different than peppermint with a drop of citrus. Consider the room in which you’ll be using your oils. Soothing scents, like lavender, are perfect for the bedroom, while you may want something more energetic for the living room or kitchen.

Whatever benefit you’re looking for, research the company and where its oils come from before buying. “Make sure you’re getting 100 percent real oil,” says Katie Stefani, manager for the sensory and home category at Homedics. “If there is even one added synthetic in there, it won’t give you the same benefit.” Beware of deeply discounted prices on essential oils. “A low price means they probably aren’t pure,” Stefani says.

Oils can be blended for specific benefits, and some companies may sell blends intended to boost immunity, improve mood or relieve allergy or cold symptoms.

Spread the Scents With a Diffuser

While many essential oils give off strong scents on their own, a diffuser, which heats a suspension of oil and water, magnifies the aroma and spreads the therapeutic benefits.

Stefani, who is certified in aromatherapy, recommends adding 5-7 drops of oil to the water in a diffuser. “Add a few more drops in the beginning to get a stronger scent,” she says.

Measure the amount of oil carefully so you don’t overpower the room. If you’re using different scents in different rooms, make sure the odors harmonize. “The odor does not have to be strong or overpowering to have an effect,” Harrison says. “It creates this soft, influential environment. When you use oils in the home, you can manipulate the feeling of your environment, the memory and emotion.”

Diffusers come in different sizes, though the scent’s reach depends on a few other factors, like how much oil is added and what type of oil you are using. “Citrus tends to evaporate faster,” Stefani says. “Right off the bat, they’ll be heavy and strong, but as time goes on they’ll go faster. Mints last longer than the citruses.”

Choose a diffuser that fits into your home décor. A quick online search will show you that the options are practically limitless. If you’re really looking to chill, some include features like colored lights and relaxing sounds. “When you come home from work, you can unwind and distress from the day,” Stefani says. “The sounds give you an added benefit. Instead of a speaker, a light and a diffuser, it’s one relaxation experience.”

What sort of experience do you want to create for your home? Calming? Energizing? Healing? Tell us about your favorite essential oils blends.

Bring Culture to Your Kitchen Part 2: Mexican

It’s late on a Friday night when that unmistakable craving for Mexican food strikes. So what will it be? You could dial up the local restaurant to satisfy your urge to inhale a savory favorite like a burrito, taco, or enchilada. Or you can head to the kitchen. Before you break out your blender to whip up a fresh salsa, add to your cooking experience by learning a little about what you’re cooking, and where it comes from.

Talk with chefs who have lived in Mexico and immersed themselves in the nation’s culture, and you’ll learn there’s a lot more to Mexican food than those Americanized standbys. Our series on cultural cooking at home brings us south of the U.S. border, where the food is not all about yellow cheese and the spiciest pepper you can find.

Food in Mexico is a way to socialize and welcome visitors into the home. “When you go to a house, the first thing they ask is if you have already eaten,” says Mely Martinez, a Mexican home cook, food blogger and operator of Mexico in My Kitchen. “Maybe it’s a very simple dish – it doesn’t matter. The humbler people eat, the more welcoming they are. Maybe it’s just a plain coffee and tortilla. It may be all they have, but they want you to feel welcome and they will feed you. It’s the way they show appreciation because you are visiting.”

Lunch conversation might turn to what’s for dinner. “Everything revolves around food,” says Douglas Cullen, a Mexican cooking instructor who recently moved back to the U.S. after living in Mexico for 25 years. Cullen blogs at Mexican Food Journal and recently launched Mastering Mexican Cooking, a cooking instruction website, and owned a restaurant and coffee shops in Mexico with his wife. “Food’s a big deal in Mexico. It’s how you share and bond with people. It’s a happy thing, and everybody’s always talking about it.”

“Mexican cuisine” doesn’t begin to encompass all of the cultures that have influenced the food there, says Joe Quintana, corporate chef for Rosa Mexicano, which has 10 U.S. locations. “It’s such a diverse culture,” he says. He held up tacos al pastor, which originated with Lebanese immigrants to Mexico, as an example. “People don’t understand how Mexican culture has brought all of these other cultures together.”

You don’t have to travel to Mexico to bring the happiness and hospitality into your own home. If you’re a novice, Cullen recommends starting with salsas. “Cooking Mexican is a bit different,” he says. “In the U.S., you think ‘I have chicken, I have beef, what can I make? In Mexico, it’s ‘I have this salsa, what goes with it? Basically, if it doesn’t have salsa, and it has something hot, they’ll say it has no flavor.”

Any Mexican chef needs a good blender, for salsas, soups and sauces. “[Blenders] are so important for getting the fineness you need,” Quintana says. “You’ll want to control the chunkiness and make it less chunky, but not so it gets too fine.” Salsa verde cruda, a green salsa, is one of the recipes Quintana recommends to beginners. “It has really simple ingredients – tomatillos, jalapenos, garlic, onions. There are so many things you can do to that recipe. Besides the freshness and the greens, you can take the same salsa verde and add avocado. All of the sudden, you have this creamy fresh salsa.” Quintana serves it in the restaurant on lamb and fish.

Mexicans in warmer regions might also make smoothies or blend bananas or strawberries with milk, sugar and vanilla extract for the children. Aguas frescas, or beverages made from blended fruit like papaya, melon, watermelon or cantelope and served with a meal, are also common.

Besides a blender, in a typical Mexican kitchen you’re likely to find a coffeemaker, toaster and microwave. The microwave is mainly used for reheating, not cooking, Cullen says. Nearly everyone uses a gas stove, but ovens are rarely used. The cooktop is used heavily. It’s where you’ll find a steaming pot of pozole during traditional family gatherings.

“We prefer gas because we like to roast and char tomatoes in the flames,” Martinez says. “Instead of warming up the tortillas in the skillet, some people like the flavor of charring the tortilla over an open flame.”

Add a tortilla press if you’re serious about cooking Mexican. Making tortillas from scratch takes longer, but it will add authenticity to your meal. “If you’re making some nice barbacoa tacos, you’ll need fresh tortillas,” Quintana says. He also uses a comal (a flat griddle) and molcajete, a stone bowl equivalent to the mortar and pestle.

Learn ingredients

Chiles, tomatillos, tomatoes, white onions (not Spanish onions, which are sweeter and can throw off the balance of the food) cumin, allspice, black or pinto beans, masa arena (corn flour), dried peppers and fresh peppers are all essentials for Mexican cooking.

Learn the different flavors of chilies and don’t automatically aim for the hottest. “The spice and flavor of the chili is an integral part of the dish, but nobody eats chili for the burn,” Cullen says. “It’s a seasoning, a flavor.”

Ready to give it a go? These recipes from our chefs will help you get started.

Salsa Verde

Red Pork Pozole

Mexican beef stew with flour tortillas

Take your time and enjoy the process. “Cooking is a big thing for us,” Martinez says. “It’s not something you can do in 10 minutes.” The person in charge of cooking for the family in Mexico might spend 90 minutes to two hours cooking for the main meal of the day. “For them, it’s showing love to their family. The time you spend eating is like a ritual, because families get together. It shows we are still very traditional, a little bit old fashioned in the way we cook, and we want to preserve that.”

Bring Culture to Your Kitchen Part 1: Thai

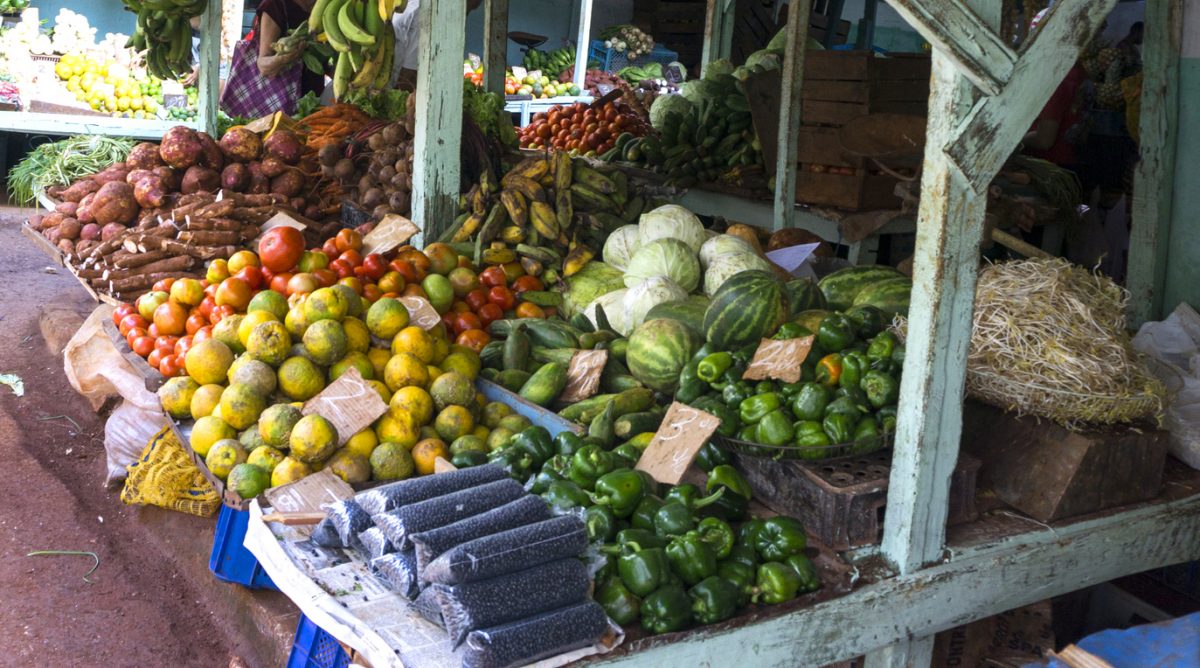
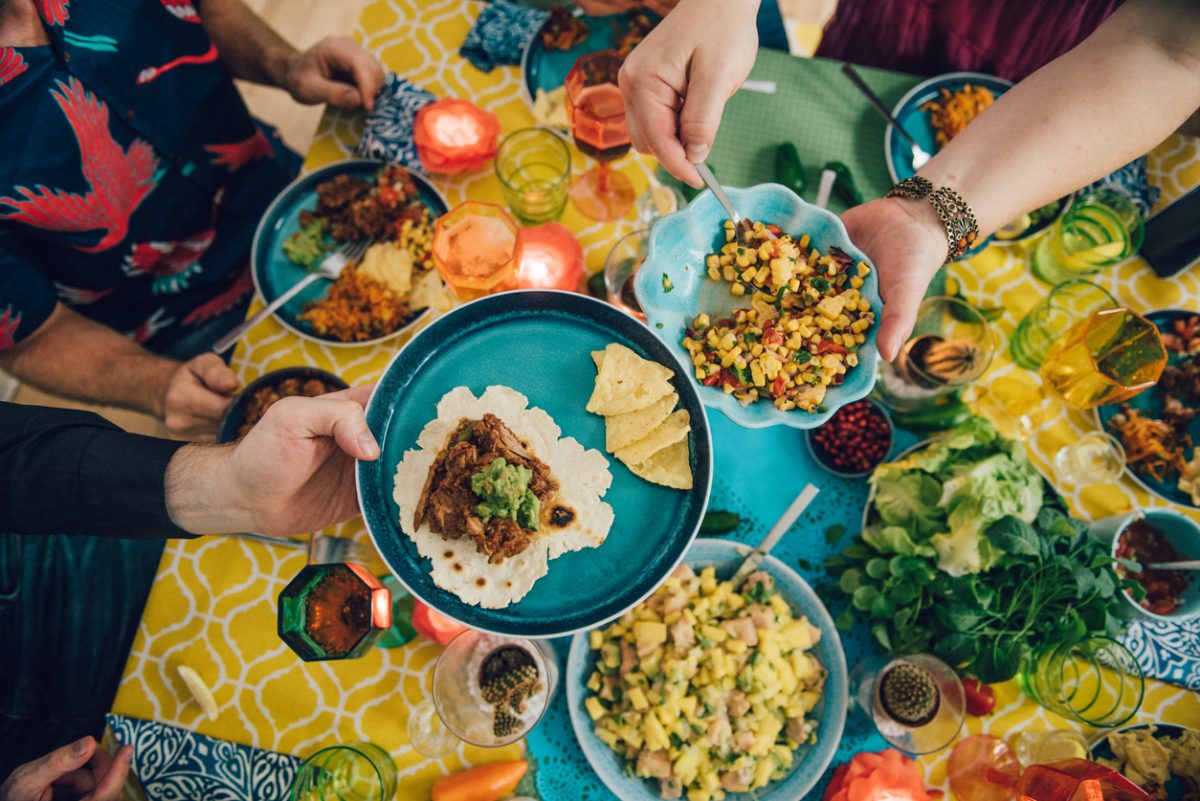
Learning to cook foods from a culture outside of your own can add new depth to your home cooking. You’ll discover new recipes, new flavors, and learn more about another culture’s history and traditions.

Over the next few weeks, In Every Home will explore various ways you can expand your cooking repertoire and bring new cultures into your kitchen. And, of course, we’ll look at the appliances you should have on hand to get there.

We’re kicking off our series with Thai cuisine. Thai food has surged in popularity in the U.S. over the past few decades, becoming a dining staple for those who crave the cuisine’s comforting and filling rice and noodle dishes and unique flavor spectrum.

“Eating Thai food will stimulate your palate,” says Bee Low, a food blogger, cookbook author and native Malaysian whose site, Rasa Malaysia, specializes in Asian cuisine. “A lot of Americans aren’t used to very sharp tastes. Thai food is a good introduction to Asian food in that you get a sharp tang, a sharp sweetness. The tastes are very strong. It gives you a peek into the culture – the food and everything is very exciting.” Low works in Orange County, Calif., and visits Thailand regularly.

Thai dishes are defined by their combination of flavors: sweet, salty, sour and spicy. “Thai cooking is probably the only cooking that uses equal amounts of salt and sugar,” Low says. “That’s probably very distinct. In Asian cuisine, we don’t use so much sugar. But, it’s offset by the tartness and savoriness.”

Thai food is often associated with spiciness, but it doesn’t have to be spicy. “It’s a combination of sour, sweet, salty and spicy,” says Krong Na Songkhla, a Thailand native, cookbook author and Thai cooking instructor who operates San Diego-based True Taste of Thai. “You have to do combinations of flavors. People have the wrong perception that it’s always spicy. It’s not. Thai food has a punch of sweet, a punch of sour, a punch of flavor. Thai food is about the mixing – it’s not only one flavor. I always tell my students: taste it, remember it, and whatever you like, you can adjust. But you cannot go only one way with Thai food.”

The variety of flavors draws from the diverse group of cultures influencing the cuisine. “We’re close to Burma, Laos, Vietnam. It’s a mixed culture,” Krong says. “You have Indian culture, you have Chinese, you have Muslim culture and Muslim food. We have Middle Eastern food. If you look at the dishes, we don’t have our own curry. The curry we have was influenced a long time ago by India.”

“Thai culture is very exciting, very energetic, very lively. It’s moving, all of the time.”

A few key ingredients will help you bring that Thai flavor punch to your kitchen.

  • Fish sauce: You won’t find a lot of salt in Thai recipes. The salty flavor comes from fish sauce. “Every single dish of Thai food has fish sauce,” Low says. “If you don’t have that, you basically cannot cook Thai food. If you replace it with salt, it’s just not going to taste the same.” American diners will be better off purchasing the pungent sauce over trying to make their own. The odor will go away as the dish cooks, Low says, leaving the flavor behind.
  • Palm or coconut sugar: Palm or coconut sugar supplies the sweetness in many Thai dishes. “I always tell my students that when they make Thai curry, never use the regular white or brown sugar,” Krong says. “Thai curry uses coconut milk, and somehow, it turns sour if you add those. If you use palm sugar, it tastes mild.”
  • Thai chili peppers: They’re sometimes known as bird’s-eye chilis, and you’ll need them to add your Thai cuisine’s spicy kick.
  • Lime: You won’t find lemons in Thai recipes. The sour flavor often comes from lime juice.
  • Tamarind: Another source of the sour flavor, often used in curry, salads or pad Thai sauce, Krong says.

“If you’re a beginner, fish sauce and palm sugar are the two main ingredients,” says Jirayu Poeter, owner of the Mama Thai Cooking Club, where she teaches holistic Thai cooking. “When you have those two things, you can make anything. Once you use those two ingredients, you can add one or two more.” She encourages budding Thai cooks to familiarize themselves with the different types of soy sauces: light soy sauce, seasoning soy sauce and black sweet soy sauce.

Familiarize yourself with the flavor of the ingredients before you start cooking. “If you don’t know the actual taste of the ingredients, you never know how to mix it together,” Krong says.

Appliances and Kitchen Tools

You won’t need to add a slew of new appliances to start cooking Thai. A good range will do the trick. You will use a wok frequently for stir-fries, but a nonstick skillet or deeper pan can also be used. “I like to use a nonstick skillet,” Low says. “It’s just the easiest, especially for someone who is just learning. I don’t want people to get discouraged with stainless steel, with food getting stuck to the bottom.” A deeper saucepan is useful for soups.

Consider adding a mortar and pestle to your kitchen to make curry paste, powder garlic and powder chili. “I always tell my students that if you don’t have it, you can use the blender. But the texture won’t be the same.”

Krong recalled making curry paste with her mother, a tedious process. “I was pounding 10-15 ingredients together and mixing it until it was smooth, just to get two tablespoons.” When she came to the U.S. two decades ago, she was amazed at how much easier curry paste could be made with a blender. “I use the blender to cut up the first round of curry. It still saves time. You use it for 5-10 seconds, then pour it out and pound for another 10 minutes.”

Ready to embrace real Thai flavors in your own kitchen? Our experts provided these recipes to start you off on your new cultural journey.

Crab Fried Rice (Courtesy of Jirayu Poeter, Mama Thai Cooking Club)

Fried rice is the easiest one,” Poeter says. “It could be chicken, shrimp or even crab. It’s super easy. You can use leftover rice to make fried rice.”

1 cup cooked rice

1/4 cup crab meat

2 cloves garlic chopped

1/4 cup white or yellow onion sliced

2 green onion sliced

1 tbsp oyster sauce

1-2 tbsp. light soy sauce (to taste)

1/2-1 tbsp. white sugar / raw cane sugar

1 tbsp. extra virgin coconut oil

1 egg

1/4 tsp ground white pepper

Garnish with tomatoes 2-3 sliced + 1 sliced lime + 2 stalks green onion

Preparations

Set the pan or a wok onto medium heat add oil. When oil is hot add garlic and onion stir until onion is cooked and garlic turn lightly brown and then add egg.

When egg start to cook then stir well to mix with onion and garlic.

Add the crab meat and stir well.

Add cooked rice, oyster sauce, soy sauce, sugar, grounded white pepper and mix well, add green onion and one last stir then turn off the heat.

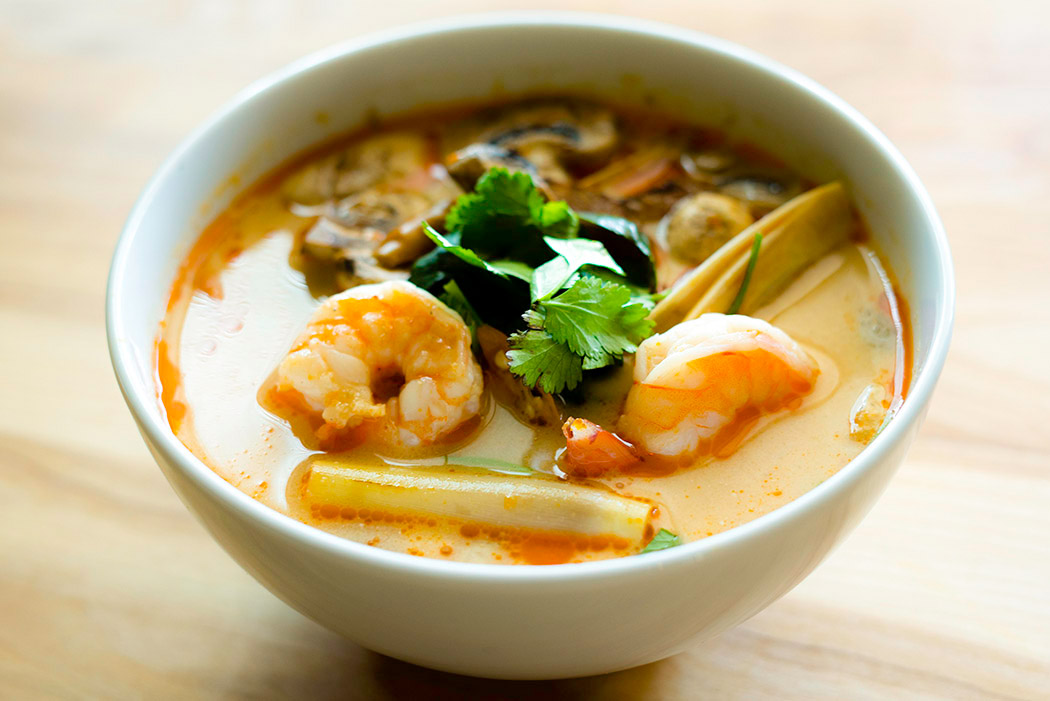
Tom Yum Kung – Spicy & Sour Lemongrass Soup with Shrimp (Courtesy of Krong Na Songkhla, True Taste of Thai)

This recipe can substitute shrimp for chicken, fish, seafood, a variety of mushrooms or tofu.

1.5 cups chicken broth (or 1 can 14.50 oz.)

1 cup water

1 lemongrass stalk, lightly pound & cut into 2″ lengths

3 pieces dried galangal

4 kaffir lime leaves, tear in half & remove central stem

14 shrimp 

1.5 cup mushrooms, slice

1/4 cup coconut milk

3 Thai peppers, cut in half lengthwise

Cilantro

Seasoning sauce

  • 3 tbsp. fish sauce
  • 2 tbsp. lime juice
  • 1 tbsp. Nam Prik Pao (roasted chili paste)

What You Need

  • Medium pot

Preparations

  1. Bring chicken broth and water to a boil.  Add lemongrass, galangal, and kaffir lime leaves.
  2. Add shrimp.  As soon as the shrimp is cooked through, add mushrooms and bring back to a boil.
  3. Stir in the seasoning sauce, coconut milk, and chili peppers.  
  4. Turn off heat and garnish with cilantro leaves.

In a Thai household, you are likely to find similar dishes on the table, regardless of the time of day. “We eat almost the same things at every meal,” Krong says. “We can wake up in the morning and have pork with sticky rice. But, we share the dishes we cook. We rotate them, no matter the time of day.” Family members will serve themselves a few bites at a time, keeping an eye on others’ plates to make sure everyone has enough. “This is the way we share,” Krong says. “We think about others, and what they like and don’t like.”

The Wizard of Wash: Meet the evangelist who will teach you to love laundry

How do you feel about laundry? For some, it is a pleasant household task that tickles almost all of the senses. There’s the fresh scent of detergent, the warmth of freshly dried laundry and the satisfaction you get when you look at the basket full of neatly folded clothes and linens in your brightly lit laundry room. Others might focus on the more labor-intensive aspects, like hauling clothes to and from the laundry room and waiting for the cycles to finish.

Whether you’re a fan of doing laundry or not, Patric Richardson, known as The Laundry Evangelist, wants to open your eyes to everything there is to love about laundry.

“When I was a kid, lots of my friends’ moms thought cooking was this big chore,” says Richardson, owner of Mona Williams, a designer vintage clothing store in the Mall of America. “Now, there are multiple TV networks devoted to cooking. I kind of think laundry is the same thing. If you decide it’s fun, it’s fun.” Just how much fun is up to you. Richardson, who has installed a disco ball in his laundry room and does laundry to the sounds of disco, takes it to the next level. He has even developed his own brand of laundry flakes, which he sells under The Laundry Evangelist label.

Richardson’s love of laundry goes back many years, to an age long before most people are even aware of the fine points of fabrics, detergents and sorting socks.

“For my third Christmas, Santa brought me a laundry machine,” Richardson says. “I have just always loved laundry. I like the whole process. The laundry room is kind of warm. You have a stain, and an hour and a half later, you have a perfect garment. There’s a real sense of satisfaction in a short amount of time.” He went on to earn a degree in textiles from the University of Kentucky and equates his love of laundry with his affection for clothes. “If you like baking, you also love cake. You like the finished product.”

The Laundry Evangelist has even built up a congregation of sorts, with his pulpit taking the form of Laundry Camp, a free, 90-minute class during which Richardson teaches participants how to wash everything they own. They’ll learn how to remove stains, and that dry-clean only is more of a suggestion. Many participants say they hated laundry before taking the class, but that changes. “Lots of people get really excited and come back,” Richardson says.

One of the more common misunderstandings about laundry, Richardson says, is that “more” – more water, more detergent, more dryer time – is better.

Some of those misunderstandings come from a lack of knowledge of how clothes washers work.

“Machines are designed to force water through your clothes,” he says. “When there’s too much water, it can’t be forced through your clothes. I always tell people that the technology in the modern washing machine is amazing. Let it do what it knows how to do. You don’t try to reprogram your computer or phone, and your washing machine is every bit that sophisticated. Let it do what it knows how to do.”

Too much dryer time causes dry clothes to start rubbing against each other, causing friction that can set wrinkles in place, Richardson says. “It’s like you’re ironing those wrinkles in.” And too much detergent won’t rinse out.

Richardson finds that short cycles will do the trick for most laundry, but consider your own needs. “If you have kids’ clothes or something really dirty, you might need a longer cycle.” For detergent, he favors soap. “I’m a fan of anything very gentle that rinses really clean,” he says. “It could be baby detergent or hosiery wash. I want things that rinse all the way out.” His essential arsenal of laundry tools includes a bar of laundry soap, a mesh bag, and a horsehair brush that will allow you to scrub clothing without damaging the fabric.

Anyone who wants to take their laundry game to the next level should start by learning more about the fabrics their clothing is made of. Richardson offered these fabric-specific tips:

Wool: Focus on minimizing abrasion during the cycle, Richardson says. He recommends putting it in a mesh bag and washing it on a fast cycle. “The bag keeps it in place so it doesn’t move around and stretch out,” he says.

Polyester: Did you spill salad dressing on your shirt at lunch? “Polyester has a tendency to hold oil,” Richardson says. A spray of 50/50 mix of vinegar and water will break up the oil.

Silk:  Wash it in a mesh bag to avoid pilling.

If you’re in the market for a new washer and dryer, Richardson recommends looking at size first. “Look at your laundry,” he says. “Don’t just say ‘That’s pretty’ and take it. Go in knowing that you need to wash big loads of laundry because your kids play hockey. The industry is so great. All washing machines are good. You really can’t buy a bad one.”

And with a little bit of knowledge, Richardson is confident you can learn to wash anything safely. “I’ve had customers wash their wedding dress,” he says. “It’s practice, like anything else.”

“Fried” and True: 3 healthy snacks for your air fryer

There is something incredibly satisfying, beyond the obvious indulgence, about the sound and texture that come with biting into a perfectly fried food. That crisp and crunch, not to mention the flavor that comes from frying, can be tough to abandon for those of us looking to be more mindful about healthy food choices.

It’s difficult to replicate everything about fried food, but cooking in an air fryer can get you close. Contrary to what its name indicates, an air fryer doesn’t “fry” food. Instead, it functions more like a small convection oven, using a fan to push hot air through the food, creating a more even texture than you would get from baking. An air fryer, given its smaller size, will do the job faster than a typical convection oven. Its size also makes an air fryer ideal for side dishes and snacks.

The applications for an air fryer go beyond just recapturing the essence of your fried favorites. “The initial popularity of air fryers comes out of a love of fried food,” says Dana Angelo White, RD, author of the Healthy Air Fryer Cookbook. “Once you have one, you realize there are a lot of other things you can do with it. There really is more to them than just French fries and chicken wings.”

“The real payoff is you take a recipe for something that would be cooked in a lot of oil and can prepare it with very little, or even no oil. You’re saving quite a bit of fat and calories.”

As an associate professor and sports dietitian for Quinnipiac University and a mother of three, White regularly turns to her air fryer for healthy snacks you might expect to come out of an air fryer, like potato skins and tortilla chips. But she also pursues less obvious recipes like raspberry yogurt cake, French toast casserole and eggs in a hole.

We’re at the beginning of the holiday season, when snacks are as easy to find as, twinkling lights and wreaths on lampposts. Your family, holiday guests and co-workers will appreciate a few health options among the traditional chocolates, salty snacks and baked treats. The air fryer will ensure that healthy doesn’t mean unsatisfying. White shared a few of her favorites:

Air Fryer Beef Jerky: Seven ingredients and four hours in the air fryer will produce a protein-packed snack.

Air Fryer Banana Bread: This sweet treat takes just 25 minutes in the air fryer.

Raspberry Yogurt Cake: Aside from a dusting of confectioners’ sugar, the sweetness in this recipe comes from raspberries and vanilla yogurt.

The Cherry on Top: Break out your blender for a modern milkshake twist

Who doesn’t love a good milkshake? They’re a decadent treat, a comfort food and a dose of culinary nostalgia in a tall, frosty glass. The thick, chilly indulgence that may or may not require a spoon to consume brings to mind images of 1950s diners, summer nights at the ice cream shop, and a quick trip to the local burger drive-thru to satisfy a craving.

Depending on the thickness, milkshakes can walk the line between food and beverage. But that isn’t how they started out. Numerous sources trace the term “milkshake” to the 1880s, when it was used to describe a health-promoting drink made from sugar, egg, whiskey and ice. It evolved over the next few decades into the delightful indulgence we know today.

Though there is an undeniable novelty to sipping on a shake while perched on a cushioned stool at a diner counter, it is easy to conjure up some milkshake magic at home. The blender is your go-to appliance to get the job done. It could be said that the milkshake helped drive the development of the electric blender, as one of the early models of the appliance, patented nearly 100 years ago by Stephen Poplawski, was specifically designed to mix soda fountain drinks.

Milkshakes are also a dessert ripe for experimentation. If you think your milkshake would taste better with a touch of cinnamon, vanilla or other flavor, you can simply drop it in the blender and mix up a new taste combination.

A late night blend of chocolate sorbet and coffee ice cream is what triggered Adam Reid’s interest in milkshakes. Reid, a freelance food writer and author of the recipe book “Thoroughly Modern Milkshakes,” was enjoying the sorbet when he decided on a whim to try the combination. “It was one of the best mocha shakes I have ever had.” He later wrote a column on using sorbet in shakes, which led to the book.

“I took inspiration from all kinds of places — street foods, desserts, savory dishes,” Reid says. “To me, you want to intensify flavors in a milkshake. The mocha shake used chocolate sorbet, because the flavor is so much more concentrated. For some of the fruit shakes, I used fruit jams or jellies as a sweetener. There’s a strawberry shake that uses ice cream, strawberry sorbet and a tablespoon of strawberry preserve. That’s going to give you more sweetness and flavors.”

To make the perfect milkshake, you should consider texture as much as flavor. This means there is some preparation and possibly some waiting involved.

“Obviously, there are a million different flavor combinations,” Reid says. “I like shakes with a really thick texture, because they’re going to melt and get thinner as you drink them. I like to let the ice cream sit out and temper it. If you bring it straight out of the freezer, you’ll have to overblend, and that will make it thinner.”

Remember, this is an indulgence, so don’t skimp on ingredients. “Use good quality ice cream and sorbet,” Ried says. “Using whole milk never hurt.” Though if you are watching your calories, you may substitute lowfat yogurt for ice cream with ice cubes (smaller are better) blended in. Most of the recipes in Ried’s book use about a quarter cup of liquid, he says, but he has gone up to about a third of a cup.

Whether your preferences lean more toward fruit, traditional but reliable flavors like chocolate and vanilla, or a more exotic flavor, it’s time to break out your blender and swirl together the flavor combination of your dreams. Traditional flavors like vanilla, chocolate and strawberry never go out of style, but feel free to let your imagination go.

“Flavor and balance are two things I look for,” Ried says. “Every burger joint in southern California has a date shake. When I did it, I used buttermilk to balance the sweetness of the dates.” Ried likes to add surprise flavors to his shakes, and has developed travel-inspired recipes based on French pain d’epices, and Mexican chocolate.

Since you’re definitely craving a milkshake by now, here are three of Ried’s recipes from Thoroughly Modern Milkshakes. They may not appear on the menu at your local ice cream shop, but it’s hard to imagine a milkshake not tasting good. “When push comes to shove, it’s going to be sweet, it’s going to be cold. There are better milkshakes, stellar milkshakes and earth-shattering milkshakes, but there’s no such thing as a bad milkshake.”

Do you have a favorite recipe? Let us know in the comment section.

Mexican Chocolate Shake with Chipotle and Almond

Makes about 3 1/2 cups/28 ounces

1/2 cup cold whole or lowfat milk (about 4 ounces)

1/4 teaspoon almond extract

1/2 teaspoon ground cinnamon

1/8 teaspoon ground chipotle powder or cayenne, or more to taste

4 medium scoops vanilla bean or original vanilla or original vanilla ice cream (about 2 cups/12 ounces), softened until just melty at the edges

4 medium scoops chocolate sorbet (about 2 cups/12 ounces), softened until just melty at the edges

Place the milk, almond extract, cinnamon, and chipotle in a blender and blend to mix thoroughly, about 15 seconds.  Add the ice cream and sorbet and pulse several times to begin breaking them up.  With the blender motor off, use a rubber or silicone spatula to mash the mixture down onto the blender blade.  Continue pulsing, stopping, and mashing until the mixture is well blended, thick, and moves easily in the blender jar, roughly 30 to 90 seconds.  Pour into a chilled glass or glasses, and serve at once.

Vanilla-Honey-Sesame Shake

Makes about 3 ½ cups/28 ounces

1/2 cup cold whole or lowfat milk (about 4 ounces)

1/4 teaspoon pure vanilla extract

1 ½ teaspoons toasted sesame oil

2 tablespoons honey (about 1 ½ ounces)

8 medium scoops vanilla bean or original vanilla ice cream (about 4 cups/24 ounces), softened until just melty at the edges

Place the milk, vanilla extract, sesame oil, and honey in a blender and blend to mix thoroughly, about 15 seconds.  Add the ice cream and pulse several times to begin breaking it up.  With the blender motor off, use a rubber or silicone spatula to mash the mixture down onto the blender blade.  Continue pulsing, stopping, and mashing until the mixture is well blended, thick, and moves easily in the blender jar, roughly 30 to 90 seconds.  Pour into a chilled glass or glasses, and serve at once.

Stupendous Strawberry Shake

Makes about 3 1/2 cups/28 ounces

1/2 cup cold whole or lowfat milk (about 4 ounces)

2 tablespoons strawberry jam or preserves (about 1 ounce)

1 teaspoon freshly squeezed lemon juice

4 medium scoops strawberry ice cream (about 2 cups/12 ounces), softened until just melty at the edges

4 medium scoops strawberry sorbet (about 2 cups/12 ounces), softened until just melty at the edges

Place the milk, jam, and lemon juice in a blender and blend to mix thoroughly, about 15 seconds.  Add the ice cream and sorbet and pulse several times to begin breaking them up.  With the blender motor off, use a rubber or silicone spatula to mash the mixture down onto the blender blade.  Continue pulsing, stopping, and mashing until the mixture is well blended, thick, and moves easily in the blender jar, roughly 30 to 90 seconds.  Pour into a chilled glass or glasses, and serve at once.

Thinking of Installing a Central Vacuum? Here’s what to expect.

When you are crouched down, sweeping the crumbs off the floor after dinner, have you ever wished that the wall would magically open up and just swallow the mess? If so, it might be time to think about installing a central vacuum.

As the name suggests, the vacuums use a unit placed in a centralized location (often the basement or the garage) and extend vacuuming power to the rest of the house through a series of strategically placed inlets backed by hidden pipes. When it is time to tackle a mess, instead of heading to the closet to retrieve the portable vacuum, you attach a hose to the nearest inlet or pull out a retractable hose and flip a switch.

While both central vacuums and portable vacuums are more than capable of handling most household vacuuming jobs, there are some differences. Central vacuums can be used on all surfaces from hardwood to carpet to non-floor surfaces such as fans and blinds. Since dirt is captured in the vacuum’s canister by design, central vacuums are a valuable tool for those seeking better indoor air quality.

Installation

Another obvious difference between portable vacuums and their central cousins is that central vacuums are built into the home. The easiest time to do this is during new construction, when the pipes and hose inlets can be built into the walls.

The process of installing a central vacuum can start before the home is built. The central vacuum installer can review the building plans to says map out the best location for the canister, pipes and inlets. They’ll talk to the owner about their options, including whether they prefer a standard or retractable-hose valve.

While it’s most convenient to build a central vacuum into a home under construction, they can still be installed if the home has already built. In many cases, installation takes only a day. As long as there is access to walls, crawlspaces and the attic, experienced installers should be able to handle the job. The level of installation difficulty, however, depends on the home. Installers will aim for a design that allows the vacuum to reach everywhere in the home.

Central Vacuum Features

While you are planning your central vacuum installation, you will be able to choose from a number of features so you can adapt your new central vacuum to your lifestyle and cleaning needs. Think carefully, because you are in this for the long haul. Some central vacuums can last for 20-30 years, or even longer.

Start with the part of the vacuum you’re going to handle the most—the hose. Do you want a standard or retractable hose? If you choose a standard hose, you will have to attach it manually to the inlet every time you vacuum. Retractable hoses can be pulled from the inlet. Some models even turn on automatically when they are pulled out. You’ll have different-sized hoses to choose from, so you can place the size you need in the rooms where you will use them the most. You might want to keep a shorter hose near the dryer for cleaning the filter, a longer one in the garage for car cleanup. Some owners keep them in areas where they often encounter messes, like near the cat’s litter box.

A standard hose will have to be manually attached to the inlet every time you vacuum. A retractable hose is pulled out from the inlet when you need to vacuum. Some models turn on automatically when the retractable hose is pulled out. Different sizes of hoses are available for placement in certain rooms, like a vacuum or garage. Some central vacuum owners favor a short, 10-foot hose in their laundry room to clean their dryer filter. Others put them in areas near their cat’s litter box for easy cleanup.

Speaking of putting features where they are needed, the “automatic dustpan” is popular among central vacuum owners. This allows dirt to be swept into the base of a wall, with the system inlet placed in the kick panel under cabinets or in the base moulding.

Choosing the canister: Like portable vacuums, some central vacuums use bags, while others are bagless. Some also can convert to a wet-dry system. Most central vacuums hold 7-10 gallons of debris. Also consider where you are installing your canister, as it can affect your cleanup options. Some models have valves mounted on the surface of the canister, which, if you place your unit in the garage, gives you the option of easy access for vacuuming your car, garage, or outdoor debris like leaves.

Like portable vacuums, some central vacuums use bags, while others are bagless. Some also can convert to a wet-dry system. Most central vacuums hold 7-10 gallons of debris.

How Safe is Your Water?

As you know, counterfeit water filters are rampant online, disguised as certified filters with trademark violations, fraudulent and misleading labels and importantly, alluring price tags.

The water that is passed through these fake filters may look, smell or taste fine, but microbial and organic contaminants lurking in the water that pose serious threats to health and well-being are often invisible and odorless.

For consumers who don’t purchase replacements from reputable sources, the threat of ending up with a counterfeit water filter is real. Ken Gauld learned this lesson the hard way when he purchased water filters online. A Michigander living close to Flint, Ken relies on water filters to provide his family with safe drinking water. Despite doing his research, Ken still received what he suspected were counterfeit water filters. He sent them to AHAM for testing, and we were able to confirm his suspicions.

U.S. Customs and Border Protection seized more than 5,200 counterfeit filters at the Los Angeles/Long Beach seaport last month. CBP estimated that if the filters had been genuine, they would have had a combined manufacturer’s suggested retail price of $224,202.

AHAM’s Filter it Out campaign aims to raise awareness of the serious health and safety risks of counterfeit water filters, which have received significant mainstream media coverage recently. Last month, InvestigateTV released a report highlighting the risk of counterfeit filters – watch it below:

Read InvestigateTV’s piece here.

Learn more about Filter It Out.

About This Blog

HOME for cooking, cleanliness, comfort and care

Categories