Warm up your winter with these slow cooker holiday beverages

Few things make you feel as cozy and at home as coming in from the cold to find a steaming mug of hot chocolate, already prepared, waiting to warm you from the inside out. Or, perhaps you prefer a spiced holiday drink, or a sip with a peppermint kick. Hot beverages are a wonderful way to weather the wintertime and experience the traditional aromas and flavors of the holiday season.

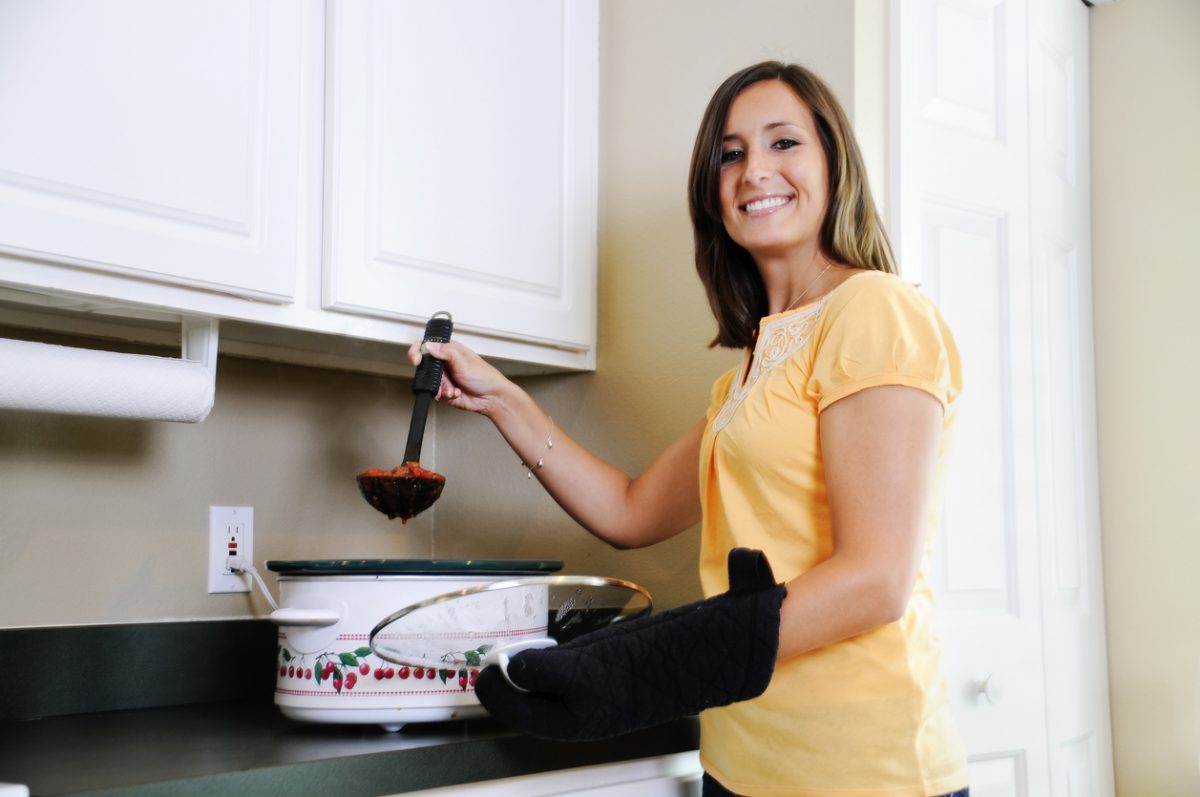
You could prepare your favorite holiday drink on your cooktop, but a slow cooker offers some unique advantages. You can prepare beverages (or cold-weather staples like stews and soups) in your slow cooker so they’re ready for you when you return. Slow cooking comes with the added bonus of being greeted by the drink’s sweet or spicy scents as you walk in the door. Slow cookers also give flavors extra time to permeate throughout what’s cooking, which is essential for holiday drinks that rely on spices.

Slow cookers are designed to do their job with minimal supervision, meaning they can be left unattended for extended periods while they cook what’s inside. If you’re entertaining, your slow cooker frees you up to enjoy your time with friends. Set your slow cooker up in a common area with a ladle so guests can serve themselves.

How a slow cooker works: Before we get to the holiday recipes, let’s run down how your slow cooker warms and cooks those wintertime favorites. The basic slow-cooker design includes an external shell, which usually houses the heating element, a pot for the food (often made from coated ceramic), and a lid. Slow cooker elements are low wattage because they are designed to cook slowly and evenly. Most have straightforward “low” and “high” settings, but the temperatures those heat to could vary depending on the brand. Check the slow cooker’s use and care manual for the temperature ranges.

Some of the newer slow cooker models have incorporated connected features to increase the level of convenience. Some slow cookers can now be operated remotely, so you can start a meal or beverage cooking when it suits your schedule or change the setting when necessary.

Now that you know how the slow cooker gets the job done, it is time to warm up with some holiday drinks. These hot beverage recipes are tailor-made for the slow cooker:

Mulled wine: This spicy, fruity beverage dates back to ancient Rome, but is still a popular Christmastime drink, particularly in the United Kingdom. It can be prepared in the slow-cooker in 30 to 60 minutes and should be served hot. (Credit: Well Plated)

Hot buttered rum: Combine the tropical taste of rum with the wintertime flavors of holiday spices like cinnamon, nutmeg and cloves. And get ready to bring out the slow cooker again for Hot Buttered Rum Day on January 17.

Credit: Southern Kitchen

Holiday wassail punch: Bring some brightness to the gray winter with this punch, which includes five fruit juices: apple, orange, cranberry, lemon and pineapple. Credit: Taste of Home

Slow-cooker hot chocolate: Hot chocolate is a childhood mainstay that never gets old. Serve it with a healthy side of nostalgia. Credit: Allrecipes

Boozy slow-cooker peppermint hot chocolate: Want add a bit of a kick to your hot chocolate? Candy canes add a holiday twist to this classic. Adults may also want to add a bit of peppermint schnapps. Credit: Food Fanatic

Applejack spiked hot cider: Spicy and sweet seems to be a theme among many holiday beverages. The rum is optional in this recipe. Add it as the drinks are served. Credit: Myrecipes

You will no doubt be tempted to lift the lid for an early inhalation of holiday ingredients, but lifting the lid early can lead to heat loss and slow down the process.

What is your favorite warm holiday beverage?

Trends, Technology, Transformation: Designers discuss kitchen redesign possibilities

Is it time to remodel your kitchen? If you are ready to make that significant investment of both time and money, you should think about the project as more than just choosing and installing new countertops, cabinets and appliances. You are not just remodeling. You are reshaping your kitchen into a space that reflects and is equipped for the way you cook, clean and interact with family and friends.

If you look at it from that perspective, envisioning the kitchen you need to accommodate your cooking, cleaning and social habits may seem challenging. An interior designer can help you sort through all of these questions, present you with options, introduce you to new options and trends, and guide you through the remodeling process.

We recently spoke with two designers — Molly Switzer of Molly N. Switzer Designs, LLC,  and Richard Landon of Richard Landon Design — for their take on the changing kitchen design, how you can make the best choices during the design process, and how you can get the most out of the relationship when you’re working with a designer.

Do your research

The appliances you have your heart set on in the beginning of the remodeling process may not be the best choice for your kitchen or lifestyle. It’s time to roll up your sleeves and do your homework. That could mean checking out what your family and friends have done, watching appliance demonstrations by retailers or manufacturers, or watching online videos. “A lot of consumers are doing research,” Switzer says. “They’re paying attention to their friends and family who are doing remodels. You can get a lot of feedback from them.” Switzer educates her clients on the options at the beginning of the process, but says it’s more valuable to visit a showroom and try the appliances. “That’s where everything gets solidified,” she says.

Research also includes really thinking about how you use the kitchen. Landon has observed a phenomenon he refers to it as ‘A-cubed syndrome,’ which means his clients have adapted, adjusted and accommodated certain aspects of their kitchen for so long, that they have accepted those things as normal. What you are used to may not be what is best for you, and it’s important to be aware of options, he says.

“You want to point them ahead, counter the A-cubed syndrome, and feed them YouTube videos about these on-point appliances,” he says. “I would say a good half of my clients are now switching to the 24-inch wide induction cooktop. My neighbor decided, after watching a demonstration, to go induction.” He encourages clients who are not familiar with steam cooking to go online and watch demonstration videos of steam ovens in action. “Every time they do that, they come to me and say they’re going to do steam. Virtually 100% of my clients are using steam.”

You should also consider how you clean your appliances. “When you have a gas cooktop, you understand that there are elements you have to clean. Some companies have come up with the technology to make the elements dishwasher safe, but most make you hand-wash those pieces. Do you want to take the time to make sure it’s clean or do you want to put it in the dishwasher?” Also consider whether you prefer a self-cleaning oven over one you have to clean manually, Switzer says.

Don’t forget to have a plan for your cleaning appliances, like your vacuum. Switzer says that central vacuums are becoming easier to install during a remodel. “It’s one of those things that, as a designer, you should bring up, especially if you see clients that have multiple stories or who don’t have a good place to store their vacuum.”

Space it out

During a redesign, both available space and how that space is used will play into your choice of appliances, as well as where they are installed.

For instance, is your kitchen just a place to cook, or does it double as a meeting place? For many of Landon’s clients, the kitchen is the new “living room” where everyone gathers. If the kitchen is your social space, design it to accommodate a gathering. “When people come to visit, they hang out in the kitchen with you if it’s possible,” Landon says. “Put in an island, because that is the new dining room table. Increasingly, I’m doing kitchens where you can sit 6-8 people around the island. They don’t have a dining room table at all.”

Socializing shouldn’t stop when the cooking starts, but historically, kitchens have often been designed with the range and other cooking appliances up against a wall, meaning the cook has his or her back to the others in the kitchen. Moving the cooktop to the island will allow cooks to socialize while they sauté. This is another example of moving away from the traditional, Landon says.

“A lot of it does come down to how they use their space and envision their space,” Switzer says. “As a designer, I ask them questions about how they use their kitchen and what appliances they use. How many burners do they use at a time? Are their two people cooking? Should we talk about enlarging the space?”

How you use appliances matters

How you use appliances, not just what the appliances do, should also factor into your decisions during the remodeling process. Kitchen designs aren’t limited to a single range, refrigerator and dishwasher, and appliances are being incorporated around more specific uses of the space. “As you get into larger kitchen spaces, if you entertain a lot, having two dishwashers can be awesome,” Switzer says. “People who like to make cocktails might have a beverage center—all of their coffee, their bourbons, cocktail mixes, wine. I try to put an 18-inch dishwasher in that area.”

Like beverage stations, zoned food storage is also catching on. “I’m seeing more and more people who have no ‘big box’ refrigerator,” Landon says. “Everything is zoned refrigeration. Consider the impact of distributed refrigeration, plus freezer units. The ability to distribute refrigeration and configure it to suit your lifestyle is often what consumers aren’t considering.”

Don’t forget to discuss incorporating your portable appliances into your remodel. “We make sure there’s a home for them,” Switzer says. “If you have to use your stand mixer and have a small space, there are cabinet lifters — a base cabinet with a hydraulic spring action piece. There are coffee centers where you can just hide [your coffeemaker] away.”

The portables you use regularly are one of the factors you should consider when determining your counter depth, Landon says. “As houses shrink, counter space is becoming a huge deal,” he says.

Kitchens are changing

Landon sees changes in the works for kitchens, driven by technology and a desire for personalized food. He encourages clients to think about the future when planning their remodel with a designer.

“I want people to realize that the world is rapidly changing in response to technology,” Landon says. “It has very much affected the way we approach food.” He noted that for the first time, teenagers report spending more on food than they do on clothing. “In parts of the country where there is a higher density and cost of square footage, this is going to drive you into a different way of thinking about a kitchen.” Changes in eating habits, like the rise of rapid ordering and customized meals, can drive the decisions you make about your appliances. Connected features that seem novel now, like refrigerators that order food automatically and cooking appliances that guide you through the cooking process could soon become normal parts of the kitchen, he says.

“All the ways we think about kitchens were set by ‘Leave it to Beaver,’” Landon says. “How you use the kitchen and the kind of appliance structure you need are radically changing.” 

Before you start, plan

If you are going to work with a designer, involve them early in the process. “You should have the designer involved before the process begins, because if the process is started, we’re trying to play catch-up the whole time,” Switzer says. “All the planning should happen before the redesign starts. It’s a big investment, and we need to make educated decisions about the process.”

So, if you are planning a kitchen redesign, don’t be constrained by your current concept of a kitchen. Look beyond your decisions on the physical features and work with your designer to create a space that fits your lifestyle now and into the future, as food, cooking and appliances continue to evolve.

On the Carpet: Style, Personalization and Care

There was a time when choosing carpet for your home meant picking out an unassuming, neutral tone like white, beige or gray and laying it throughout the house. Today, consumers often venture beyond the safe choices of the past and look to their carpet as an opportunity to make a statement.

“Regardless of the fiber, they want a look that is personalized,” says Teresa Tran, director of soft surface portfolio management, residential, for carpet and flooring manufacturer Shaw, Inc. And, Tran says, that’s not necessarily about whether you prefer loop pile, cut-pile Berber, or another common carpet style. While no one type of carpet stands out as a trend, Tran says, Shaw has found that consumers are looking for a full range of colors to choose from and carpet that is durable, easy to clean, and stays looking like new.

“We’re seeing a big trend in patterns, small-scale solid or something that is very bold,” Tran says. With less focus on uniform carpeting throughout the home, Tran says, homeowners are more willing to go with a bolder pattern in high-traffic areas like the bedroom and family room. That might mean a traditional pin dot, diamond, or geometric pattern with some variation, Tran says.

The preference for personalization has led carpet manufacturers to change their approach as well, Tran says. “It used to be that we would develop products on capacity, fiber types,” she says. “Today, we’re doing it differently, trying to understand what the consumer needs. The way carpet is manufactured today, I don’t think a consumer has to go for a specific style. It’s okay to take chances in patterns and visual.”

With hard surfaces trending, many consumers are also opting to put rugs in as a way to personalize their space. Most types of carpet can be customized into rugs, Tran says.

If the look of the carpet reflects your personality, the type of carpet construction and fiber you select should be based on lifestyle, foot traffic, how much you use the room and for what purpose. If you have pets or children, for example, you probably want a carpet that is stain resistant and durable. The carpet manufacturer and retailer will likely have some suggestions based on your needs. Take a look at this primer from the Carpet and Rug Institute:

  • Cut pile: Known for durability, good for high-traffic areas
  • Textured plush: Good for busy households, hides vacuum and foot marks well
  • Saxony: Ideal for interior rooms.
  • Frieze: Curly texture that minimizes footprints and vacuum marks
  • Plush: Dense and luxurious. Better for low-traffic, formal areas of the home
  • Loop pile: Loops at uniform height, common with Berber styles
  • Cut-loop pile: Combines cut and looped yarns for a varied texture, adept at hiding soil and stains

Whether you prefer a bold color, busy pattern or understated neutral tone, all carpets and rugs need regular and proper vacuuming. The style of carpet you choose will affect the way you vacuum.

A common misconception is that all carpets and all vacuum cleaners are the same, says Rob Green, senior design engineer with Dyson. Check the use and care manual or manufacturer’s recommendations for your model vacuum to see whether it is an appropriate choice for cleaning your carpet.

Here are some other factors to consider when vacuuming your carpet that will help keep it looking like the day it was installed:

Style of carpet matters more than materials: “The material the carpet fibers are made from does not affect the vacuuming techniques as much as the construction of the carpet,” Green says. Tuft and weave are important to consider when vacuuming. “The depth of the pile and length of each tuft, the construction of the backing, and the bonding between the piles and the backing should drive vacuuming technique more than material.” This means a cut pile, deep/long, twisted tuft may be more susceptible to fuzzing or fraying if it is cleaned with a rotating brush bar than a short, looped pile, regardless of the material. Consult the carpet’s use and care manual for specific recommendations.

Choose the right height: Generally, deeper carpets and longer piles require greater penetration from the vacuum’s bristles for better cleaning, Green says. However, he adds, it is important to know the recommended cleaning of the flooring to ensure the carpet is suitable for cleaning with and will not be damaged by a rotating brush bar.

Is a robot doing the work? Robotic vacuums have seen countless innovations and improvements in the more than two decades since they first hit the market. However, Green says, they still call for a different approach than conventional vacuums. Robots may be less adept at cleaning certain surfaces. “The deeper and thicker a carpet, the more resistance it will give the robot, potentially making it harder for the robot to move,” Green says. “Also, consider that the robot is working on an algorithm and will not detect delicate surfaces such as rugs that might now be suitable for cleaning with a rotating brush bar.”

Need for speed: Consider the type of carpet when you’re choosing your speed setting. When you are vacuuming thick or deep pile carpets, or carpets with rubber backing, a lack of airflow could cause the vacuum to limpet down, Green says. “At this point, it may be desirable to reduce the suction power to allow ease of use,” he says. “This will come at the cost of cleaning performance.”

What type of carpet do you prefer? Tell us in the comment section!

All Mixed Up: 6 Facts about Stand Mixers

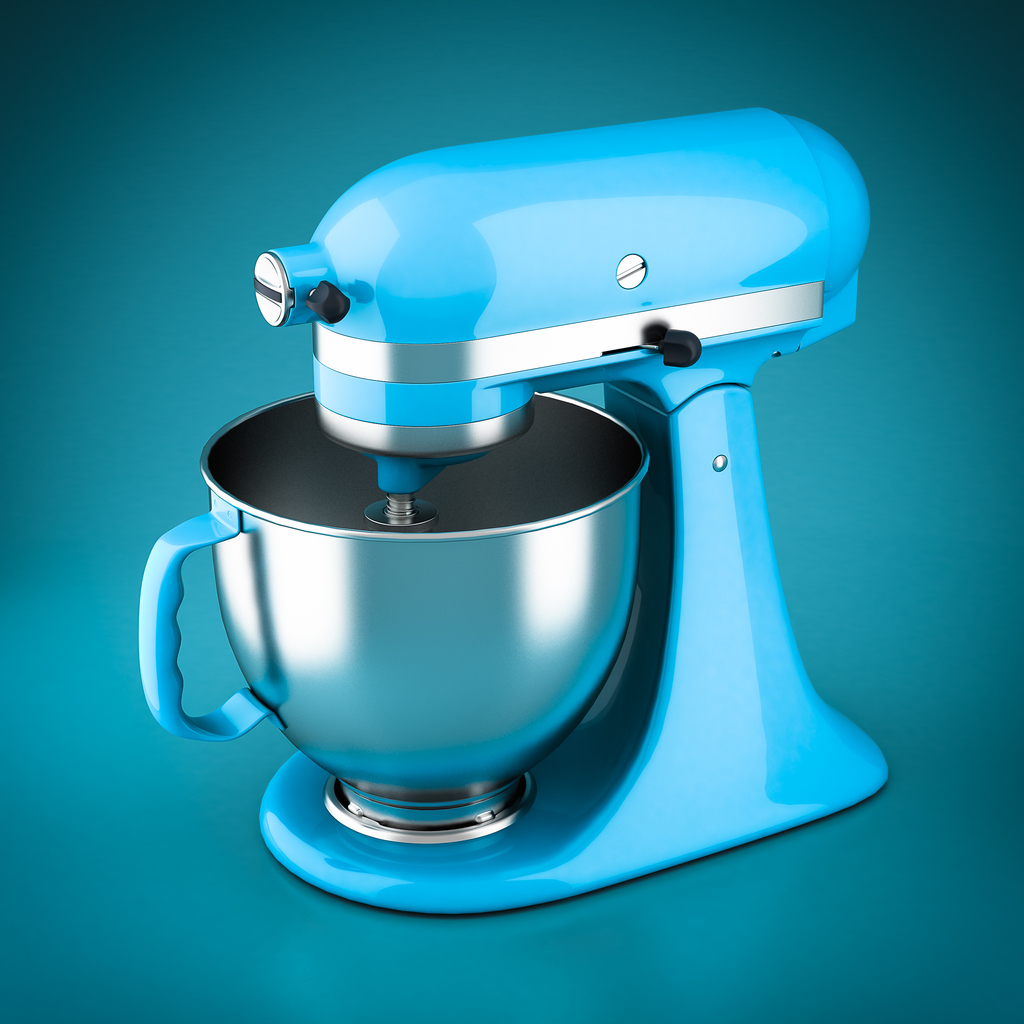
The stand mixer is a kitchen workhorse. While stand mixers are probably most commonly associated with baking and sweet treats, they are equally useful for kneading bread dough and whipping up a batch of mashed potatoes for dinner. Stand mixers are likely to dwell in cabinets when not in use, though a range of colorful finishes can also make them into an eye-catching design element in your kitchen.

Stand mixers have a long history that goes back more than a hundred years. The first stand mixer, which held 80 quarts, was developed for bakeries in the early 1900s. A smaller model for home kitchens was developed soon after.

Today, 43% of consumers report owning a stand mixer, according to AHAM research.

Whether you look to your stand mixer for baking, dinner or everything in between, take a look at these facts about stand mixers to see how your mixing habits and mixer stack up!

Desserts, out of the box: Stand mixer owners really like their cake and muffin mixes. In fact, 82% use their stand mixer to make those mixes at least once a month. They enjoy their brownie mixes too, with 60% reporting that they mix up a batch at least once a month.

Dinner (or lunch) is right behind: Mashed potatoes ranked right behind cake, muffin and brownie mixes among the most popular uses, with 53% of stand mixer owners saying they used their mixers to make mashed potatoes at least once a month.

They are used regularly: Stand mixers are used about four and a half times per month. Four percent of owners use them every day, and 31% use them at least once a week. They’re used for an average of 19 minutes at a time.

Mixers are multi-purpose appliances: A stand mixer isn’t just a mixer. Many models come with a variety of attachments that give the mixer various capabilities. Some of the more common include mixing beaters, dough hooks, whipping beaters, and smaller-sized beaters. Less common are meat grinder, juicer, pasta making and ice cream-making attachments.

They make users feel like pros: Nearly half (48%) of stand mixer users say the appliance makes them feel like a professional baker. More than half (62%) describe their stand mixer as a professional-style unit.

What’s your favorite recipe to prepare with your stand mixer? We want to try it, so share it in the comment section or with us @AHAM_voice on Twitter!

Facts about blenders, a kitchen staple

They whip up healthy shakes and smoothies and decadent milkshakes, crush ice and puree fruit. Blenders are equally handy at every meal and if you’re craving a snack. They are among the most versatile of kitchen appliances.

If you have a kitchen, chances are you have a blender. More than 90% of households report owning at least one personal or full-size blender, according to new AHAM research. People are using them more frequently, too, with full-size blenders being used an average of 6.3 times per month, up from 4.4 times per month in 2009. Personal blenders are used an average of 8.7 times a month.

Healthier eating habits seem to be one reason behind the increase in blender use. “Eating healthier” is the top reason given by personal blender users (33%) who are using the appliance more, while 31% of full-size blender users say they’re using it more often because they’re drinking more smoothies.

Whether you prefer full-size or personal, shake or smoothie, these facts from AHAM’s recent portable appliance research features will let you see how your blender and blender habits measure up. How do you use your blender? Let us know in the comments!

What is blending?

Fruit smoothies are popular among blender users. They are made more than twice a month on average using both types of blenders. More than 25% of blender users report making smoothies in their blenders five or more times a month. Plenty of other healthy options like fruit and vegetable juices, soups and nutritional shakes also come out of blenders regularly. However, blender users like to indulge, too, and making ice cream milkshakes and frozen drinks both ranked among the top uses.

Snack time

Blenders are a part of every meal. While they may not be as commonly associated with breakfast as coffee makers and toasters, 33% of personal blender owners report using them most often breakfast, double the 16% who report using them most often at dinner. But snacks between meals edged out breakfast by a point—34%—as the most common time for putting the personal blender to work.

Snacks were also the top use for 30% of owners of full-size blenders, vs. 24% for dinner, 22% for breakfast and 12% for lunch.

The need for speed

Speed settings are one of the features that makes blenders equally adept at preparing a sauce, shake or smoothie. More than half (57%) of full-size blenders have four or more speed settings, and 85% have three or more. Among personal blenders, 22% have four or more settings, and half have three or more.

Speaking of speed, blending sessions tend to be over quickly. Most personal (72%) and full size (66%) blender owners report using it for five minutes or less per session.

Features and accessories

Ice crushing is the most popular blender feature and is found on 50% of full-size and 45% of personal blenders. Most—83% of full-size and 72% of personal—also have a pulse feature, which temporarily takes the blender to top speed at the push of a button. More than half of users use the pulse feature “every time” or “frequently.”

Blender accessories can add convenience. If you are looking to take your freshly blended drink with you, 20% of full-size blenders will accommodate that with a travel cup and lid. Other common blender attachments are food choppers and food processors. Some models also include removable ingredient caps and pre-programmed recipes.

Nice job on the cleaning

Blender users, for the most part, are doing a good job keeping the appliance clean. Nearly 90 percent of users of both full-size and personal blenders clean the blender jar after every use, and another 5% clean it “frequently.” Most of those (85% and 83%) clean the blades as well. Hand washing, either with or without disassembling the blender, is the most common cleaning method.

Age, Store, Serve: Wine refrigerators will help you pour the perfect summer glass

Ah, summer. The sound of waves crashing as you relax at your favorite vacation spot. Late-afternoon breezes chasing away the heat of the day. Beads of condensation forming on the glass of perfectly chilled, crisp white wine as you lift it to your lips, ready to let the cares of the day drift away.

Whether you go for that crisp white, a sweet rose or a fruit-laced red, temperature matters when it comes to wine. If you have aspirations of becoming a wine scholar or just want to show your wine- sophisticate friends that you know your stuff, too, it helps to know a little bit about the proper temperature at which to store and serve wine. The wine refrigerator is the appliance that will get you there.

Wine refrigerators, also known as wine chillers or wine coolers, have become standard features of high-end kitchen renovations. Unlike regular refrigerators, which store food and drinks below 40 degrees, wine refrigerators are designed to maintain temperatures ideal for wine, whether it is being stored, aged or served. They offer protection from wine’s biggest enemies: heat, lack of humidity, temperature variation, vibrations, ultraviolet light and odors. In short, wine refrigerators are your best option for storing wine this side of a royal palace cellar.

If you think you are ready to up your wine storage and serving game, there are a number of factors to consider. While wine refrigerators aren’t any more difficult to operate than a regular refrigerator, the details of wine storage matter, especially if you’re storing wine for the long haul. I spoke with Marshall Tilden III, vice president of sales at Wine Enthusiast, which sells an array of wine refrigerator models and publishes the popular Wine Enthusiast magazine, for some guidance on what wine drinkers need to think about before they make the jump from wine rack to wine refrigerator.

As with many appliances, you should start with size. Look at how much space you have available, particularly if you opt for a built-in wine refrigerator. Many built-in models mimic the size of other major kitchen appliances, like dishwashers or refrigerators. But, if you don’t have room for or don’t want a built-in model, there are many portable models available, with a range of capacities. When making your choice, consider how many bottles you currently store, and think bigger. Wine is a hobby that tends to grow like the boldness of the flavor in a perfectly aged cabernet.

“We always stress to customers to get a unit that can hold about 25-50 percent more than your current collection,” Tilden says. Once you get into the world of collecting wine, it grows quickly. It’s best to buy bigger than you need, unless you’re constrained by space.” Fortunately, you have options ranging from small units that store a few bottles to models that can hold hundreds of bottles. Wine refrigerators are available in finishes consistent with popular appliance looks, like stainless and black stainless, and are often integrated into the kitchen near refrigerators.

Along with capacity, your wine refrigerator should be able to accommodate the size and shape of the bottles of your preferred brands. “Wine bottles can come in all shapes, sizes and forms,” Tilden says. “Some models have adjustable shelves or luxury spacing, so if your collection has bigger bottles, [the wine refrigerator] has the capacity or you can adjust the shelves.” 

The next factor you should consider is how you will be using the refrigerator. Whether you’re serving, storing or aging, temperature matters. It can affect wine flavor and aroma. “White wine should be served anywhere from 44-50 degrees, whereas red wine should be served somewhere between 59 and 65 degrees,” Tilden says. “The lighter the wine, the colder you serve it.”

If you are aging wine, it must be kept around 55 degrees. “Only a fraction of the wines in the world are meant to age, evolve and improve,” Tilden says. But if you are going to put the time and effort into aging wines, you will want to keep conditions as close to perfect as possible. “If it’s too cold, it will slow the aging,” Tilden says. “If it’s too warm, the aging will speed up. If you don’t have the right temperature to age it, you might miss the optimal drinking stage.”

Single-zone wine refrigerators generally keep wine at 55 degrees, which is ideal for storing and aging, Tilden says. However, if you are storing, aging and serving, consider a dual-zone model, which allows you to keep zones of the wine refrigerator at different temperatures. That way, you can move a bottle into another zone when you’re getting ready to serve it. Where you keep your wine refrigerator can also affect the temperature inside, so make sure the one you choose can handle the ambient temperature. This is especially important if you are keeping the refrigerator someplace warmer, like in a garage.

Humidity also affects wine, and higher-end units may include humidity controls, Tilden says. This is important for longer-term aging. “If the cork dries out, air gets in, and the wine oxidizes,” Circulating fans help move the air and moisture, and some include spaces for lava stones to absorb moisture.

Aging wines are sensitive to motion, and certain models also include features that minimize vibration.

Wine can be an investment, and it’s a good idea to think about security as well. “The majority of units that hold over 36 bottles or so come with locks,” Tilden says.

Ready to relax? I hope you thought ahead—in the time it took to read this article, you could have brought a glass of red up to the perfect serving temperature. Time to pour yourself a glass.

The Hidden Dangers of Counterfeit Water Filters

Online shopping makes it easier to run errands, saving us time and often money, too. As a savvy shopper, you know that a too-good-to-be-true price on a designer purse, shoes or sunglasses probably means it’s a fake; but did you know other unsuspecting household products you use daily could be counterfeits too?

Counterfeit water filters are rampant online, disguised as certified filters with trademark violations, fraudulent and misleading labels and importantly, alluring price tags. Here’s what you need to know so a potentially harmful counterfeit filter doesn’t end up in your online shopping cart — or home.

Water may look, smell or taste fine, but human senses cannot always detect microbial and organic contaminants lurking in the water that can seriously harm our health and wellbeing. The Association of Home Appliance Manufacturers (AHAM) conducted tests to find out how counterfeits stack up to certified filters.

Using the standard that certified filters are tested against for consumer safety, three independent labs performed tests to measure counterfeit filters’ efficacy at removing lead, cysts and other contaminants from water during the stated shelf life of six months. Additional testing sought to make sure contaminants weren’t being introduced into clean water. Here’s what the tests revealed:

Lead

Labels on counterfeit filters claim to reduce lead in water to meet the NSF/ANSI 53 standard. Of the filters tested, only two out of 18 filters successfully filtered out lead for the full six-month refrigerator life of the filter. In a separate test of 14 filters, eight filters failed before half of a typical lifetime in a refrigerator. Every single counterfeit filter failed to perform at twice the typical lifetime, which is a requirement since many consumers often forget to replace their filters or don’t have a ‘replace filter’ light on their fridge, resulting in use them well beyond the suggested six-month time frame.

Cysts

NSF/ANSI 53 standards require filters to reduce the presence of cysts (cryptosporidium parvum oocysts) by 99.95 percent. To allow for a margin of error, AHAM lowered the bar to a 90 percent for its test. Even with the lower standard, seven out of eight counterfeit filters failed to removed 90 percent of cysts, despite labels claiming they would. An eighth filter was removed from testing due to clogging.

Extraction Test

Per NSF/ANSI standards 42/53 4.1, filters should not introduce new contaminants above the allowable limit. The test checked for 159 different contaminants that can be found in water, such as volatile organic compounds, semi-volatile organics, other semi-volatile organics, regulated metals and nitrosamines.

After uncontaminated water sat in 46 counterfeits for three 24-hour periods, ten separate compounds were found over the total allowable concentration. In other words, the filters introduced these contaminants – elements such as arsenic, ethanol and octane — into clean sample water.  The chemicals are consistent with those leached by non-food grade plastics.

Don’t roll the dice when it comes to shopping for your family’s refrigerator filter. Only purchase filters sold by a refrigerator manufacturer that stands behind its products. For a complete list of trusted filters and more information about the report findings, visit FilterItOut.org.

Here’s the Buzz on Electric Hair Clippers

It was time for a haircut. But, with Father’s Day approaching, this 42-year-old dad of three decided it was time for an upgrade. After years—a lifetime, really—of $12-$22 trims, I decided to venture into the higher end of hair care with a cut at The Grooming Lounge, a men’s salon with locations in Washington, DC and Northern Virginia that markets itself on providing customers with an extra level of comfort and personal attention. That includes hot towels and head massages.

The real reason I visited The Grooming Lounge was to meet Rich Conant, a 25-year veteran of the hair cutting and styling business, who generously agreed to show me his collection of professional-grade clippers and share some advice on how to handle clippers like a pro.

If you have an electric hair clipper in your home, the odds are good that Dad is using it regularly. AHAM’s Portable Appliance Research found that 56% of households own an electric hair clipper. In 88% of those households, an adult male is the primary user. Clippers are used an average of four times a month.

As Rich worked his magic on my graying, middle-aged hair, I peppered him with questions on the finer points of clippers and technique.

Let’s start with the clippers themselves. Clippers aren’t a one-size-fits-all appliance. You have probably noticed that your barber has an assortment of clipper attachments. If you buy a clipper, it will also come with a variety of attachments, or guards. Those determine how much hair you’re taking off. They’re numbered, generally from 1-8, and the lower the number, the closer the cut. The numbers refer to eighths of an inch. So, a #0 will cut very close to the skin, a #1 will leave 1/8 of an inch, a #2 will leave you with a quarter of an inch, a #3 3/8 of an inch, and so on. If you’re using clippers at home and have recently switched models, Rich cautioned that guards may not be measured exactly the same from model to model. The rule of thumb, if you aren’t sure about the length, is to start longer than you need. You can always take more hair off, but growing it back will take longer.

When changing or attaching the guard, Rich strongly recommends double-checking that it is securely attached. This will prevent it from slipping off during the trim, which could result in a hairstyling disaster—a bald spot. Your barber’s commercial grade clippers likely have a locking mechanism to prevent slippage. If you’re doing the job yourself, make sure the guard you choose is for humans, not dogs. Some clippers come with dog-grooming attachments, which should be clearly labeled.

Rich talked me through the art of hair clipping, pointing out the importance of constant visual assessment, measuring and balancing. A large mirror is your best friend, and a comb will help guide your work and help create a natural transition between the clipped hair and scissor-cut hair. “Use the comb as a guide to keep it even,” Rich says. “As you move the clippers up, move the comb down to meet where you want to cut to.” Use a texturing shear to improve the transition between clipped and cut hair.

When you’re going around the edges, you’ll likely get better results with a trimmer, not a clipper. They look similar, but a trimmer is smaller and is designed to help you get at smaller areas.

“You could use clippers as trimmers, but it’s hard to get around the ears or do detail work,” Rich says.

The clipper or trimmer are valuable tools for keeping sideburns to the preferred length. Whether you prefer a straight-across, no-sideburn look or full-on Elvis sideburns, balance is critical. “Make sure the sideburns are even,” Rich says. “Face the mirror and put your fingers at the bottom of each sideburn.” If your fingers are in line, your sideburns are balanced.

If you have more exotic hair aspirations, like carving lightning bolts, your sweetheart’s initials or a Batman logo into your hair, clippers are the tool that can get you there. However, you’re probably better off leaving the job to a professional. When I raised the issue of elaborate designs with Rich, he mentioned that the road crew of a prominent 1990s alternative metal band had once been regular clients of his in California. He claims a Ferrari design among his clipper art masterpieces. Designs require very short hair and extreme precision. Rich sometimes would outline the design in felt pen before going in with the clippers. “Once you cut with the clippers, it’s permanent,” he says.

Once the clipping is done, it’s time for cleanup. Fortunately, clippers need minimal care and maintenance. AHAM member Wahl recommends using the brush that came with the clippers after every use, oiling them regularly, and not using water to clean them. The use and care manual will offer specific guidance. AHAM’s research found that 72% of clipper owners clean it after every use or “frequently.” Most—78%—use the brush that came with the clippers.

If you’re shopping for an electric hair clipper this Father’s Day, two important factors to consider are size and weight. The majority of clippers—83%—are purchased in a store. Shopping in person will let you test the size and weight, and the packaging will contain information about the specific attachments that are included, as well as other characteristics, like corded vs. cordless. AHAM research found that ease of use and price were the top factors for consumers when buying clippers.

Thanks to Rich’s knowledge and skill, I’m heading into Father’s Day with a sharper-looking head of hair and knowing more about clippers than I ever thought possible. Whether you’re spending the day at the barber, by the lake, in the yard or at the game, happy Father’s Day!

Straight from the Chefs: July 4th and Summer Cooking Advice

Whether you’re cooking indoors or outdoors this July 4th, there are plenty of principles that apply to both that can help you knock the ball out of the culinary park this summer. To help you up your summer cooking game, we have compiled the best advice professional chefs have given us on holiday cooking, covering everything from planning your holiday meal, to keeping an organized kitchen, to cleaning up afterward.

Great cooking and great parties start with great planning. If you’re hosting this July 4th, the groundwork for a lot of your kitchen success will be set before you even pull out the first cooking appliance. That means not waiting until the last minute. A few simple steps can help you get ahead.

  • Decide what appliances you’ll need and put them within easy reach.
  • Prep what foods you can in advance, like chopped vegetables, and think about what kitchen tasks you can delegate.
  • Take inventory of the cooking tools you have at your disposal. Pro chefs recommend a good set of knives and quality cookware.

You can plan just about everything but the weather, but bad weather doesn’t mean your party is a wash. You might even discover a new flavor or reunite with an old classic like the dirty water dog. You can still cook most of your summer favorites—chicken, pulled pork, hot dogs, burgers, shrimp, vegetables and desserts—with your indoor appliances. That includes chicken, pulled pork, hot dogs, burgers, shrimp, vegetables and desserts. Your slow cooker, broiler and range will get the job done. Tradition is great, but be willing to venture outside the traditional. Think about how you might incorporate some of your local or family culture into the menu. That could mean something as simple as a nontraditional spice, or planning a full menu based on foods that reflect the regional culture. Talk to farmers at the local farmers’ market for inspiration and unique ingredients. Sometimes, they’re cooks, too, and will share recipes and cooking tips.

Food safety should be a priority all times of the year. Keep any meat in your refrigerator at 40 degrees Fahrenheit or below until you’re ready to cook. A good digital thermometer will make it easy to check whether your meats are done. They should be a minimum of 165 degrees in the center of their thickest point.

Finally, is the party over? Hopefully, you haven’t put off all of the cleaning to the end. Do whatever cleaning you can as you go. Are you done with that hand mixer or immersion blender? Will you need it again? If not, clean it and put it away. That goes for any tools or appliances you’ll use. You will enjoy the party more if you know there isn’t a pile of cleaning-related tasks waiting for you after the fun is over.

Don’t forget to have a plan for your leftovers. Most can be stored safely for 3-4 days in the refrigerator, according to the Food Safety Inspection Service. Refrigerate hot foods within two hours of cooking.

Do you have a great July 4th or summertime party cooking, planning or cleanup tip? Let us know in the comments. We’ll have more later this month on July 4th parties, summer get-togethers and how your appliances can help you make memories this summer.

Essential vacuum maintenance tips for high-level floor care

Vacuums are like the magician of home appliances. You pass them over the top of some dirt and—presto—it disappears! There’s nothing magic about it, though. Whether you use a canister, stick, upright, central or robotic vacuum, the cleaning power it provides is the result of precision engineering and many parts working together to help you get the upper hand on dirt, dust and allergens.

Vacuums tend to live in closets or under beds, kept out of sight until we need them. Like many appliances, it is easy to take vacuums for granted until you need them and they don’t work. A few simple steps can help ensure that your vacuum continues to make magic!

Change and clean the filter: Failing to clean or change the filter might be the most common reason for low vacuum performance. It’s also one of the easiest to address. Your vacuum’s use and care manual will offer guidance on specific filter replacement, care and cleaning, but make a habit to check the filters on your vacuum regularly for dirt. If you are cleaning a filter, allow it to dry completely before returning it to the vacuum. Keep in mind that your vacuum may have more than one filter, so make sure you are caring for all of them properly.

Empty the bag and canister: Some models include indicators to signal when it is time to change the bag or empty the canister. If yours doesn’t have an indicator, don’t wait until the bag or canister is overflowing. Change the bag or empty the canister when it’s one-half to two-thirds full.

Clean the brush roll: A functioning brush roll is essential to dislodge dirt and allow it to be picked up by the vacuum. Check it periodically to make sure it hasn’t been wrapped up in hair or blocked by debris, which can put stress on the belt and reduce the vacuum’s performance.

Replace the belt as needed: The belts on vacuums wear over time. As they do, performance diminishes. Plan to have your belt changed every two years. Check your vacuum’s use and care manual for instructions on how to change the belt, or visit an authorized service provider.

About This Blog

HOME for cooking, cleanliness, comfort and care

Categories