Physicians share their allergy prevention advice

Ragweed. Pet dander. Tree pollen. Mountain cedar. Regardless of what’s causing your allergy symptoms, the sniffling, coughing, sneezing and itching are a major downer any time of the year. Before you reach for the antihistamines, look around the house. Odds are you already have many of the tools—your appliances—that can reduce the level of allergens in your home and help you breathe a bit easier.

AHAM spoke with two allergy experts, Corinna Bowser, M.D., of Narberth Allergy & Asthma in Narbeth, Pa., and Sakina Bajowala, M.D., of Kaneland Allergy in North Aurora, Ill., who shared their advice on how your appliances can help you find allergy relief:

Vacuum: Vacuums with HEPA filters can be helpful in removing both ground allergens, like dust mites, and airborne allergens like pollen. A stick vacuum may be a convenient option to help you remove dust mites from the hard surfaces in your home between regular cleaning sessions.  Finally, consider having someone who doesn’t suffer from allergies do the vacuuming.

Room air cleaner: Air cleaners also utilize HEPA filters to remove allergens from the air. Do you have pets? Keep an air cleaner running in the room or area where the pets spend their most time and in the room where the allergic person sleeps. “Running a HEPA filter can help to reduce the levels of allergens in the air by up to 50 percent,” Bajowala said. “The air filters can help trap a lot of the allergens and make the air more suitable for asthmatic or allergic patients to breathe.”

Air conditioner: Air conditioners will help filter outdoor allergens and keep them outside. Combine them with a room air cleaner for an extra layer of protection. “Many patients with asthma and allergies do a lot better in air conditioned environments,” Bajowala said. “Both room and portable air conditioners can be helpful.”

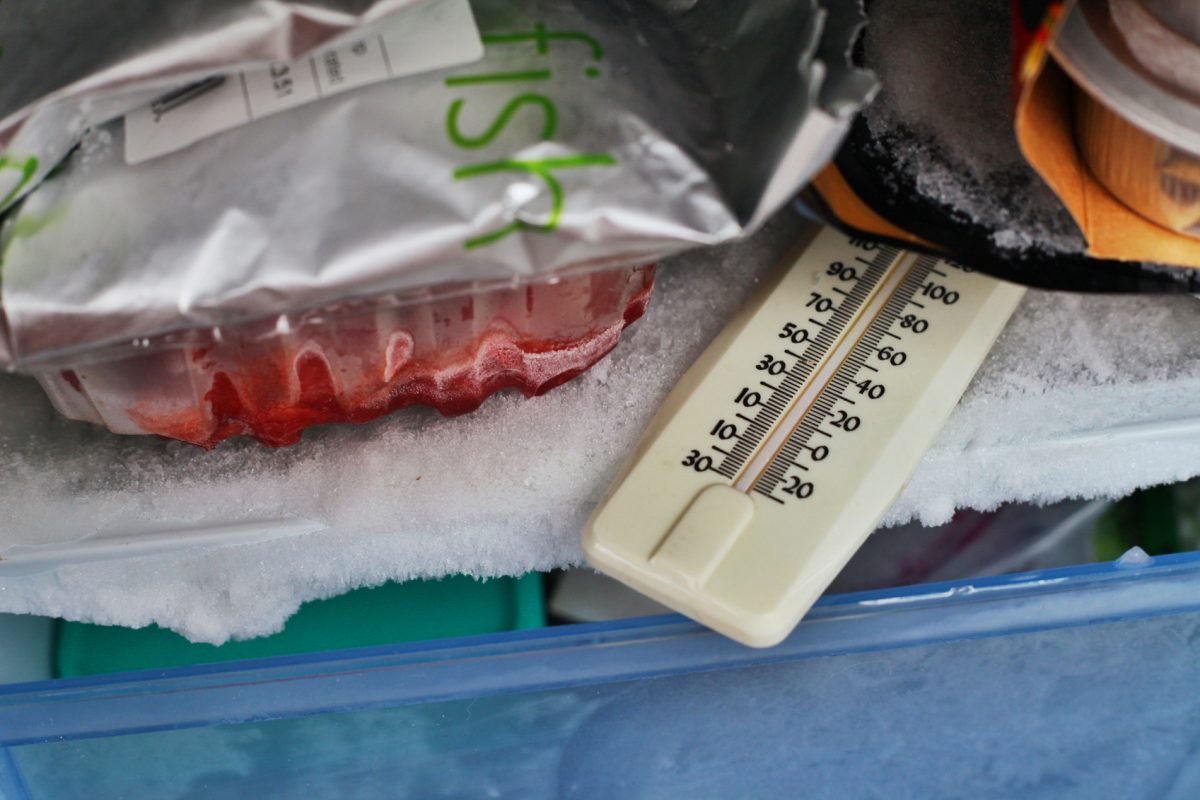
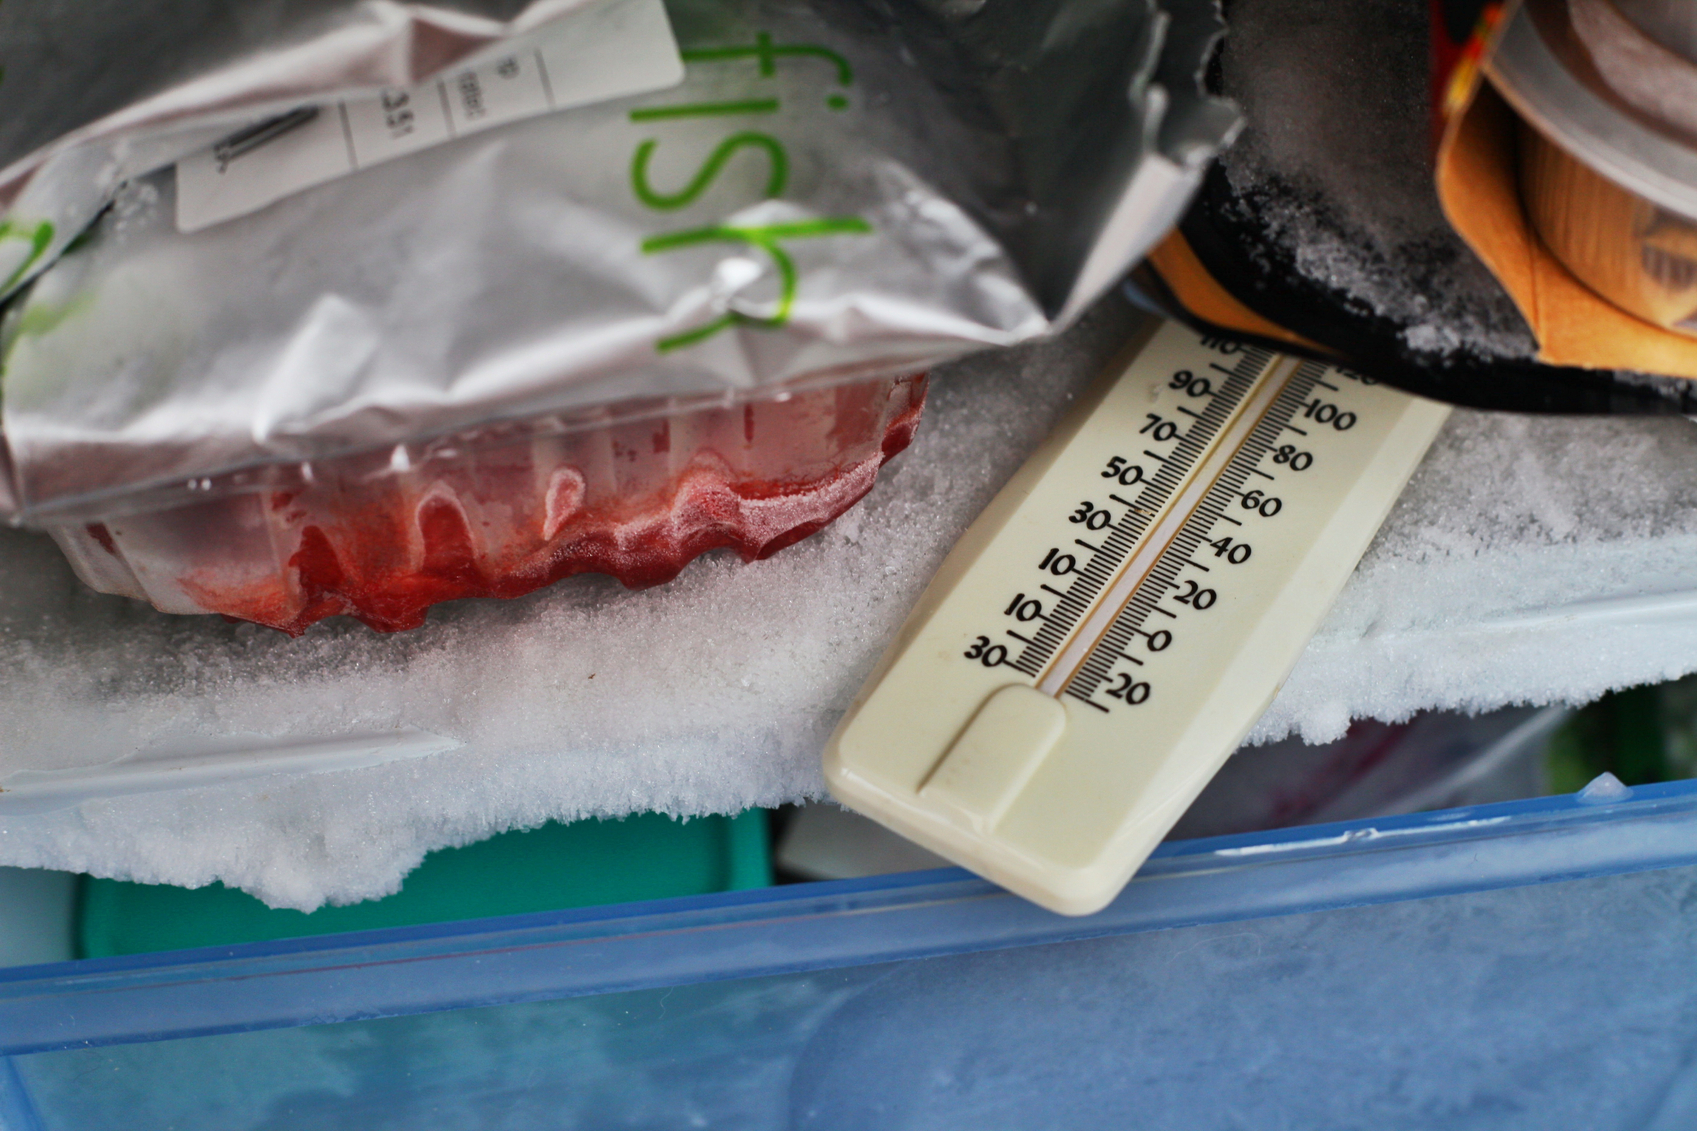
Dehumidifier: The dreaded dust mite thrives in a human environment. “The more people, animals and humidity, the more dust mites,” Bowser said. Dust mites live year round, which means you have to take year-round precautions. Dehumidifiers can help reduce the humidity in your home and give the mites a less-favorable environment. “The recommended humidity is under 50 percent,” Bowser said. Bajowala recommends purchasing a humidity monitor to check your levels. Keep in mind that any appliance that uses water has the potential to grow mold, so follow the manufacturer’s recommendations for cleaning.

Washing machine: Dust mites tend to thrive in mattresses. You can help kill the mites by washing your linens in hot water. Washing machines will also help remove outdoor allergens like pollen from your clothes. “The pollen that covers cars is the same stuff that settles in our hair and clothes,” Bowser said. “It can become airborne again.”

Dishwashers: This isn’t related to seasonal allergies, but Bajowala recommends that anyone who lives in a home where someone suffers from food allergies wash their dishes on a sanitize cycle. “It does a better job of cleaning the surface and not transferring [allergens] from dish to dish. Hand washing can leave food protein behind.”

Finally, it’s important to visit a doctor to see if you can find out what’s causing your symptoms. “It helps to get tested and see what you’re allergic to,” Bowser said. “You can then focus more on what’s causing it and get the right advice.”

Advice from a dietitian on how your appliances can help you eat healthier

From your oven and ranges, to your refrigerator and freezer, to your blender, your appliances, when used properly, can be one of your best tools in your efforts to eat healthier. Much of healthy eating comes down to planning and preparation, says Tamara Melton, MS, RDN, LD, founder of LaCarte Wellness, a corporate wellness consultation firm in Atlanta. Melton is not only a registered and licensed dietitian, she’s also a busy working mom who loves to cook and regularly puts the meal prep tips she offers her clients into action for her family.

“You don’t have to have the fanciest appliances, but having high-quality appliances that you know how to use can aid someone who is trying to eat healthier,” Melton said. “They help store your food and cook it well. It’s really important.”

While your appliances can’t do all of the work for you, they’ll make your path to a healthy lifestyle much easier. You’ll have to put in the prep time, though, so Melton recommends carving some time out of your week to prepare the foods you’ll eat. Melton offered her advice on how to take advantage of your kitchen appliances:

Refrigerator: If you organize your food for easy access, you’ll be less tempted to grab your phone and order takeout. Put your food in easy-to-access containers so the ingredients are easy to grab when you’re making the next meal. Slice up vegetables and fruit and store them in sandwich bags for snacks. Keep snacks for the kids within their reach on the lower shelves of the refrigerator. Want to save time in the morning? Boil eggs in advance and store them in your refrigerator until you’re ready to eat.

Freezer: Melton bakes muffins and quick bread and stores them in the freezer, defrosting them in the microwave for 15-30 seconds for an on-the-go breakfast. She’ll also freeze extra portions of spaghetti, chili and other dishes to take for lunch or serve as leftovers.

Rice cooker: The rice cooker gets a lot of use in Melton’s home and is a cornerstone of her cooking. “I cook most of our grains in there,” she said. She regularly takes advantage of the rice cooker’s convenience to prepare grains like couscous, quinoa, bulgur and farro. “I’ll put rice in with chicken broth, coconut milk, cilantro. I’ve made quinoa that I’ll take out and make into a Greek quinoa salad.”

Oven and range: “I like to make a lot of one-pot dishes,” Melton said. “We do a lot of roasted veggies.” The range and oven are used to prepare healthy foods for that night and later in the week. “I can walk away from it, and prepare some for the rest of the week.” Pay attention to your cookware and invest in quality saucepans, sauté pans, roasting dishes and dutch ovens, Melton recommends.

Microwave: The microwave oven can be the best friend in the kitchen for busy parents. Melton has a large microwave that she uses to quickly steam vegetables and defrost proteins. “We have steamed veggies as a snack,” she said. “Now that school’s back in, I steam veggies three times a week. The microwave is really important.”

Blender: The blender is an essential tool for making healthy smoothies and juices that can get the kids to eat their fruits and vegetables without them even knowing. Try one of her favorites: ½ a cup to a cup of cottage cheese, a cup of frozen berries, a cup of orange juice and a bit of honey. Add a hard- boiled egg (from the refrigerator), a muffin or quick bread (from the freezer, defrosted in the microwave) and coffee, and you have a convenient, healthy breakfast.

Toaster oven: Take advantage of your toaster oven to reheat leftovers with a smaller appliance and cut down on food waste, Melton recommends. It’s may be a more efficient option than your oven for reheating smaller portions.

How you arrange your appliances can also affect how willing you are to cook a healthy meal, Melton said. She recommends keeping the appliances you use regularly within easy reach. Make sure you reserve enough prep space as well.

Vacuum Bags, Belts and History: Advice from the Curator of the Vacuum Cleaner Museum

Tom Gasko was about eight years old and walking to school when he found his first vacuum. It was a GE Roll-Easy from 1956. He was immediately fascinated.

“It looked like a barrel,” Gasko recalls. “Somebody had thrown it away. My mom said ‘That thing probably has bugs in it.’ I thought it was very interesting.” Gasko took the vacuum apart and figured out how it worked. Friends and neighbors, hearing of his interest, began giving him their old vacuums. He followed his passion into a successful career in vacuum sales, repair and design, and ultimately to his current role as curator and manager of the Vacuum Cleaner Museum and Factory Outlet.

Gasko’s vacuum collection, which began with the GE model, has now grown to nearly 800 and includes nearly every model ever made. To him, the individuality of vacuums makes them stand out among home appliances.

“Every dryer you buy is a square box with a rotating drum,” he says. “The design is pretty much the same. Vacuum cleaners are completely unique. Then, you add on top of that the passion of the door-to-door sales. It’s passion that you have with no other appliance.”

Visitors to the Vacuum Cleaner museum can get a guided tour through Gasko’s collection, and he’ll share details about each model and note how their design reflected the events of the time.

He might point out the Atlas vacuum, released in 1957, whose design evokes the classic Chevy model of the same year.

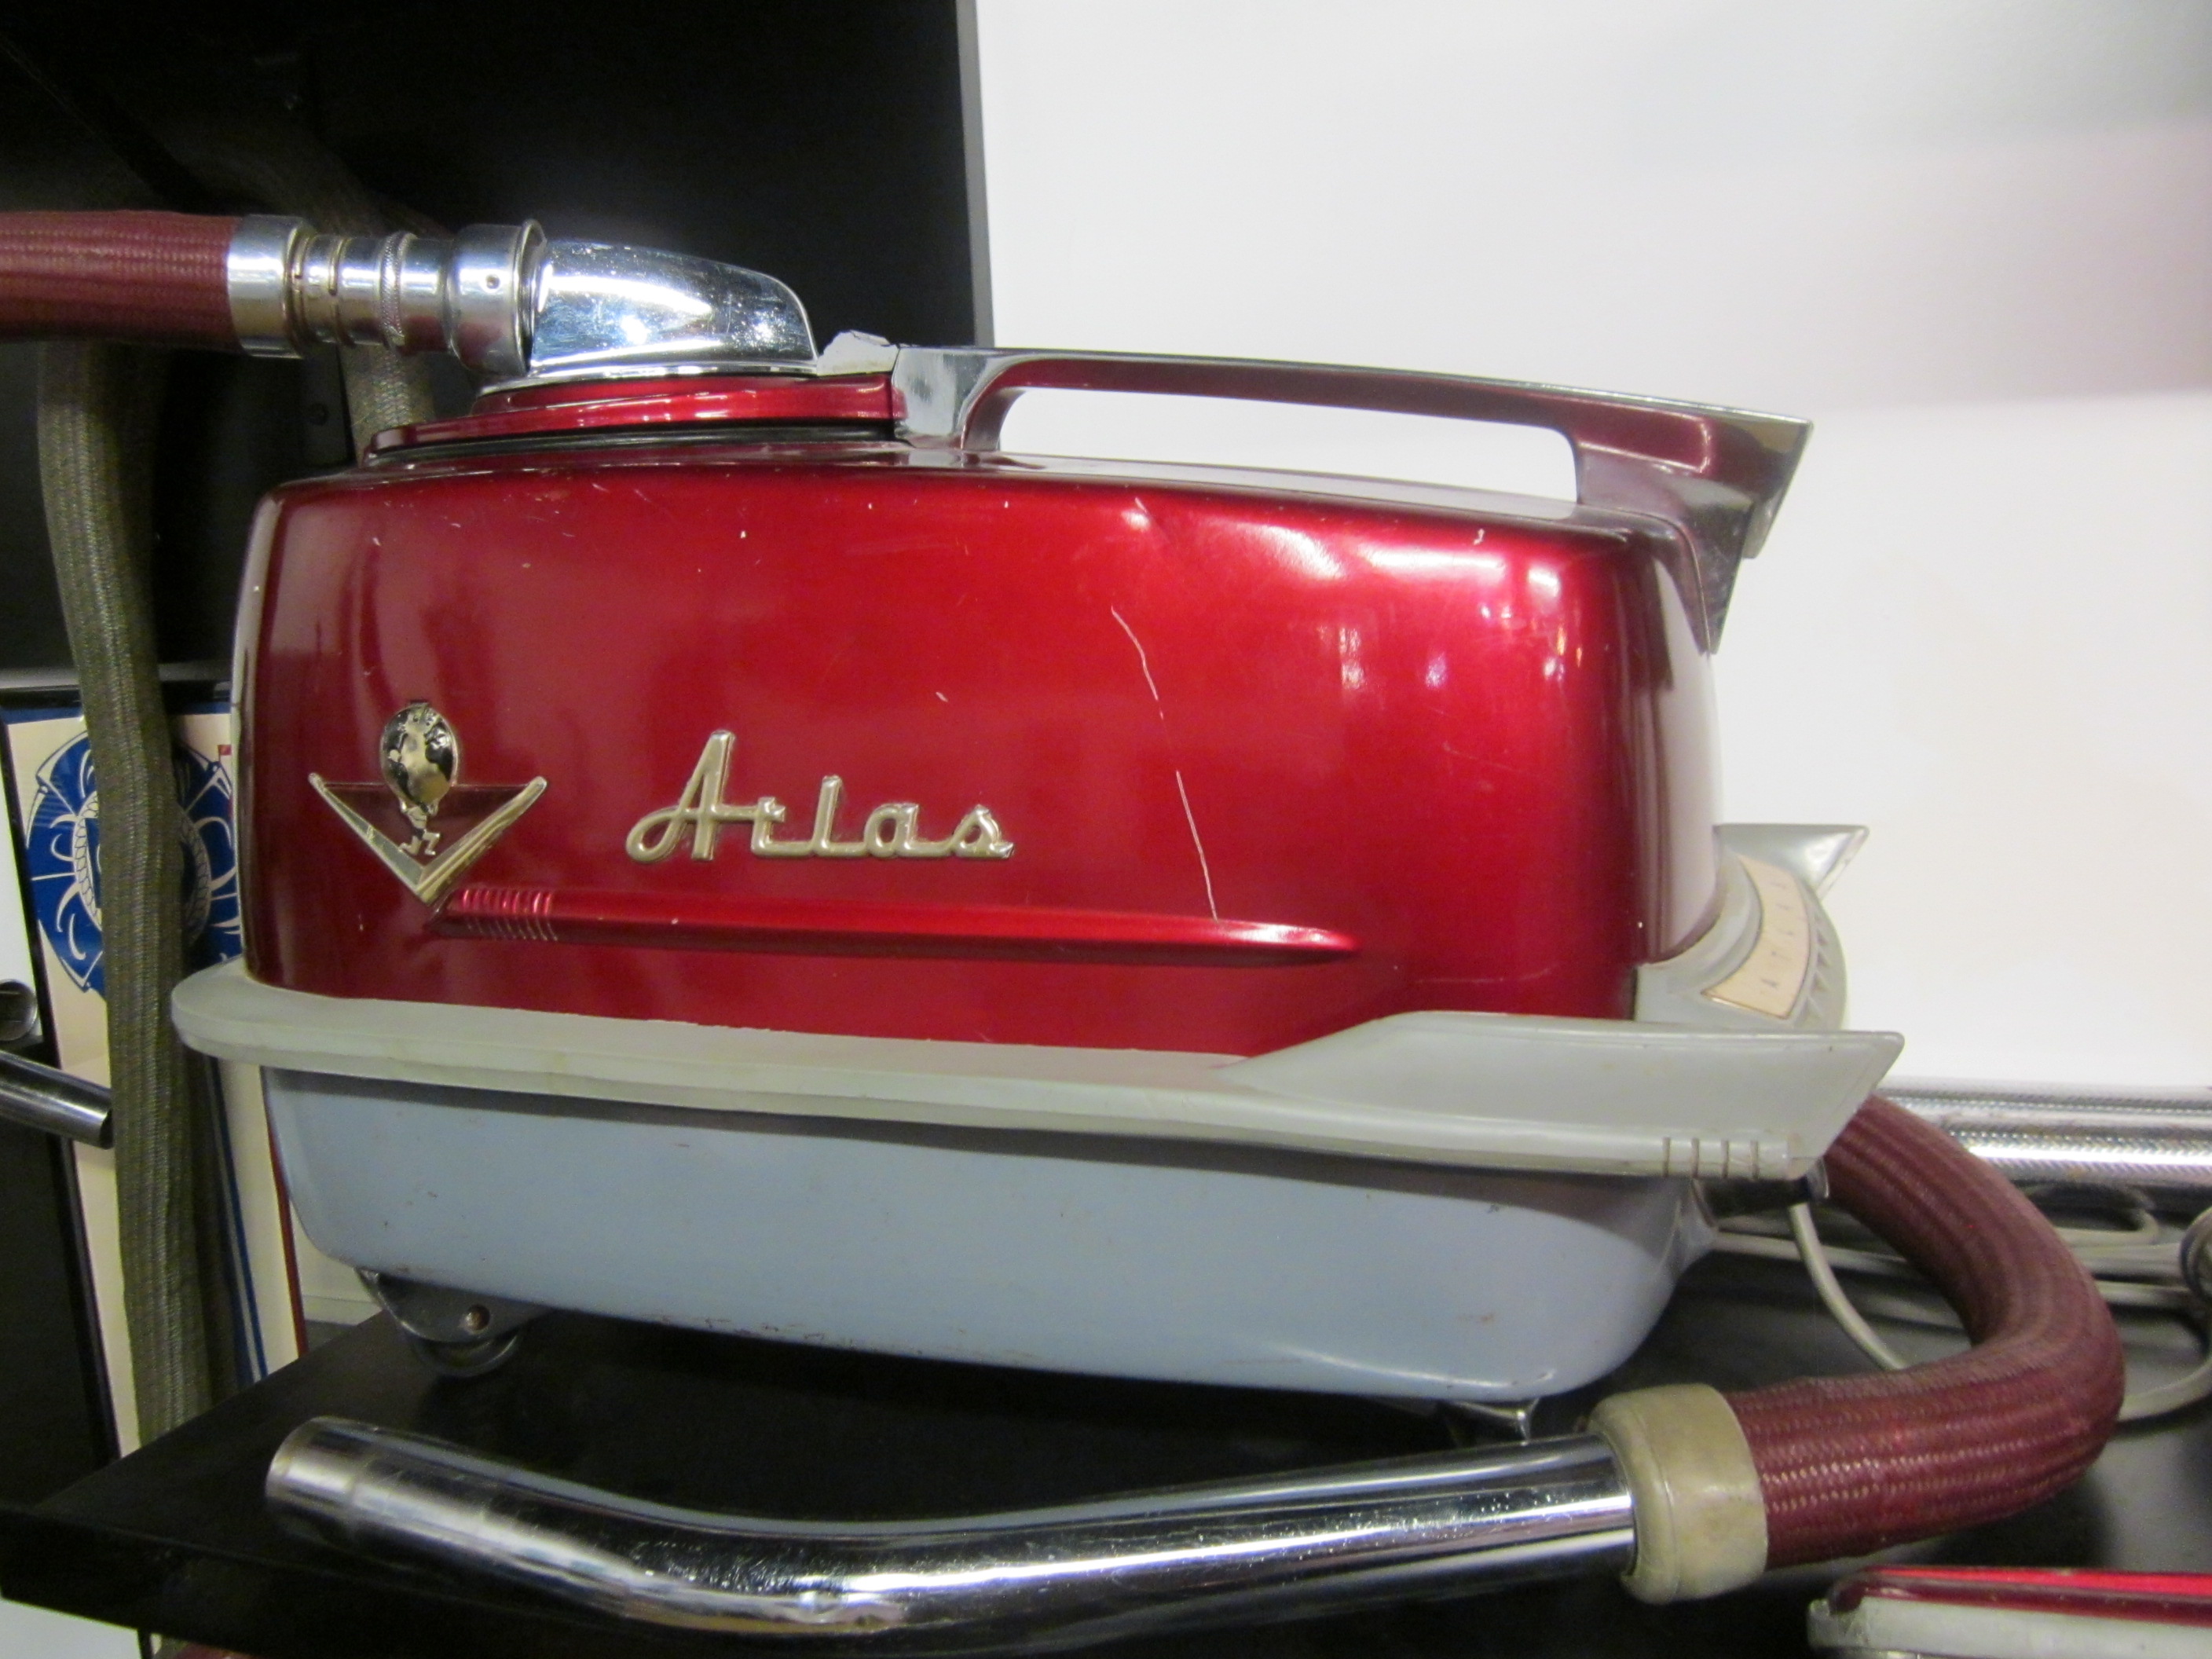
He’ll show you models from the 1960s, the age of the race to the moon, Star Trek and Lost in Space. This Fairfax model, Gasko says, was designed to resemble Rosie, the robotic maid from “The Jetsons.”

1960sFairfax
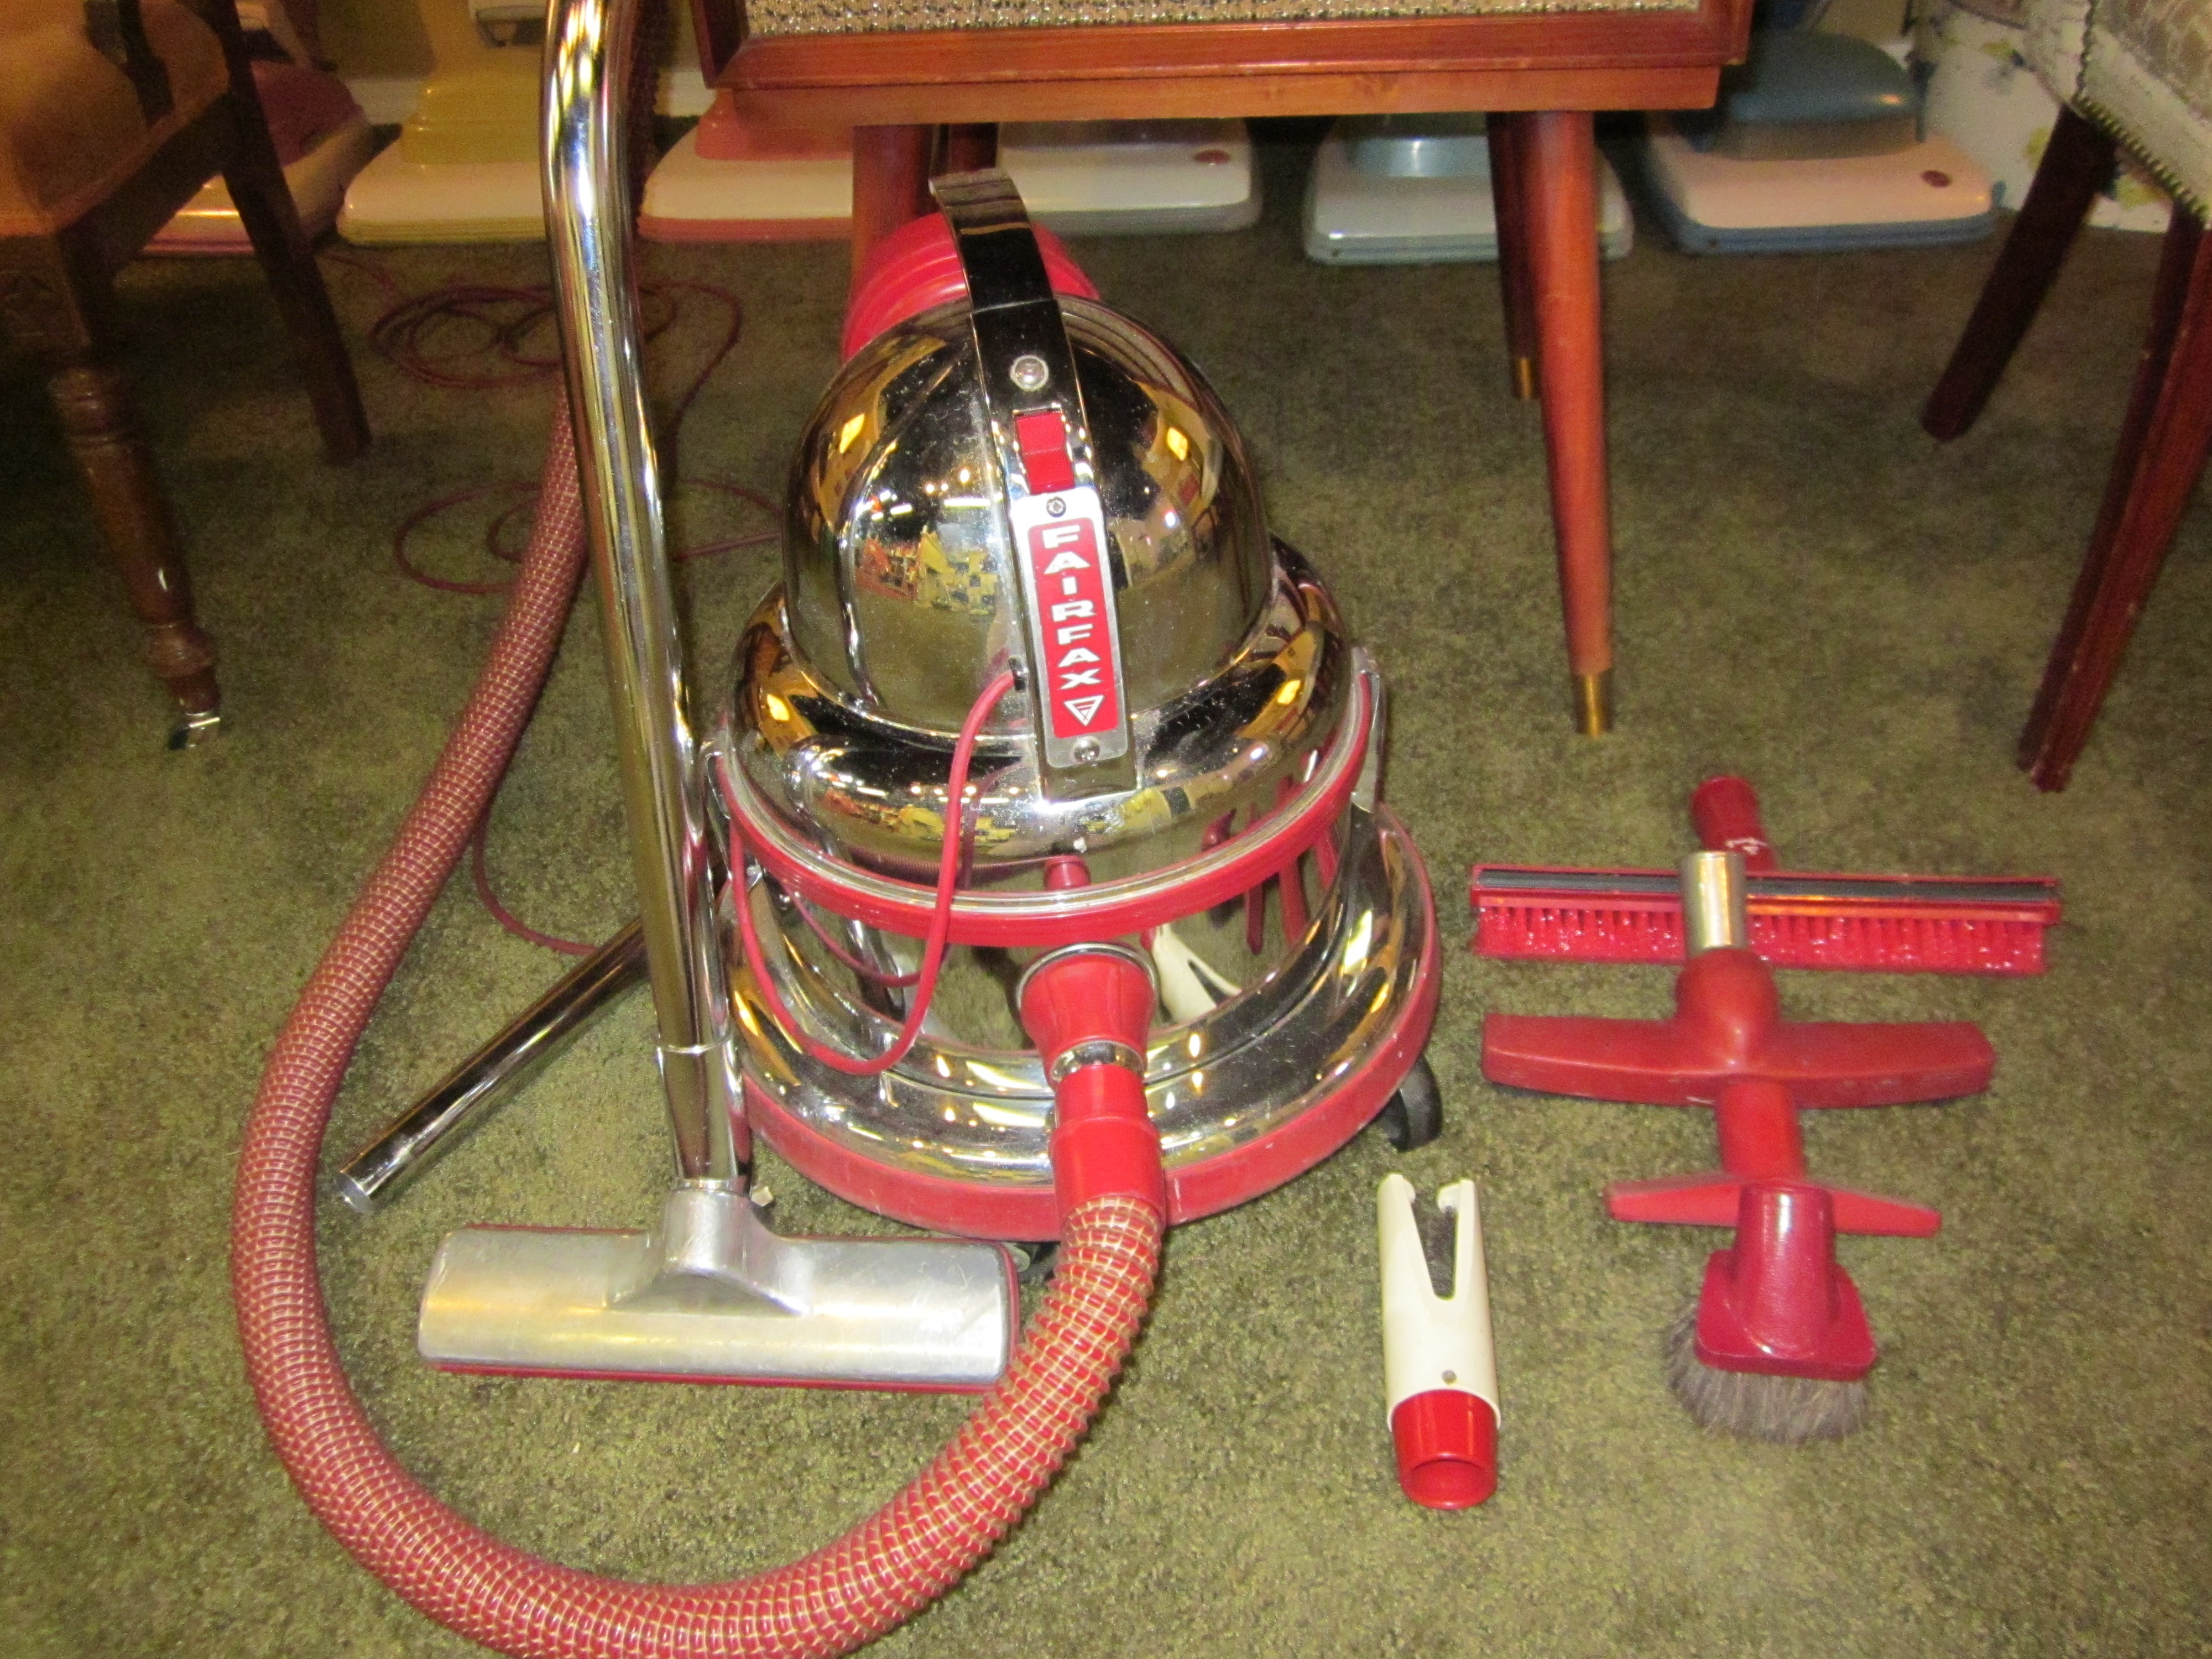
The 1970s, the era of Saturday Night Fever can is reflected by this Kirby model. The rake on the front is designed to tackle the strands of that iconic relic of the time, shag carpet.

1976Kirby
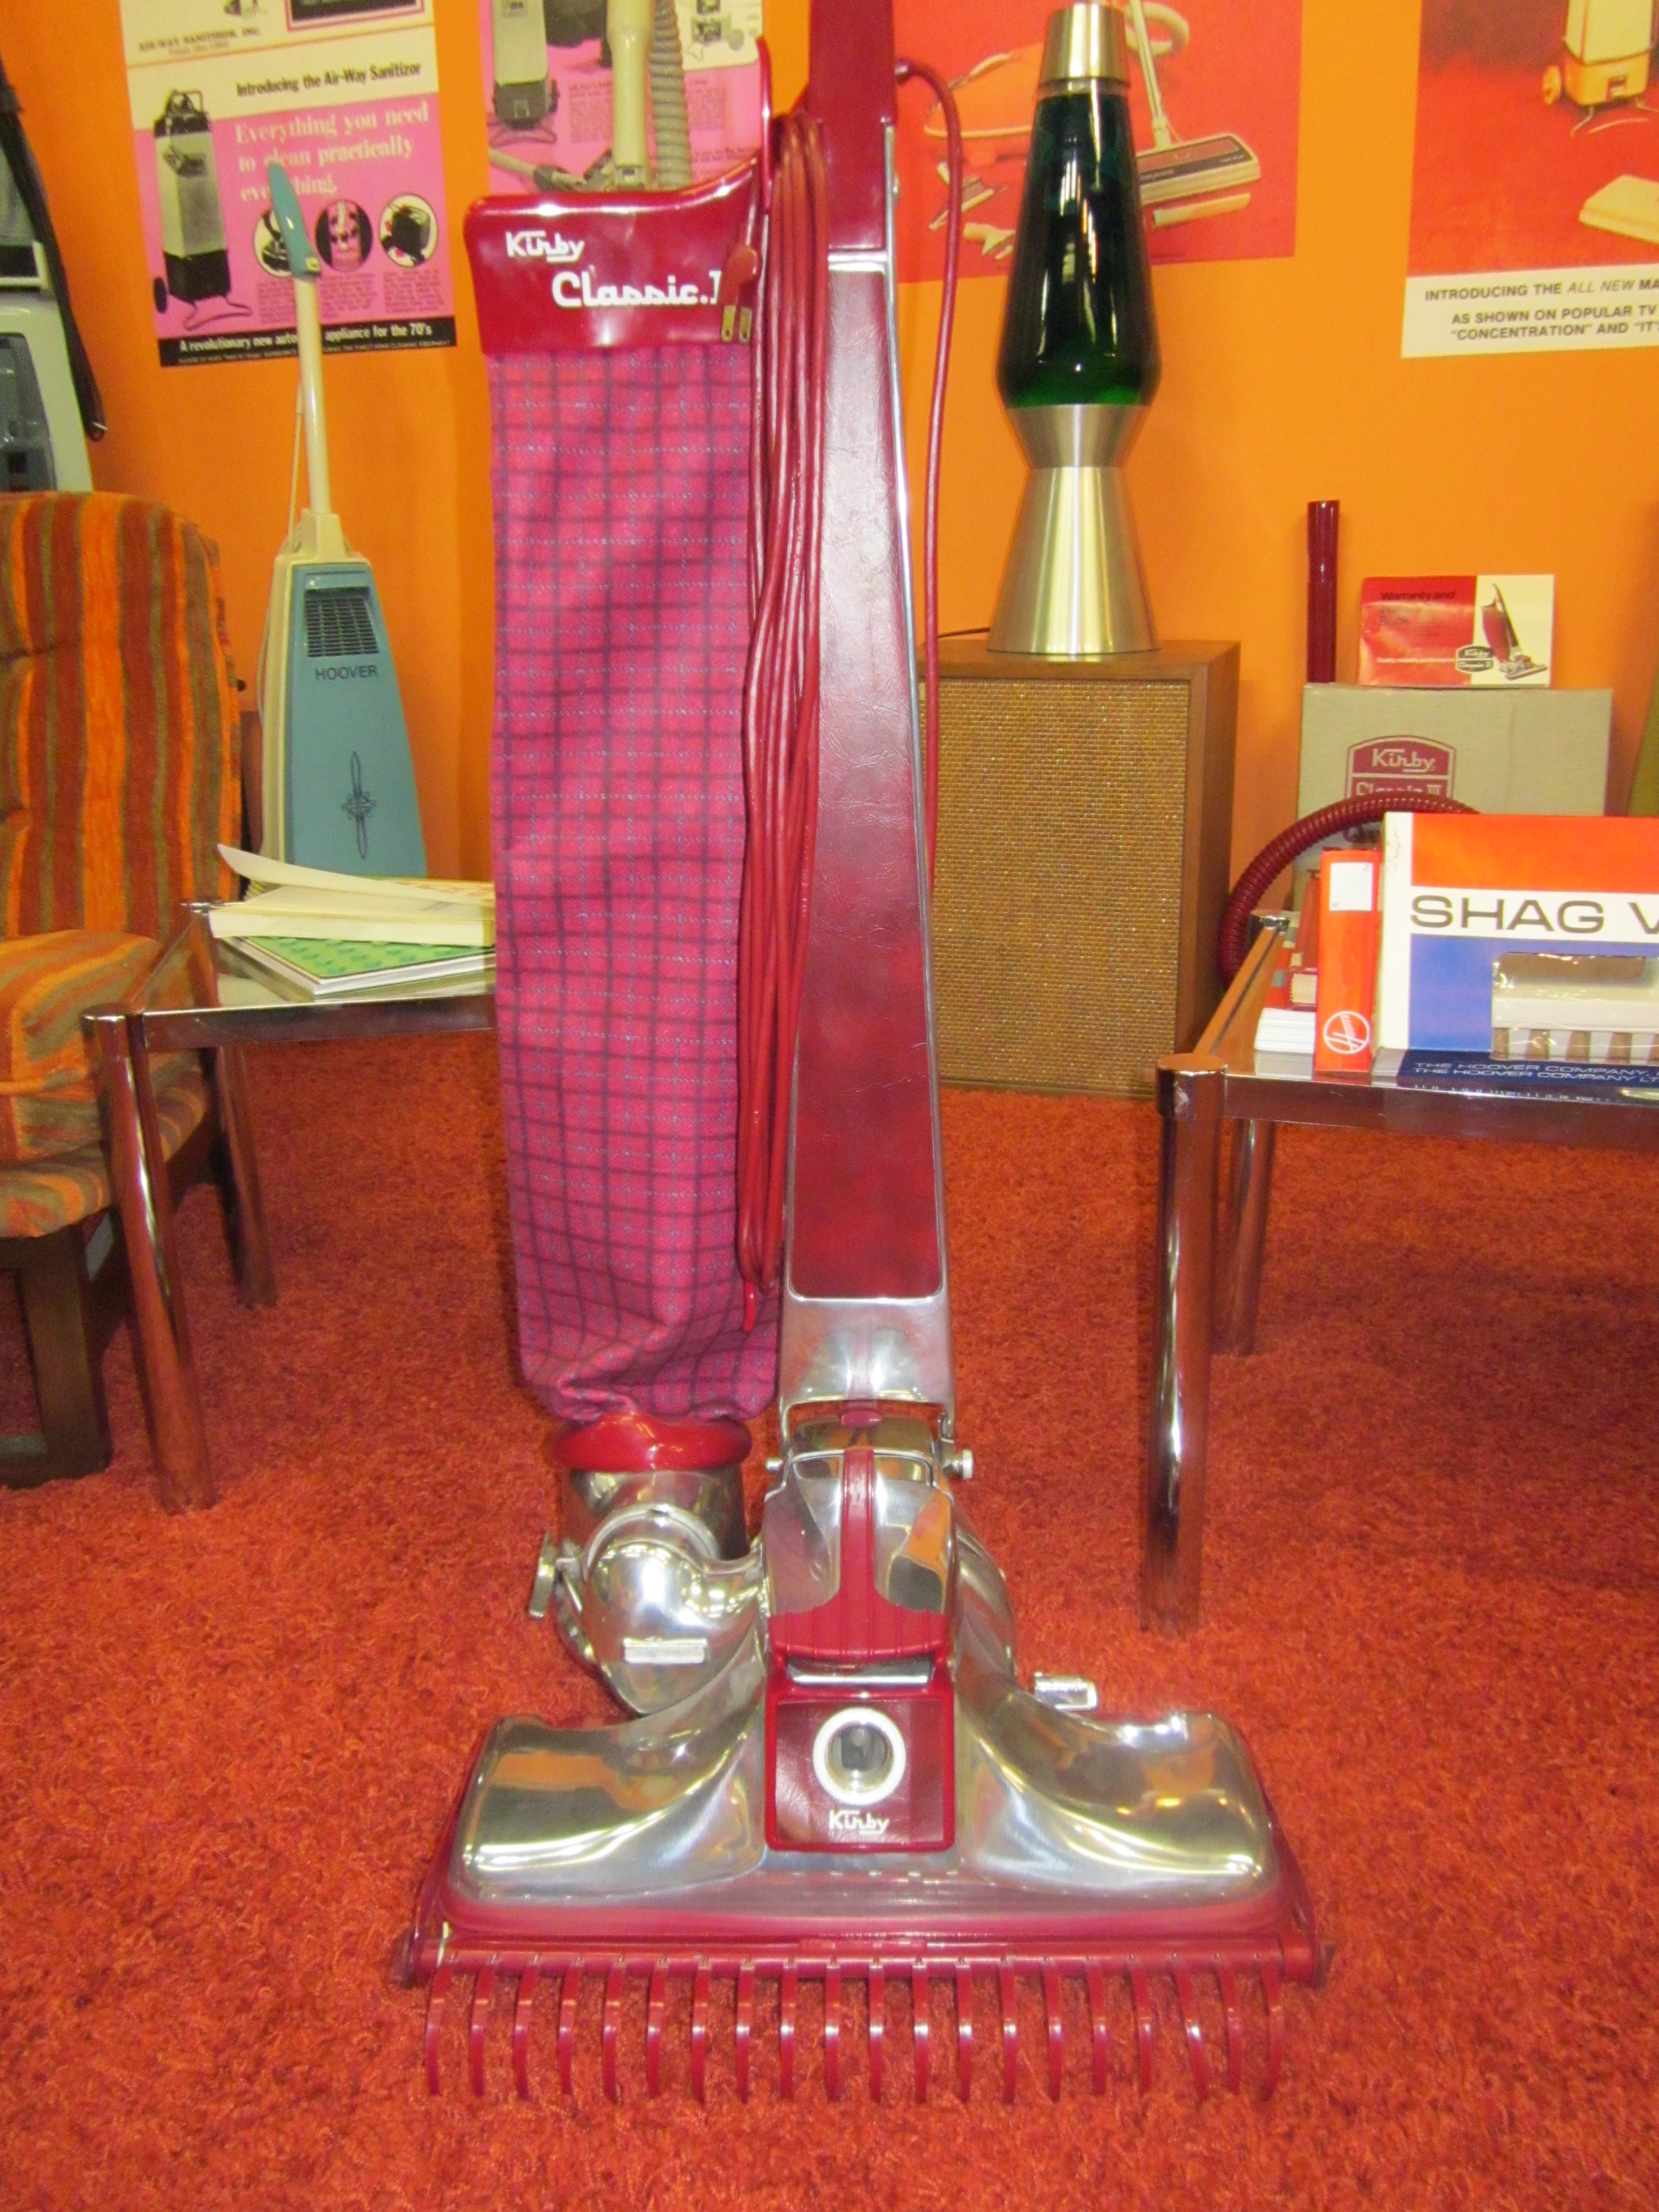
It’s safe to say that Gasko is one of the world’s vacuum experts. That designation means he gets a lot of questions from consumers about which vacuum they should buy. There’s no easy answer, as it depends on the home’s flooring, carpet style and cleaning needs.

Vacuums are relatively easy to care for, but Gasko sees widespread misunderstanding among consumers who aren’t aware of the simple steps they can take to keep their vacuum…well, sucking.

“They don’t understand that the removing of the dirt from the machine and filters, and changing the bag, is the best thing they can do to lengthen the life of their machine,” Gasko says. Upright vacuums without bags are common models, he said, but their owners often neglect basic maintenance. “Just because it doesn’t have a bag doesn’t mean it doesn’t have filters,” Gasko says. “Most people don’t know where the filters are or how to clean it. They don’t realize there are one, or two, or in some cases, three filters.” If you don’t clean your vacuum filters, eventually, the suction will disappear. Gasko estimates that about half of the vacuums put out with the trash work just fine. But their owners have failed to clean the filters and believe the vacuum no longer works.

Most filters are washable, Gasko says. He recommends removing the filter every time you empty the canister. Simply rinse it off and allow it to dry for 24 hours before you put it back into the vacuum.

Another simple maintenance step you can take is to change the belt every two years. “I’d estimate 50 percent of vacuums in people’s closets have worn out belts. Everyone waits until it breaks.” Belts usually cost about two dollars, Gasko says. A worn belt means the vacuum’s rotating brush won’t turn at the correct speed, limiting its cleaning power.

Vacuum owners also tend to neglect the attachments that come with the cleaner, Gasko says. “If it’s an upright, it has an onboard hose attachment, an extension wand, a crevice tool, a dusting tool and a furniture tool.” A canister vacuum will have a power head and rotating brush. The attachments can greatly expand the vacuums ability to clean and allow it to tackle different surfaces, like mattresses and furniture. But they too often sit unused in the closet, the casualties of their owners’ reluctance to read an instruction manual, Gasko says.

If you’re in the market, Gasko firmly believes that cordless vacuums are the future of the industry. It’s a safe bet he already has some in his collection. But he’s still on the hunt for a Hoover Model O.  “They only made 239 of them,” he says. Do you have one? Let us know!

Universal design: How to select appliances


Universal design started as a concept aimed primarily at creating accessible, barrier-free homes for people with disabilities. But it has evolved into the concept of creating a comfortable, accessible space for all members of the household, and there are number of reasons why a homeowner may decide to pursue it during a remodel or renovation.

“Aging in place is a huge thing,” said Chris Salas, owner of Cocina Interior Design in Calgary, Alberta, Canada, and a Certified Master Kitchen and Bath Designer. “Multiple generations may be living in one home. You may have small children and older parents living under one roof and need flexibility in the spaces according to who’s using them. Resale is also a big factor. You aren’t ruling anybody out.”

Many appliances already incorporate universal design concepts and are easy for anyone to use, Salas said. But if you’re looking to build a kitchen that’s accessible to people of all sizes and physical abilities, there are certain features and elements you should consider when choosing your appliances. Salas, who has more than two decades of design experience, shared her insight on what homeowners who are pursuing a universal design concept should keep in mind.

Cooking

A traditional oven/range has limits to where and at what height it can be installed. Wall-mount ovens and microwaves can be mounted and placed at different heights according to the needs and abilities of the user, so they may be preferable. How the oven opens is also a factor. “Side-opening ovens are handy for everybody,” Salas said. Think about how all household members will reach the controls, not just those for cooking. For example, you may choose to put the fan control at counter level rather than at the rear of or above the range, or use a remote-operated fan. Many cooking appliances already have safety features in place that are appropriate for universal design concepts, Salas said. “A lot of cooktops and ranges have an indicator showing that the surface is still hot. Some even have a lock-out so you can’t turn on the cooktop without knowing how.”

Dishwashers

You’ll need adequate space and access to load and unload dishes as well as put them away. Salas has designed kitchens with all dish storage on the same side of the dishwasher door so those who are unloading the dishes don’t have to go around the open door. Dishwashers with single or double pull-out doors rather than a standard design may make opening, closing, loading and unloading easier.

Refrigerators

Consider the width of the door swing and whether all parts of the refrigerator are reachable. “It might be hard to get out of the way of a 36-inch door,” Salas said. “The smaller doors come in handy. The French door is probably the best invention for universal design.” Keep the height in mind as well. “The door swings may not be as big as a one-door model, but you might not be able to reach half the fridge because it’s tall.” Salas recommends testing appliances before you buy them. “Some fridges have a really good feel but may be difficult to open,” she said. “The bells and whistles might look or sound cool, but once you’re living with it, it might not add value. Get out and try these things to make sure they work.”

Outside the kitchen: Laundry

The height of the appliance relative to the user’s needs is also a factor in choosing and installing clothes washers and dryers, Salas said. “Keep flexibility in mind,” she said. “The washer and dryer can be on a pedestal. You can build them up onto your custom platform. It’s all about the user’s height. The front load is optimum for anybody to use.”

Stay cooking with these kitchen appliance safety tips

An excited mother and her happy children cooking a roast together in the kitchenWhen used properly, home appliances have a proven and extensive track record of safety. Appliances are rigorously tested for safety long before they make it to retailers’ shelves. Many of the accidents that involve appliances are easily preventable.

John Drengenberg, consumer safety director for UL, has been involved in the appliance safety and testing business for more than 50 years, earning the informal title of “Mr. Safety.” He recently spoke with AHAM and shared some of the kitchen appliance safety knowledge he’s gained over more than a half century spent in and around appliance testing.

Don’t touch hot surfaces: Manufacturers design portable appliances to be carried and handled in a way to reduce the risk of injury. In the case of cooking appliances, handles and knobs are often designed to stay cooler than other parts of the appliance when the appliance is in use. “All crock pots come with two handles, and that’s the way you should carry it,” Drengenberg said. If a knob or handle breaks, contact the manufacturer for a replacement. Only the manufacturer’s parts will have been tested with that appliance, and improvising or using one intended for a different model could create a risk.

Unplug your appliances…: Any appliance, regardless of whether it’s turned on, poses the risk of electrical shock. Unplugging the appliance when it isn’t in use will drop that risk to nearly zero.

…but don’t let that cord hang: “Cords are a snagging hazard,” Drengenberg said. A child can be injured by a falling appliance or burned by cooking appliances like crockpots or deep fryers. Some models include breakaway connectors to reduce the chance that an appliance will fall if the cord is pulled.

Don’t toast your toaster: Toasters and other portable appliances shouldn’t be stored near ranges. The heat from the stove can melt or damage the outer surface of the appliance. That both damages the appliance and could create other hazards if the inner components are exposed, Drengenberg said.

Keep  plugged-in appliances away from the sink: Plugged-in appliances used near the sink might fall into the sink, creating an electric shock risk. “Now it’s turned on, in a sink full of water, in a metal sink,” Drengenberg said. “It’s a perfect storm.”

Treat blades as knives: Most food processors include interlocks to stop the blade from rotating when the appliance is taken apart for cleaning, Drengenberg said. But the blades on blenders and food processors are sharp and should be handled with care during cleaning. “When you’re washing the blender or blade, it’s a sharp cutting tool,” he said.

Set the proper microwave cooking time: Care for a potato or some popcorn? Cooking those two foods for too long is a common cause of fires in microwaves, Drengenberg said. When fires happen, it’s often because the user mistakenly put too much time on the microwave and forgot the food was cooking, he said. Manufacturers have installed sensors in many models to shut the oven off in case of fire. If there’s a fire in your microwave, turn it off and keep the door closed. Opening the door could make the fire worse.

Watch what’s cooking: Most of the more than 100 million ranges and cooktops in use in the U.S. are used safely. But unattended cooking remains a leading cause of household fires in the U.S. and the leading cause of cooking fires. Monitor what you’re cooking when your range or oven is in use. AHAM, appliance manufacturers and UL are working to reduce cooking fires through technical developments and consumer education.

Prevent range tipping: Never use the oven door for support or as a step. Check to see that an anti-tip device has been installed on your range.

Read your manual: The instruction manual for your appliance should include ways to reduce hazards. Appliance safety standards from UL contain a list of “important safeguards” that are to be included in instruction manuals, Drengenberg said.

Do you have a question about kitchen appliance safety? Ask us in the comment section, and we’ll get an answer from “Mr. Safety.”

How to prevent odor, mold and mildew in your washing machine

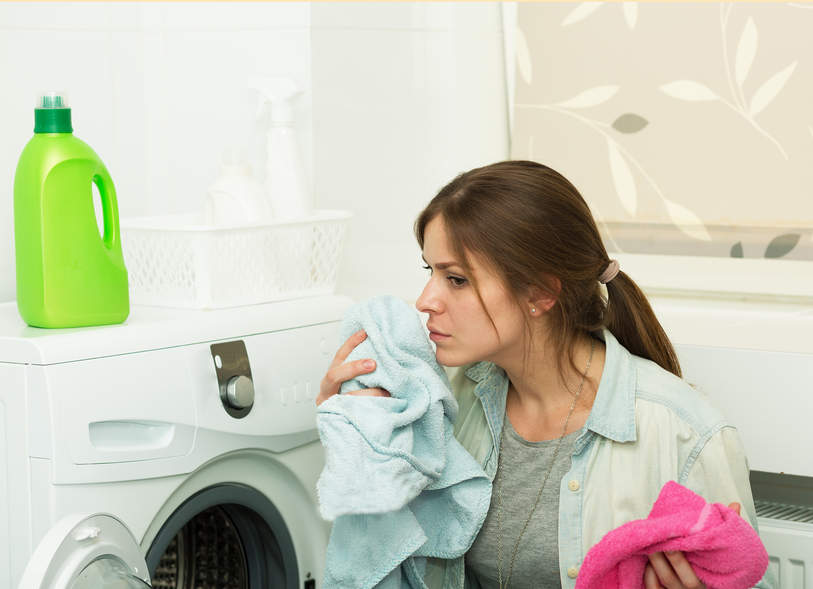
Advancements in clothes washer technology have led to dramatic decreases in energy and water consumption and larger average tub volume. A new high-efficiency unit, compared to a 10-year-old clothes washer, will save more than 5000 gallons of water per year and nearly $135 in operating costs from decreased electrical consumption.

Like all household appliances, clothes washers require regular cleaning and maintenance. All clothes washing machines have the potential to have some amount of odor, mold and mildew after a period of use.

Potential causes of odor, mold and mildew may include:

  • Washing machines generally are kept in somewhat closed and damp environments, such as laundry rooms and basements.
  • The laundry that is put into them contains a wide variety of organic materials.
  • Modern high-efficiency washing machines use less water and are more tightly sealed when the door or lid is closed.
  • Over time, changes have occurred in consumer laundry habits including the use of less bleach, more fabric softener and more frequent cold water wash cycles. These habits may impact the accumulation of biofilm and other residues, increasing the potential for odor, mold and mildew.

Consumers can take several simple steps to control odor, mold and mildew:

  • Follow the instructions in your washing machine’s use and care guide.
  • Increased air flow greatly reduces the development of mold and mildew. Consult your use and care guide for additional instructions on this topic.
  • Always remove wet items from the washer promptly after the machine stops running. Wet fabric left in a closed space is particularly conducive to the development of odor, mold and mildew.
  • Use only the amount of detergent recommended on the detergent container. If your washer is a high-efficiency machine that recommends use of “HE” (high-efficiency) detergent, use only HE detergent, not regular detergent. Regular detergent may generate excessive suds in high-efficiency machines, and the excessive suds can leave a film that is conducive to the development of odor, mold and mildew. Excessive suds do not make your clothes cleaner.

If specific cleaning instructions are not included, it is good practice to use a cup of chlorine bleach or a commercially available washing machine cleaner and hot water without any laundry once a month. This will help you maintain a clean machine.

Always use precaution if children are present in the household, as children should never play near or on appliances.

Tips to keep your dryer running safely


Hand holding a clothes dryer lint filter that is covered with lint.

When used and maintained properly, clothes dryers are extremely safe appliances. But accidents still happen. Between 2010 and 2014, fire departments responded to an average of nearly 16,000 fires involving clothes dryers or washing machines each year, according to the National Fire Prevention Association. And the NFPA says that failure to clean the clothes dryer is the leading cause of fires involving dryers. When failure to clean a dryer was a cause, the fires led to $44 million in direct property damage.

Regular cleaning of your dryer both improves performance and reduces the risk of fires. There are four areas of your dryer that need regular cleaning: the lint filter, the interior and venting system, and the rear of the dryer. Here’s how to keep each clean:

  • Lint filter: This easily accessible and removable piece should be cleaned after each time you use the dryer. The lint can usually be removed by hand. The filter should also be periodically cleaned with a nylon brush and hot, soapy water to remove residue. Don’t use your dryer if the lint filter is blocked, damaged or missing. Contact your dryer’s manufacturer or a licensed service technician to ask about a replacement filter.
  • Interior and venting system: This is the venting material that leads from your dryer to your dryer vent, which typically is outside the home. The system should be cleaned once a year by a qualified service technician. It can become blocked if it isn’t cleaned regularly, leading to longer drying times. If you’re noticing clothes are taking longer to dry, it may be time for cleaning.
  • Behind the dryer: Lint can build up behind your dryer as well. Check the rear of your appliance regularly and remove any trapped lint.
  • Drum: Remove any lint that has collected in and around the drum.

Cleaning is important to prevent fires, but there’s more you can do to reduce your dryer fire risk. Keep these items out of your dryer:

  • Anything that has come into contact with flammable liquid: This includes materials that have been used to clean up gasoline, alcohol, solvents, cooking oil or other types of flammable material. Most can’t be completely removed in a wash cycle, meaning the flammable material remains in the fabric. Dry these items outdoors away from heat. Even if the item makes it through a drying cycle, a fire risk remains for hours afterward.
  • Foam, rubber, plastic or other heat-sensitive material: These materials aren’t made to withstand the heat of a dryer cycle. They should be line-dried. If you are using a dryer, use a no-heat cycle.
  • Glass fiber materials: Follow the manufacturer’s care instructions.

Proper installation can also reduce your risk. Are you installing a dryer or having one installed? Follow this advice from AHAM and UL:

  • Use rigid or semi-rigid sheet metal venting material. This will reduce airflow and reduce dryer times.
  • Use the shortest, straightest possible vent length, and use a louvered or box hood-style to cap your outside vent.
  • Check the air flow. You should be able to feel the air flowing out of the dryer vent to the outdoors when the dryer is on.
  • Regularly inspect the venting system behind the dryer. Replace any damaged or crushed pieces.

Get AHAM and UL’s pamphlet, “Helpful hints for using your clothes dryer safely and effectively.”

The Facts on PACs and RACs: Should you choose a portable or room air conditioner?

Should you buy a portable air conditioner (PAC) or a room air conditioner (RAC)? Both will keep you cool, but it’s important to understand the differences so you can choose which will best help you keep your home comfortable.

Here are five points to consider when deciding whether to buy a PAC or RAC:

How much space do you have available? This goes for window and floor space. If you’re considering a RAC, measure your window to see if it’s large enough to accommodate the unit and can handle the unit’s weight. If you’re considering a portable air conditioner, check the unit’s dimensions to see if you have enough floor space available.

Does your neighborhood allow window units? Many neighborhoods and condominiums don’t allow residents to install window units because of aesthetic or security concerns. If you live in an area governed by homeowner or condominium association, check the rules in advance before you purchase a window unit.

Where are you trying to cool? While both RACs and PACs are often used to supplement a primary air conditioning system, RACs will likely remain installed in the same place for longer. Many who use portable units move them from room to room depending on their cooling needs.

How’s your view? While both portable and room air conditioners require windows for installation, RACs tend to block more of the view than PACs and can’t be moved as easily.

How much power do you need? Regardless of whether you choose a RAC or PAC, you’ll need a model that’s powerful enough to cool the room. Use this calculator to determine how many BTUs you’ll need based on the square footage of the area you’re trying to cool.

Avoid Kitchen Redesign Regret

You thought you had built the kitchen of your dreams. Then you started to notice you were running out of storage space. Or that there isn’t quite enough space on your counter for your portable appliances.

That flashy, trendy style you loved in a magazine might look great, but more important than style is choosing a kitchen design that really works for your needs.

Taking the time to plan properly is the key to avoiding redesign regret, said Alana Busse, lead designer and remodeling specialist for Westside Remodeling in Thousand Oaks, Calif., and president of the National Kitchen and Bath Association’s Central Coast & Valleys chapter said. “There are many people who tell us they want to start next week,” she said. “We tell them we need the proper planning time. Those are the people who later say they should have planned more. They have regrets because they really didn’t think things through. The more time people can spend planning, the happier they are in the end.”

Busse offered these tips to help homeowners plan their kitchen redesign and avoid “redesign regret:”

  • Build in organizational space. Pull-outs for pots and pans, roll-outs for kitchen tools and easily accessible storage areas for your favorite portable appliances should be part of the design, Busse said. It’s one of the areas homeowners might overlook to cut costs, but they sometimes regret that decision, she said.
  • Focus on what you need. “Normally, people redo a kitchen to improve the functionality,” Busse said. “Sometimes when people are trying to follow a trend versus what’s timeless or what they love, it’s not really something they like or what goes with the house. Ultimately, it’s the homeowner who will be using it. If it doesn’t fit their style or needs, they can develop resentment toward it.”
  • Think about your future lifestyle. When planning your redesign, consider how your needs and lifestyle might change. “People who remodeled when their kids were young, or when they didn’t have kids, end up regretting not building in enough storage space, or remodeling just for a look,” Busse said. “Now, their lifestyle has changed to ‘How quickly can I clean this and have two bowls of cereal before sending the kids off to school?’”
  • Know what’s cooking. Cooking habits are a major consideration when planning a redesign. Will you be cooking five-course meals daily, or do you tend to reheat prepared meals? Do you like to bake? Your design should reflect how you cook and include the right appliances for your needs.

Appliances are a major part of both the functionality and look of any kitchen. “Everything has to be designed around the appliances,” Busse said. “They’re what’s going to be used every single day,” Busse said. “Your fridge is on constantly. Your range is the main area you’ll be cooking. Appliances are the whole point of making the kitchen a gathering place.”

Keep these tips in mind when you’re planning a kitchen redesign to make sure you choose the appliances that meet your needs, now and in the future:

  • Give appliances a test run. “I recommend clients test appliances as much as they possibly can,” Busse said. Many manufacturers have showrooms to allow shoppers to try appliances. Take advantage of those opportunities.
  • Build a refrigerator in to the design. Busse has had clients buy a refrigerator before they have their kitchen redesigned. It’s important to choose one that fits with your plans. “People tend to think every fridge is the same, so they buy one first,” Busse said. “That can hurt the design.”
  • Consider your dishes. Do you wash a lot of Tupperware and plastic dishes, or do lean more toward fine china? Choose a dishwasher that’s appropriate for the dishes you use.
  • Make room for portables. If you have a favorite portable appliance, your designer may be able to build a space that gives you easy storage and access. “People should think about their portables,” Busse said. “If you’re going to wind up using the toaster, we’ll design a space for it. Be honest with yourself about which portable appliances you’ll keep. Bread makers you might use only a few times a year, so we don’t need to store it on the counter. But maybe there’s a specific cabinet design we can do for it.”

Keep your freezer frost-free


As the weather becomes hotter and more humid, frost is usually no more than a memory. But it can occasionally make an off-season appearance in your freezer. There are reasons why it happens, even in frost-free models.

Newer refrigerators retain colder temperatures than their predecessors. When the refrigerator or freezer doors are opened—especially in hot, humid weather—moisture can enter the door and cause freezer frost. This may also cause moisture to form in parts of the refrigerator. Defrost heaters in newer models also have shorter run times to meet current efficiency standards.

But don’t let the frosty winter throwback put a chill on your summer. Take these steps to keep your freezer frost-free:

•Arrange shelves and food items in a way that allows air to circulate.
•Don’t overload your freezer full or leave it empty. Both can encourage frost formation. It should be at least half full.
•Make seasonal control adjustments. Your user manual may have recommendations on the appropriate settings for hot and cold weather.
•Seal liquids and high-moisture foods stored in the fresh food section of your refrigerator. This will reduce the chance that the moisture will escape into your freezer.
•Open refrigerator and freezer doors as few times as possible.
•Clean your condenser coils twice a year. Check your user manual for proper cleaning procedures. Cleaning the condenser coils can also save energy.
•Check and maintain door gaskets. A good door seal will help keep the warm, moist air where it belongs—outside of your refrigerator and freezer.

About This Blog

HOME for cooking, cleanliness, comfort and care

Categories